Showing posts with label top. Show all posts

Monday, December 31, 2012

Shredded Pork Deliciousness & My Top 5 of 2012

Uploaded from the Photobucket iPhone AppFirst of all, I have to share this recipe.  I made shredded pork last night for the very first time (or as my husband and children refer to it as "pork butt" as they snicker -- yes we are rather juvenile here.) from Pioneer Woman's blog.  It's made with Dr. Pepper and chipotle peppers.  We ate it on hamburger buns for bbq sandwiches.  It came out so deliciously moist, I would have never guessed.  Halfway through cooking, I was flipping it over and not liking the smell or the looks of things, but when it was finally done...to die for!  The only difference in mine was that I only had a 3 lb roast versus her recommendation of 5-7 lbs, so the Dr. Pepper was cut in half to 1 can, I only used a half a can of chipotle peppers, and the cook time was just 3 hours from start to finish at 300 degrees. 

Check out the recipe here. I was uber impressed that mine actually looked like the pictures when I pulled it out of the oven at the end.  Hubby was in heaven and ate like a pig.  Definitely a recipe that will become a staple around here.

Back to business....I can't believe 2012 is ending and we're on to 2013.  Where does the time go? My babies are growing up too fast.  I swear the older I get, the faster time flies.

What are you doing to celebrate? This is the first time in 3 years my two older children weren't in Oklahoma with their dad.  We're having a little party with Grandbea, my mother-in-law.  We will be counting down the hours with lots of games from my husband's  much-loved show, Table Top.

For eats, I've planned piglets in blankets (little smokies wrapped in crescent rolls), homemade dutch oven bread, crockpot mac n cheese, copycat Chili's skillet queso, homemade hot apple cider, and chocolate muffins (at the request of Miss Molly). Plus, some champagne for the grown ups.

Since we are coming down to the wire tonight, I thought it would be fun to post the Top Five most popular posts from my little blog from the entire year.

Top Five Sewing Chick Posts of 2012
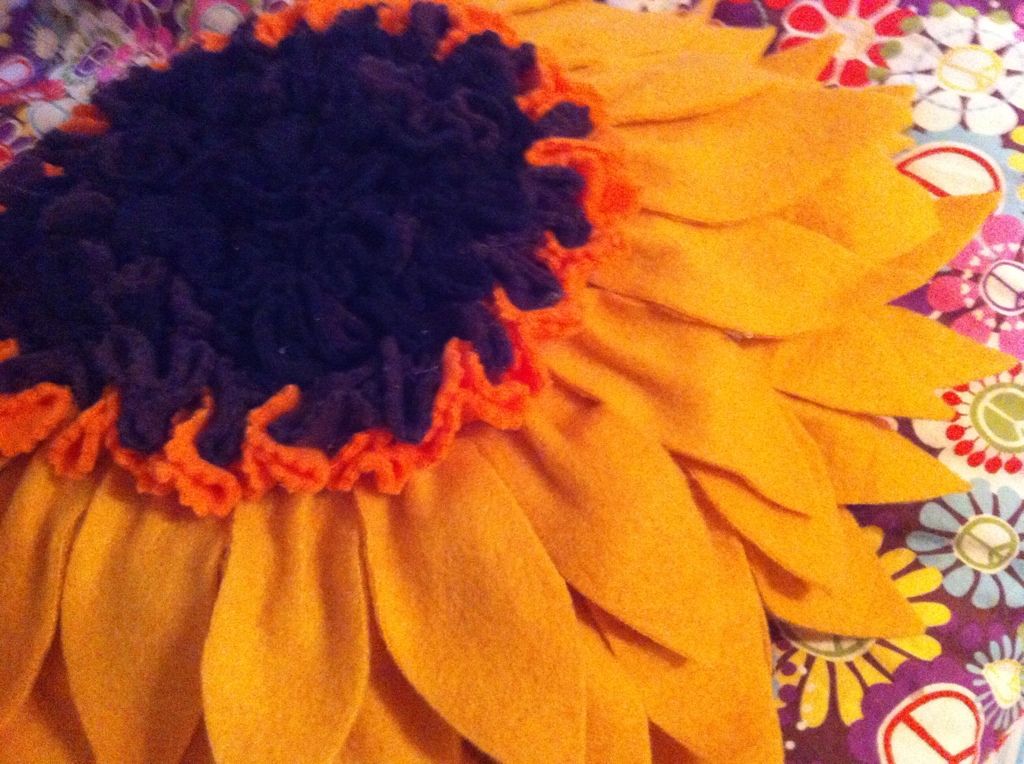


#5 Fleece Sunflower Pillow Tutorial.  This tutorial I came up while actually making someone else's tutorial project.  It was a peony-like fleece flower. I kept thinking how bright and sunny a sunflower pillow would look, so I whipped one up and loved it so much I had to share. 

Uploaded from the Photobucket iPhone App
#4 Upcycled T Shirts into Rosette Embellishments  I'm always surprised at what's really popular on my blog.  This was the fourth highest on my blog.  It's a fun little embellishment.  I love to make these rosettes because no matter what, they always come out looking fabulous.

Untitled
#3 Ribbon Flower Baby Headband tutorial.  I love these little headbands on Miss Molly.  I happened to be playing around with the ribbon to make an accessory to go with her outfit and I just loved how the flower came out. 


#2 Jointed Waldorf doll tutorial.  This is one of my most popular posts even lately.  I love to make these Waldorf dolls and it's fun to share my love with everyone else.  If you haven't tried one, they really aren't as scary to make as you might think. 

Uploaded from the Photobucket iPhone App 
#1 Spiral Hot Dogs.  Who knew such a simple idea could make hot dogs so delicious?  I was surprised at the popularity of this post.  In fact, it was a spur of the moment that I decided to take pictures of my husband making them. 


Monday, October 29, 2012

Upcycle T Shirt into Peasant Dress

Easy peasy tutorial!!  Upcycle a favorite t-shirt into a peasant dress for your daughter.

Materials:
1 Tshirt
1/4 to 3/8 inch width elastic


495BC82A-A900-425B-90E3-10883D7E7CAE-16374-00000E609A58DF38

Step 1:  Cut off the top of the tshirt.  Make sure to do a slight upward curve at the sleeves so you don't end up with a V as you hem the sleeves. (I will take a picture of this close up in the next few days and post.)

Uploaded from the Photobucket iPhone App

Step 2: Fold over the neck and sew a casing.  Leave a small opening to insert the elastic.

Uploaded from the Photobucket iPhone App

Step 3:  Insert elastic using a safety pin.  Try on and wiggle around elastic to make sure you have enough, cut and pin. (I use about 18-20 inches for a 3-4T)

Step 4:  Sew elastic ends together.  Insert into the casing, and sew up the casing opening. 

Uploaded from the Photobucket iPhone App

Step 5: Voila! You're done!

Uploaded from the Photobucket iPhone App

Uploaded from the Photobucket iPhone App

Saturday, July 28, 2007

Part I Nursing Shirt Tutorial is Up!!

I disappeared for a few days, but I have returned! I had to finish the first module of my distance learning school before I could come back, and now I'm just waiting for my last test to be graded. It has three modules, but the first one is the longest.

Sorry this tutorial took so long, I swear whenever I plan something, life gets in the way...sigh.


So, if you want to learn how to turn a regular t-shirt pattern into a nursing shirt, here is part I. This part shows you how to create the extra pattern piece for the overlay. I have also included the text for part II and part III on sewing the shirt, but I am still working on those pictures, so they will be up very soon, but if you don't need a visual aide (which I require since I'm a visual learner), then you can easily finish on your own.

This particular pattern is how to do the "T-top" nursing shirt style. Basically, it is an overlay that is sewn down the middle of the shirt with one large nursing opening hidden underneath that you simply pull to one side or the other. This style is my favorite to sew and wear because people really can't tell it's a nursing shirt, especially if you use a print. Prints camouflage the overlay really well in this design.