Showing posts with label waldorf doll. Show all posts

Friday, July 27, 2012

Pixie Cone Puppets! Our newest design...

Here it is! This newest design from Sewing Chick Studio and The TipToe Fairy.  It's Walforf-inspired cone puppets.

They are so much fun to make!  My kids have loved to play with these puppets for years.  

This pattern is less daunting than making a full complete Waldorf doll.  And, once you're done, embellishing your puppet is a great way to use up small amounts of leftover trims or scrapbook embellishments.  

Need an amazing kid's gift for birthdays, Hanukkah, or Christmas? These are always a treat! I have yet to meet a child who doesn't light up the minute they see these puppets.

 Included in this pattern is a 22-page PDF with step by step instructions with full color pictures as well as printable pattern pieces. 

The pattern is now up at Craftsy.com.  Shortly, it will be available on my website and Etsy. 

Intended for ages 4 and over.

>

Sunday, May 27, 2012

Waldorf Doll Tutorial

I know my waldorf doll tutorial is much loved, and I often get emails about it.  I've spent the last few hours updating it to a printable PDF. I've also updated it in the side bar of tutorials. 

You can download it here.

If you are new to my blog, I have a jointed waldorf doll sew along tutorial that is fairly easy.  It has lots of pictures for each step, and it includes a printable pattern for the body, arms, and legs as well.  I will warn you that these are time consuming little creatures, but it's such a satisfying feeling to finish one. 

I'm in the midsts of making a couple waldorf dolls for my microboutique, and in doing so, I will soon have a waldorf doll wig tutorial as well available for download in the very near future.

I'll keep you posted!

Sharing this over at: 

Tip Junkie handmade projects

Tuesday, July 20, 2010

Waldorf Knotty Doll Tutorial


These are quick and easy dolls to make.  You can whip one out in approximately 30 minutes. They are great for baby shower gifts.  My little one loves to suck on her clothes and blankets, so I decided to make one for her out of some leftover minkee.  She chose purple.

Click here for the pattern

** To get the entire pattern on a 8.5 x 11 sheet of paper, I had to overlap pieces, so make sure you trace it and do not just cut it out after you print it. 


Materials:

1/3 yd of knit material - fleece, hemp fleece, sherpa, velour, minkee, etc - any soft thick knit

handful of stuffing - I prefer wool stuffing

needle and matching thread


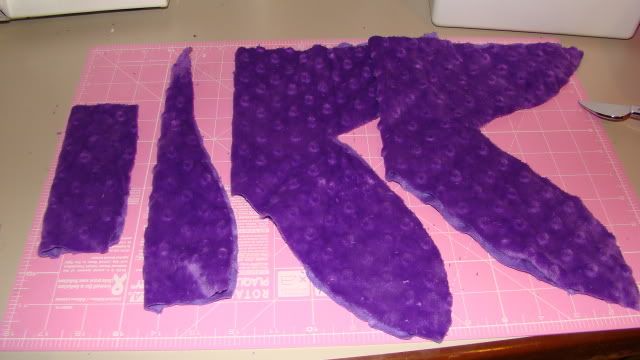
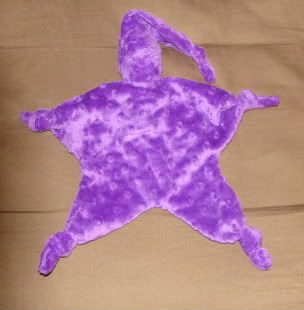
Step 1:  Cut out pattern pieces.  Cut 2 of the body, 1 hat, and 1 head.


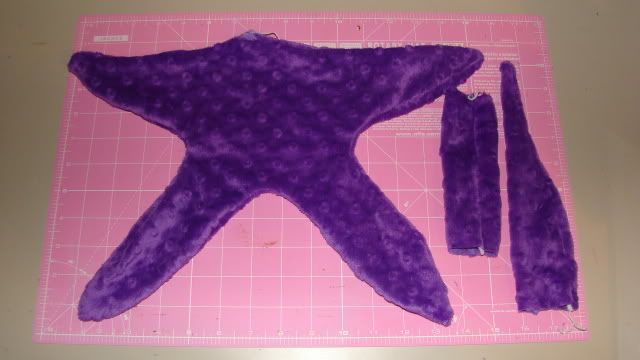
Step 2:  Right sides together, sew the hat, head tube, and body together.  Make sure to leave a small opening (about 1.5 inches wide) for the head to fit in the middle of the body. Turn all pieces right side out.
Step 3:  For the arms and legs there are two options.
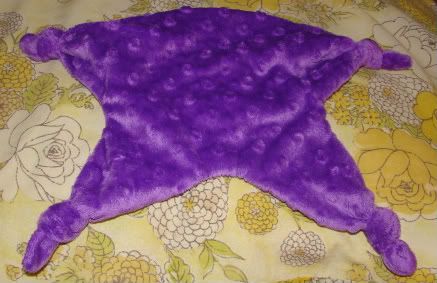
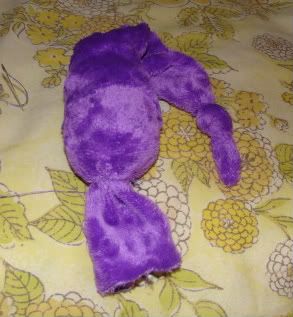
  • Option 1:  Knot each hand and foot (as shown).
  • Option 2:  Put a little fluff of stuffing in each hand  and foot and sew a running stitch around each hand and foot and pull the threads tight and tie off.  
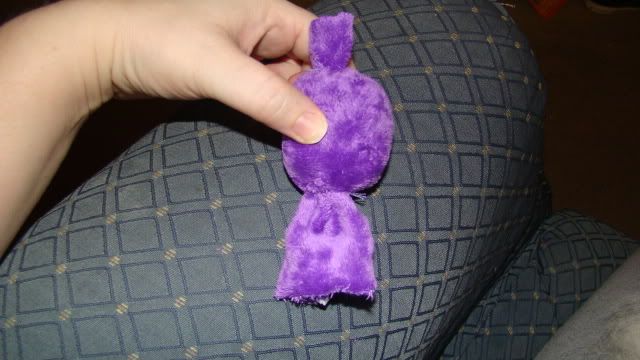
    Step 4:   Approximately 1 inch from top of head tube, wrap a piece of yarn or thread around it several times, pull tight, and tie off.  Make a ball of stuffing and insert it into the open end of the head tube.  As close to the stuffing as you can get, tie off the bottom end of the head tube just like the top.


    Step 5:  Attach the hat to the head.  Fold under the raw edges of the hat, pull on head (it should be snug), and sew around the edge, hiding the thread ends under the hat when you tie it off.  Next, knot the end of the cap.


    Step 6:Insert the head into the body.  Fold raw edges of the body inward, and sew the bottom of the head to the body.  I realize I didn't get a good picture of this...To describe it better, sew the head to the body like it would look if it's shoulders were shrugged, lol, if that makes sense.  Hide thread ends in the body. 

    Now you're done!

    Thursday, March 20, 2008

    Doll Fairy Wings Tutorial

    Fairy Wings for your Doll - Tutorial

    It's ready! Now you can sew fairy wings for your dolls, very easy and in about an hour. Click the fairy wing picture below to take you to it. If you are new to this, you will need Adobe Acrobat to get PDF files. You can download it here for free.

    You can design your own wings as easy or hard as you like, but I have also included the pattern I drew for this tutorial. You can find it at the very end of the tutorial. Also I have embellished these wings very little, feel free to go wild on yours with glue and glitter or paints.

    With waldorf dolls, I like to use hemp silk in natural or dupioni silk in white and I dye them myself. For this tutorial, however, I used plain ol' cotton broadcloth. Any woven/quilting fabric will work just fine. Knits will end up very wonky and will stretch, so I don't advise stretch fabrics for this.


    Coming in the next couple of days - The No-Sew Fairy Wings for your doll version!! For those of us who are too lazy to get out the sewing machine.

    Monday, December 17, 2007

    Waldorf Fairy - coming soon

    So my kids and I don't like the ugly angel tree topper at the top of the Xmas tree. It's not something I broadcast loudly since I live in the belt buckle of the bible belt, but I am an athiest and since leaving christianity behind years ago, I really want to rid myself of christian icons around my house like angels, but my husband I got that tree topper our first Xmas together. Still...it's ugly.

    So my kids have been bugging me this weekend to make a new one, and I've just decided it's a perfect way to get my waldorf fairy tutorial completed and have a new tree topper at the same time. So...I'm posting this to remind myself when we get back from Oklahoma this week to create it. It will not be a complete doll since it will be a tree topper, but you can find the complete doll over in the freebies section. But it will teach you how to make fairy and elf ears for a waldorf doll and how to make an easy set of fairy wings, and how to make a cool tree topper all in the same tutorial.

    Below are the best example pics I could find that I had. I think I'm going use posterboard covered in felt for the cone for the tree topper and then I'm going to use to make a body out of velour as well, similar to the pink fairy you see, and then it will have ears like the boy pixie. And I'm going to create the petal fairy skirt similar to the pink fairy to hide the connection between the body and posterboard cone.


    We're taking the laptop so I'll hopefully have time to blog this week. But right now I have to finish my school work. I'm on the second to last section which is typing long surgeries which is kinda fun but scary when something starts going wrong. I just typed up a heart valve replacement and it took 3 tries to wean the guy off the heart bypass, yikes!

    Monday, September 10, 2007

    Waldorf Doll Sew-A-Long

    Just a short little update today. I have updated the jointed waldorf doll sewalong. It now has a downlodable PDF pattern for the body and arms and legs and the missing pictures are up again.

    It's under the "FREEBIES" on the left or for the lazy people, here is the link:

    Jointed Waldorf Doll Sew-a-Long

    Also, I'm finished with the Halloween pattern for the embellished overalls. It just needs to be all put together and should be available at the end of the week.

    Friday, August 24, 2007

    Fairy and Elf Waldorf Dolls

    Use coupon code CHICK to get 10% off sewing patterns at TipToeFairy.com!!!


    Several years ago I had a successful waldorf doll business called SnuggleBees. But I got pregnant with baby #2 and I knew soon I wouldn't be able to make them with a newborn around, it's a lot of hand sewing so I decided to sell the biz. I had turned her down previously, lol. So I sold them most of my patterns but I kept my special ones.

    So what does this have to do with anything? My waldorf doll tutorial needs some cleaning up. There will be a printable PDF pattern and some updated pictures for the tutorial coming soon.

    When I make waldorf dolls, fairies and elves are some of the most popular (mermaids too, but we'll get to that soon). Do you believe in fairies? I do, fairies and mermaids are my favorite style of waldorf doll to design.

    I'm creating a little pattern on how to turn your waldorf doll into a fairy or elf:
    - how to dye mohair yarn into fairy colors
    - pattern to add pointy fairy and elf ears to your waldorf doll
    - patterns to make detachable wings for your waldorf doll
    - pattern for a petal fairy skirt or dress for you waldorf doll too.
    Below are some examples of my fairies and elves

    Thursday, July 19, 2007

    a little bit of this and that

    I haven't updated in a couple days. I'm working on a few things, and I'm working on updating the waldorf doll sewalong with a downloadable pattern to use and I need to fix the missing pix.

    Anyway, other than that life is boring right now, lol. I need to head down to my storage unit and grab some more fabric to finish the last of the nursing tutorial.

    And who wants to make boutique applique stuff? I'm going to work on a little tutorial for making professional appliques. Sometimes I just hate the way people applique. I guess you can call me an applique snob, lol. Long ago in a time before Mr. E, I was quite the popular eBayin' boutique overall maker.

    ok, now, there was something else I was going to mention, but it's left my brain. Crappity crap crap, I can't remember what it was. Argh.

    Oh I got the coolest idea for my little tag obsession. Ya know I'm obsessed about those too? Anyway, so I was looking in this neat British craft magazine I picked up at BN and they have these little family tree type garlands made from those tags into pockets. But my idea is more for kids and very very cute. I'm going to try to whip up a protoype very soon.

    Oh, oh, oh!! I remembered my idea I forgot. Who wants to learn how to make clothes for dolls? It's soooo easy. I don't even use patterns. I think this is a great way to teach kids how to design their own patterns. This will be my next tutorial after the nursing stuff.

    I think I'm going to post the nursing stuff in phases. Since it's taking longer than I thought, I'm going to do like part 1, part 2, etc. Look for the first part this weekend.

    Okeydoke, off to vacuum and clean, I'm having one of my intuitive moments telling me I'm going to get a last minute phone call tomorrow for people coming to look at my house.

    Popular Posts