
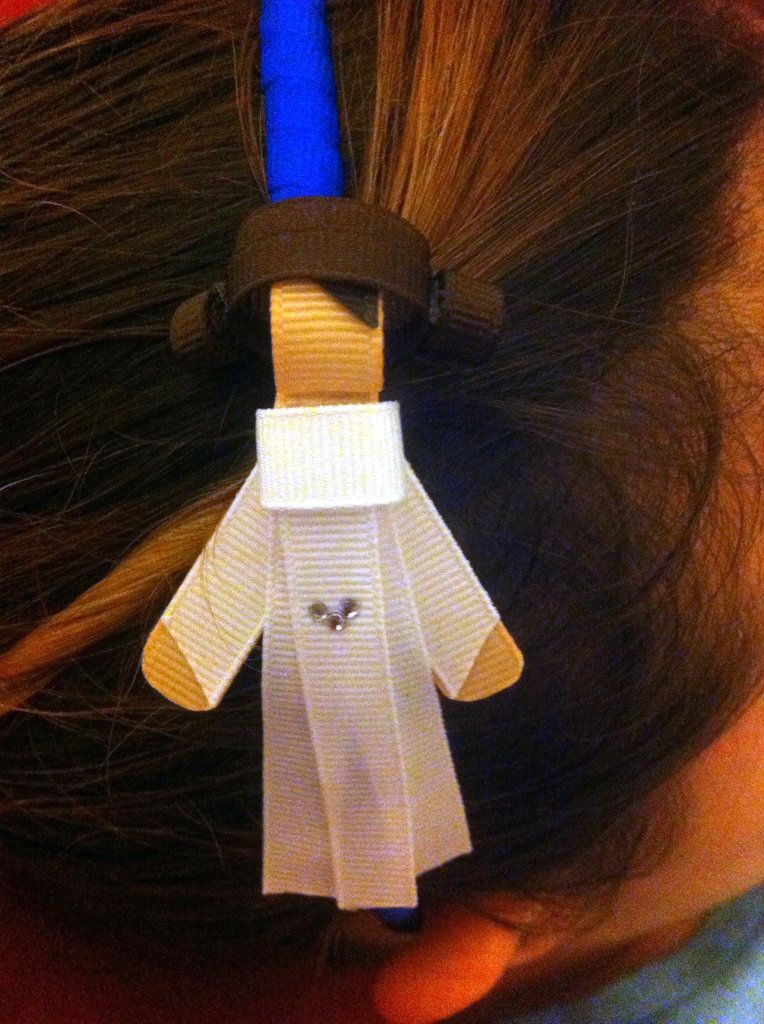
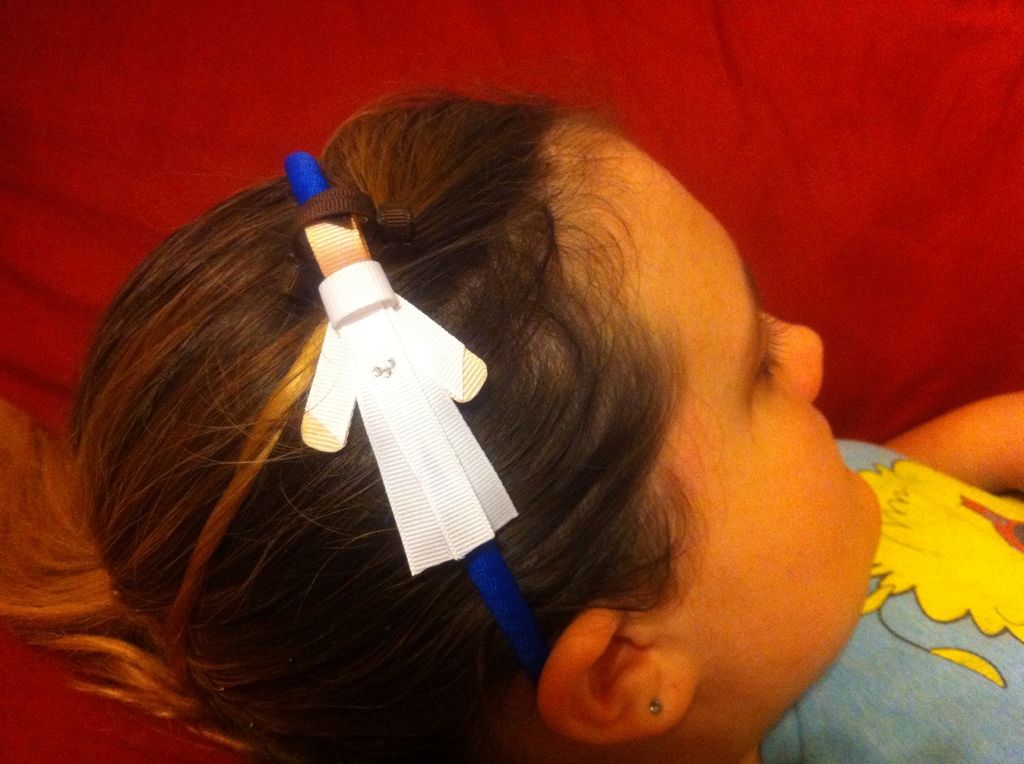
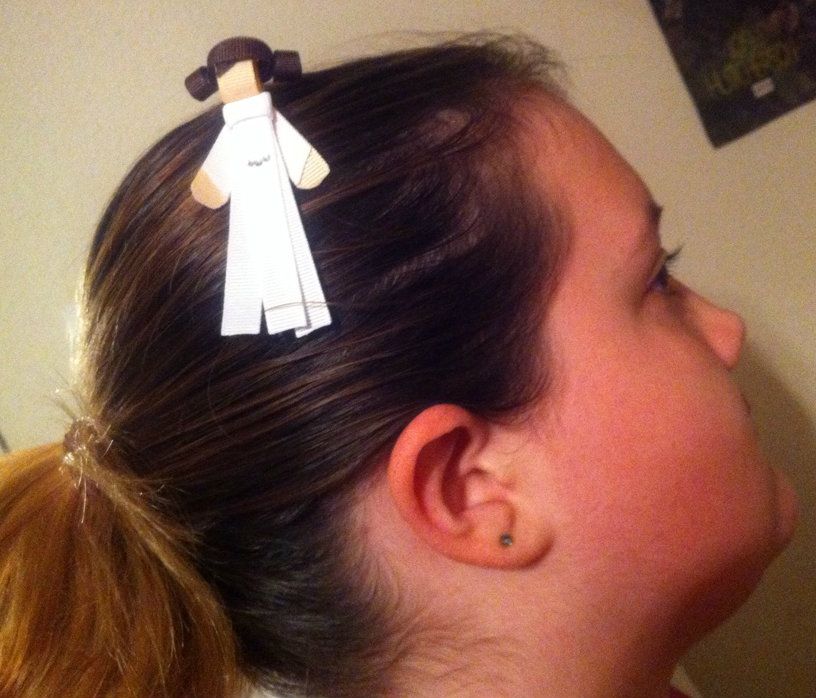
This is Part 2 of my Star Wars Ribbon Sculpture tutorial. This tutorial will show you how to make a Princess Leia ribbon sculpture hair decoration. I have it pictured both on a hair clip and on a headband, so you can see which you like better.
As in my Yoda post, I've seen tutorials that tell you to use that fray spray, but I don't like it. I prefer to seal my ribbon edges with FIRE! I usually just light a candle and run my edges close to it to seal them. I'm not good with holding a lighter. I plan to get a wood burning tool very soon to try that method.
Princess Leia Ribbon Sculpture Hair Clip / Headband Tutorial
Materials:
Hot glue gun or fillet tape
Scissors
Lighter or wood burning tool to seal edges
Ribbons:
- Peach: 1 piece of 3 in, 2 pieces of 1.25 in
- White: 1 piece of 1.5 in, 2 pieces of 1.1 in, 3 pieces of 2.5 in
- Brown - 1/4 inch - 2 pieces of 4 in, 2 pieces of 2.25 in
- Brown - 3/8 inch - 1 piece of 1.1 in
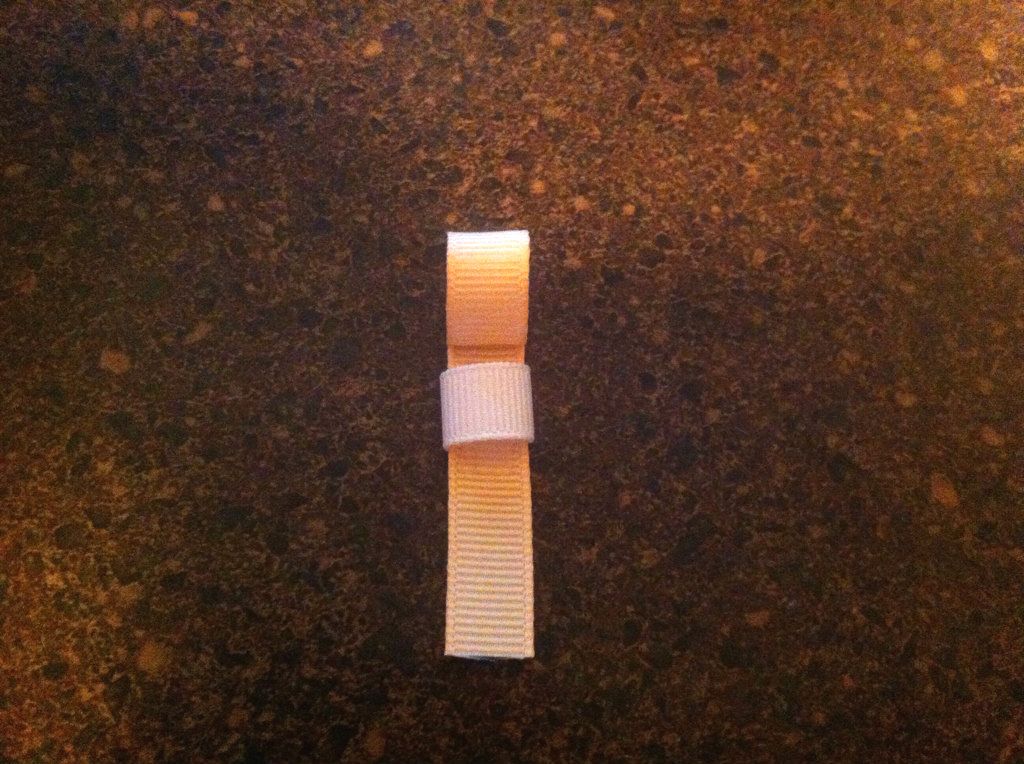
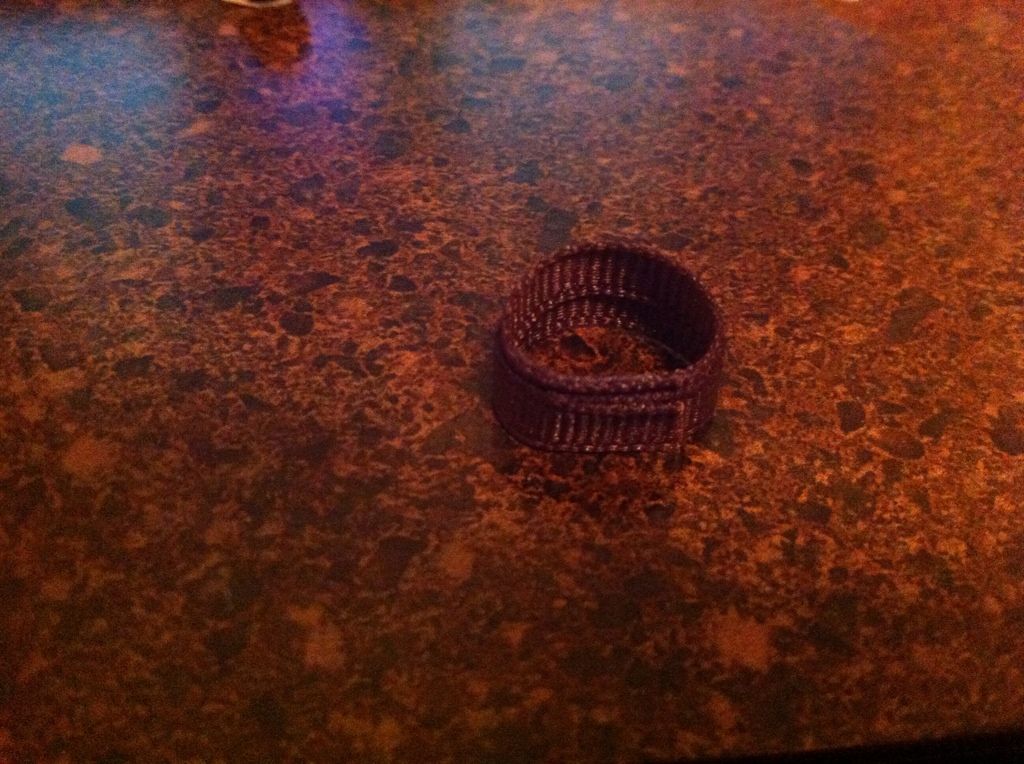
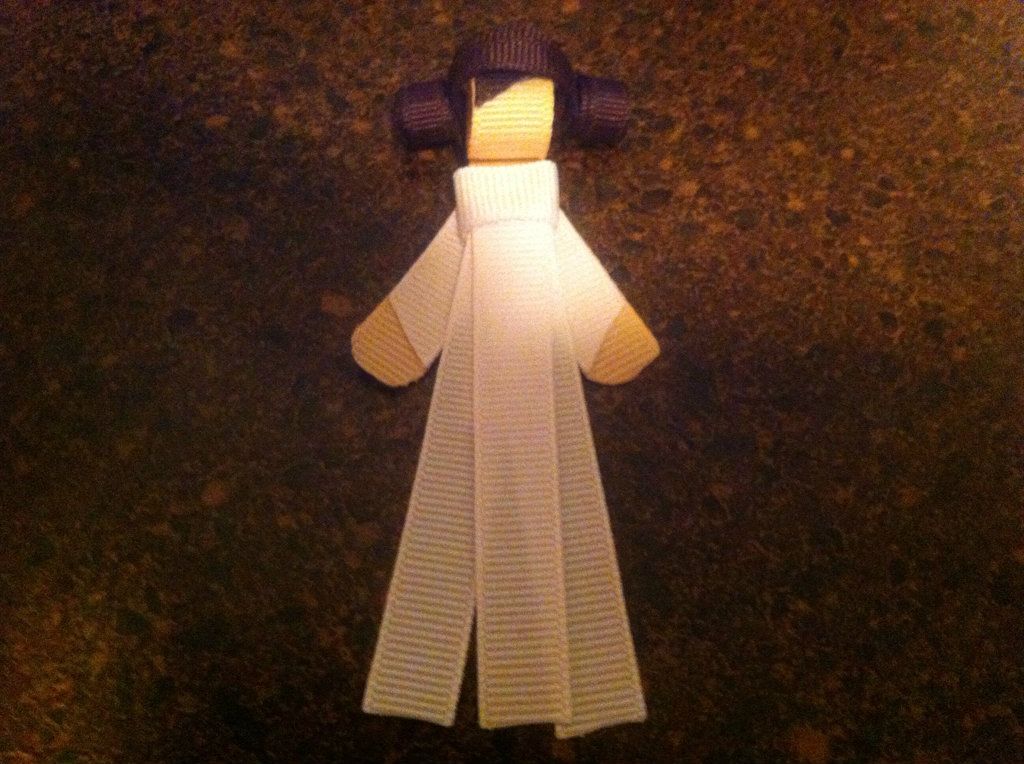
Step 1 - Take the 3 inch peach ribbon and roll the top into the head and gluing.
Step 2 - Take the 1.5 inch white piece and looping it around the body as shown for the bodice. Glue it down in the back, but leave it an open loop in the front.
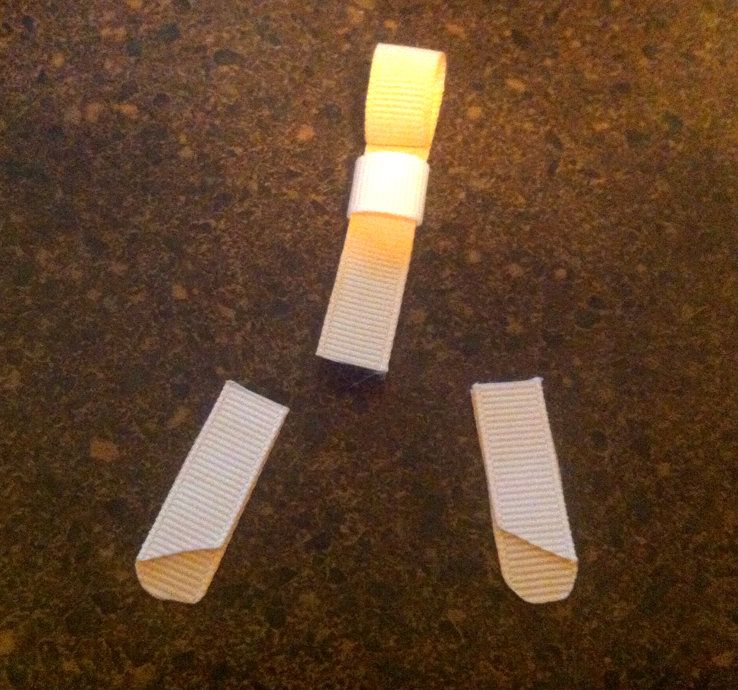
Step 3 - Take the two 1.25 in peach ribbons and round the edge of each arm and heat seal.
Step 4 - Take the two 1.1 in white ribbons, cut at diagonal and heat seal. Then, glue to the arms for sleeves, as shown.
Step 5 - Glue the arms to the back of the body as shown.
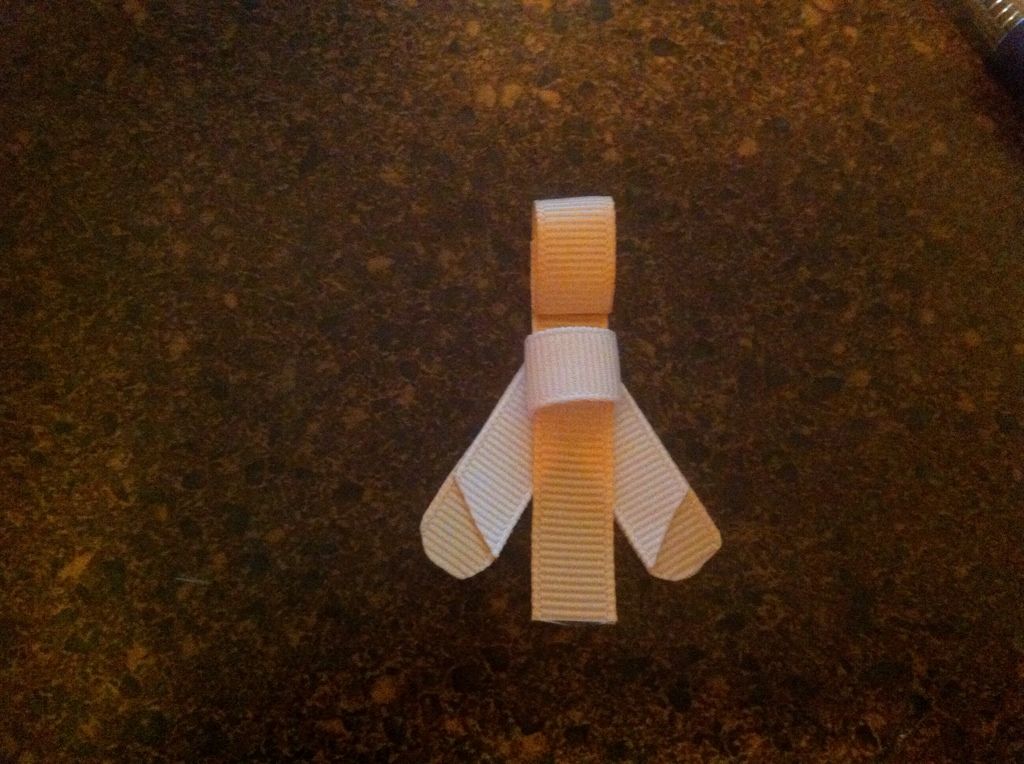
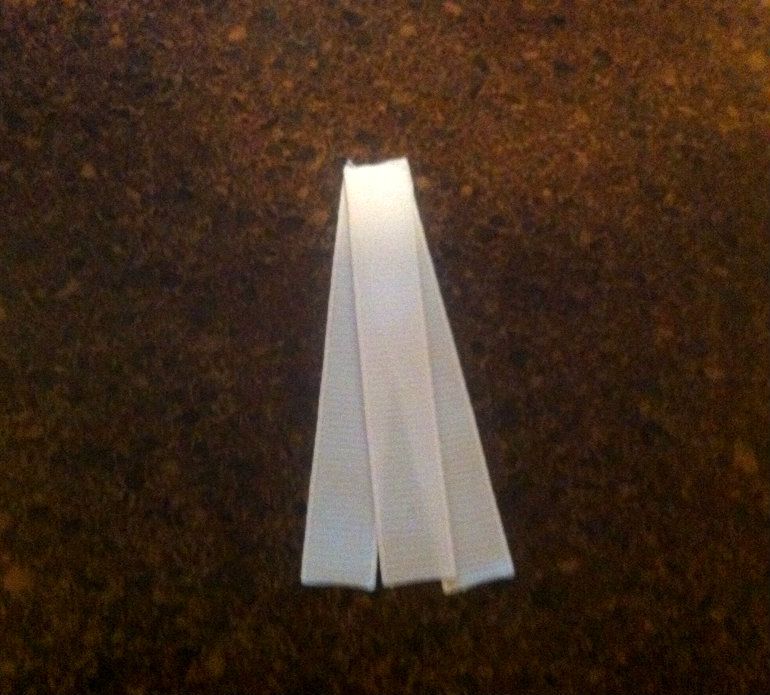
Step 6 - Take the three 2.5 inch white ribbons and glue them together so that the top is only the width of one ribbon at the very top, as shown, to create the dress.
Step 7 - Insert and glue the dress under the bodice loop, to hide the raw edges.
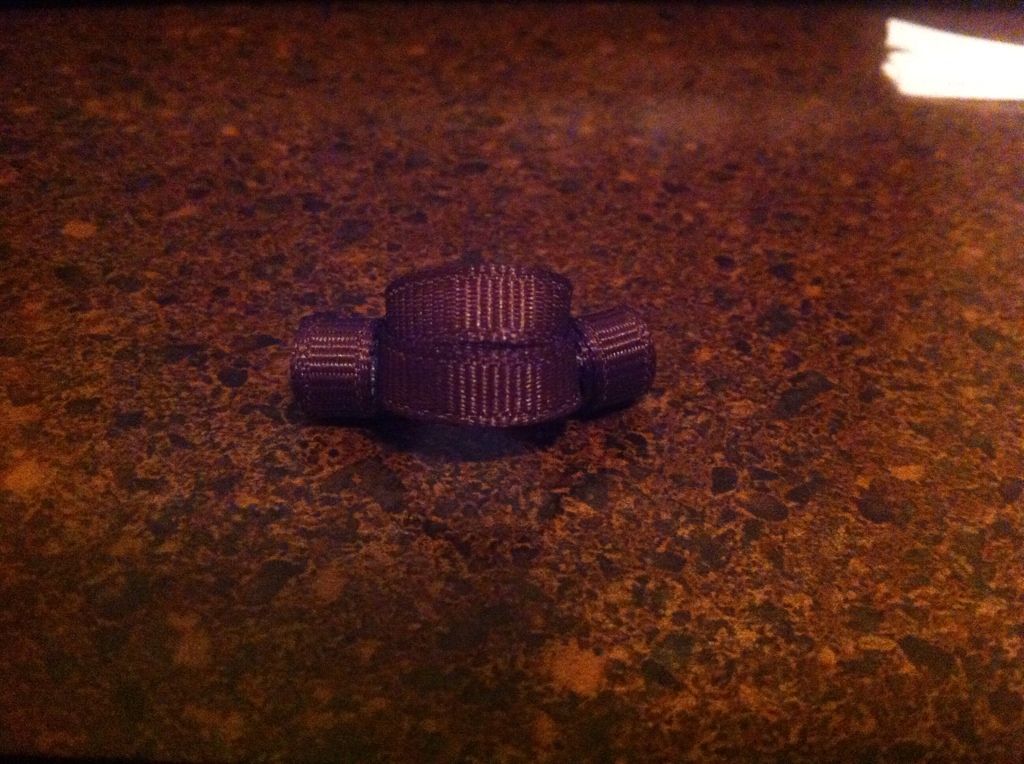
Step 8 - Take the 3/8 in brown piece and cut it at the diagonal for bangs. Heat seal the bangs, and glue it down the head.
Step 9 -Take the two 2.25 inch (1/4 inch) brown ribbons and glue them as loops -- make one just slightly smaller than the other.

Step 10 - Take the loops and insert the smaller one just a bit at the back of the larger loops and glue. It should look like below. This will be the hair.
Step 11 - Take the two 4-inch brown 1/4 inch ribbons and roll each one into a roll for the "buns." Glue at the beginning and at the end to secure the roll.
Step 12 - Glue one on each side of the larger loop ribbon
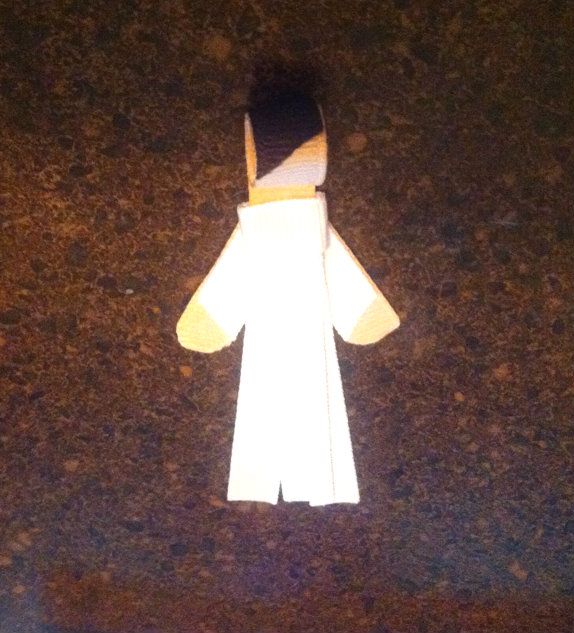
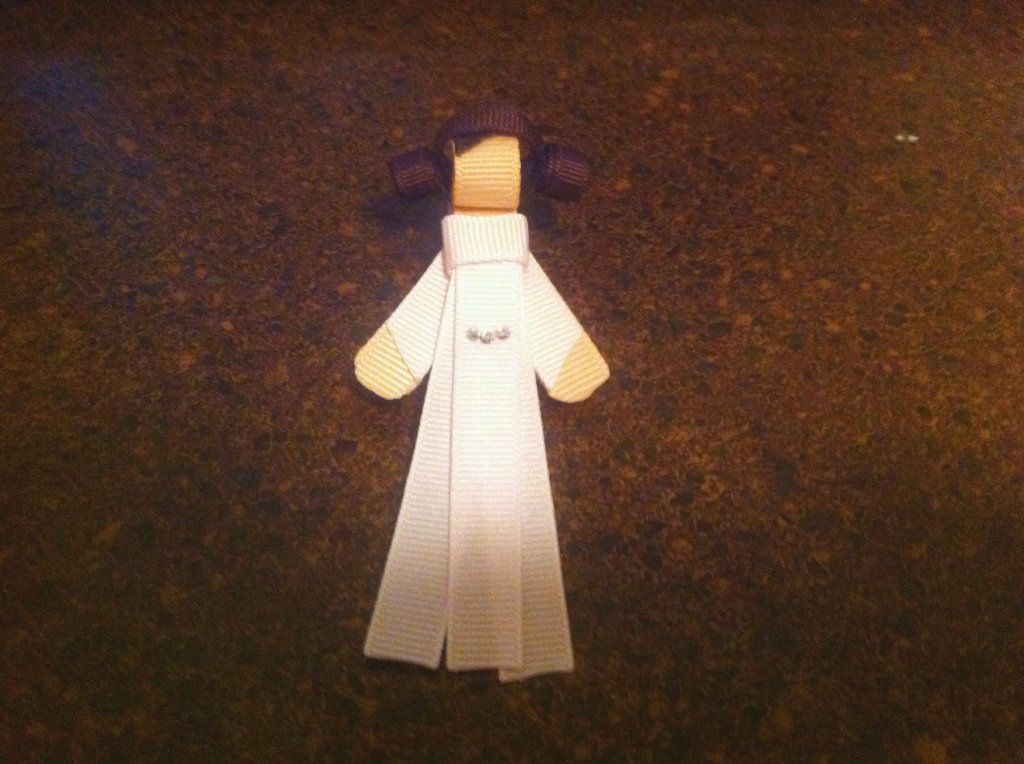
Now you're done! This is how your completed Princess Leia will look.
For embellishments, you can add a belt of hot fix crystals or a thin silver ribbon. Personally, I like the hot fix crystals. Here are a couple of close ups of the finished Leia.


2 comments:
Love it! So cute! Thanks for sharing at the Pomp Party! Hope to see you back next week!
That is SOOOO... cute!
Post a Comment