Monday, December 31, 2012

Shredded Pork Deliciousness & My Top 5 of 2012

Uploaded from the Photobucket iPhone AppFirst of all, I have to share this recipe.  I made shredded pork last night for the very first time (or as my husband and children refer to it as "pork butt" as they snicker -- yes we are rather juvenile here.) from Pioneer Woman's blog.  It's made with Dr. Pepper and chipotle peppers.  We ate it on hamburger buns for bbq sandwiches.  It came out so deliciously moist, I would have never guessed.  Halfway through cooking, I was flipping it over and not liking the smell or the looks of things, but when it was finally done...to die for!  The only difference in mine was that I only had a 3 lb roast versus her recommendation of 5-7 lbs, so the Dr. Pepper was cut in half to 1 can, I only used a half a can of chipotle peppers, and the cook time was just 3 hours from start to finish at 300 degrees. 

Check out the recipe here. I was uber impressed that mine actually looked like the pictures when I pulled it out of the oven at the end.  Hubby was in heaven and ate like a pig.  Definitely a recipe that will become a staple around here.

Back to business....I can't believe 2012 is ending and we're on to 2013.  Where does the time go? My babies are growing up too fast.  I swear the older I get, the faster time flies.

What are you doing to celebrate? This is the first time in 3 years my two older children weren't in Oklahoma with their dad.  We're having a little party with Grandbea, my mother-in-law.  We will be counting down the hours with lots of games from my husband's  much-loved show, Table Top.

For eats, I've planned piglets in blankets (little smokies wrapped in crescent rolls), homemade dutch oven bread, crockpot mac n cheese, copycat Chili's skillet queso, homemade hot apple cider, and chocolate muffins (at the request of Miss Molly). Plus, some champagne for the grown ups.

Since we are coming down to the wire tonight, I thought it would be fun to post the Top Five most popular posts from my little blog from the entire year.

Top Five Sewing Chick Posts of 2012


#5 Fleece Sunflower Pillow Tutorial.  This tutorial I came up while actually making someone else's tutorial project.  It was a peony-like fleece flower. I kept thinking how bright and sunny a sunflower pillow would look, so I whipped one up and loved it so much I had to share. 

Uploaded from the Photobucket iPhone App
#4 Upcycled T Shirts into Rosette Embellishments  I'm always surprised at what's really popular on my blog.  This was the fourth highest on my blog.  It's a fun little embellishment.  I love to make these rosettes because no matter what, they always come out looking fabulous.

Untitled
#3 Ribbon Flower Baby Headband tutorial.  I love these little headbands on Miss Molly.  I happened to be playing around with the ribbon to make an accessory to go with her outfit and I just loved how the flower came out. 


#2 Jointed Waldorf doll tutorial.  This is one of my most popular posts even lately.  I love to make these Waldorf dolls and it's fun to share my love with everyone else.  If you haven't tried one, they really aren't as scary to make as you might think. 

Uploaded from the Photobucket iPhone App 
#1 Spiral Hot Dogs.  Who knew such a simple idea could make hot dogs so delicious?  I was surprised at the popularity of this post.  In fact, it was a spur of the moment that I decided to take pictures of my husband making them. 


Friday, December 28, 2012

Melt in Your Mouth Brown Sugar Fudge

991BF747-5F24-4075-8824-5A993BD3B920-243-0000002CC835EA7D

I'm a born and raised in Texas girl, and my family LOVES Tex-Mex food.  When I was a little girl there was a local restaurant called The Monterrey House.  They would give you these little bits of candy in the chip basket that were Mexican candies called Leche Quemada.

I loved those little candies, and even now 20-30 years later - god, I feel old - I still remember the taste and never can find anything like it.  So, I've been on a hunt.  I found a recipe that was literally 4-5 hours long.  Who does that?  I'm not stirring for 5 hours.  Then yesterday I found penuche.  It's brown sugar fudge.  It tastes almost exactly like those little candies.  So, today I attempted my own.  Most recipes have heavy cream in them.  But, I looked for a recipe that had marshmallow creme in it because that's what I had on hand.  Plus, on a snowy and icy day in Texas (Yes! Our first White Christmas ever I think!), you don't leave the house because down here we don't know how to drive in that kinda weather.    

So, after cleaning up the kitchen after dinner, my reward was this recipe.  I made the penuche tonight and it's heavenly. It literally melts in your mouth, but it's very rich. One little piece will do you, and if you eat more, you will feel the sugar overload.  My 8 year old loved the taste and texture combination. Everyone else was asleep, so he was my only taste tester so far, but he's usually the best taste tester.  He loves all his momma's cooking :D.

This recipe has an option of nuts, but I left them out as a lot of my family (i.e. me) doesn't like nuts.

Uploaded from the Photobucket iPhone App

Penuche Fudge

2 tbs butter - cold
1 1/2 c sugar
1 c brown sugar
2/3 c evaporated milk
5 oz marshmellow creme
1 tsp vanilla
1 c pecans - OPTIONAL

Line a loaf ban with foil or plastic wrap.

In a 2 or 3 qt sauce pan, warm milk on medium then add white and brown sugar.  Stir constantly with a wooden spoon until rolling boil.  Then, add the marshmallow creme.  Stir and stir and stir until the marshmallow creme is completely melted.

When the mixture is back to a rolling boil set the timer for 5 minutes.  STIR CONSTANTLY!  Do not stop stirring until the timer goes off.  Then pull the pan off the heat, mix in the vanilla.  Drop in the butter, as one big piece is fine, and let it sit for 2 minutes without stirring.  The butter will be mostly melted at the end of the 2 minutes.  Then, vigorously stir until well mixed -- for this I used a metal whisk.

Pour entire contents into loaf pan and allow to set until firm.  Mine set in about an hour's time.  Then, remove the plastic wrap/foil from loaf pan and cut fudge into squares.  Store in a covered container for up to a week. 

Uploaded from the Photobucket iPhone AppUploaded from the Photobucket iPhone App

Thursday, December 27, 2012

Snow Day!!

As I've said many times, we're in Texas, which rarely gets snow. Funny thing, Mr E kept begging me for snow on Christmas -- like it was my decision, lol. And, when the meteorologists started saying last week, we might be getting a white Christmas, I did not believe them. Then, as it got closer and closer, they started increasing the amounts of snow that was going to happen.  Amazing, we woke up to a yard covered in snow and it was still falling. I think we probably had about 4 inches, which is amazing for here. 

I wanted to share my children enjoying the snow, so I can look back years from now and remember the time. Miss Molly has never seen snow or played in the snow. I think the last time there were flurries was when she was about 8 months old. I rushed her outside bundled in blankets and a hat and had my oldest hold her while I took a picture of all three of them.

 She LOVED the snow and begged to go out many times a day the past couple of days, until her shoes and pant legs were caked with snow and her little toes were red when I finally got her in and undressed. She calls her mittens her "mermits." I have no idea where she came up with that name, but she asks me to put her "mermits" on a hundred times a day. 

Uploaded from the Photobucket iPhone App

This is Mr E the minute he walked outside. 

Uploaded from the Photobucket iPhone App

This is Miss Molly picking up a snowball for the first time. 

Uploaded from the Photobucket iPhone App

This is when Miss Molly walked outside for the first time while it was still snowing. 

Uploaded from the Photobucket iPhone App

This is my dear Ms Em, who was just hit in the face by her brother, who you can see laughing like a crazy man in the background. Don't worry, she retaliated. 

Uploaded from the Photobucket iPhone App

Merry Christmas!!

Tuesday, December 25, 2012

Wee Wonderful Dollies

Uploaded from the Photobucket iPhone AppI saw the Wee Wonderfuls book on the library catalog online one day and decided to check it out. Unfortunately, it had a bit of a wait on the request list, so it took me until this week to get it. 

I love the cute stuff in it.  So so so so cute!! I decided to try my hand at these little slumber party dolls.  I'm doing this from memory, I can't remember what they were called.  But, I loved how they had little balls for hands and their hair was ADORABLE.

Call me lazy, but I skipped the sleeping bag thing and just made two of the dolls.  I'm not one to use patterns.  I hate patterns, except my own.  I also hate following directions, but who doesn't?

So, I tediously traced these out and cut them out and then cut the fabric.  I followed step by step instead of doing my own thing because I wanted to do these right.  The directions were a teensy bit confusing because I think a step might have been forgotten about closing up the doll bottom.  I looked and looked, but could not figure out where it said to close the very bottom of the doll body.


All in all, if you are new to dollmaking, this is probably a great way to get your feet wet with detailed instructions and great illustrations.  Even the embroidery stitch illustrations will really help someone who hasn't made dolls.  However, I've discovered in the last couple years that I am a Star Trek Borg.  I feed on efficiency.  I need to go the shortest most direct route to get somewhere.   So, had I not followed the directions step by step, I would have been done a whole lot faster, which drove me a little crazy.  It's a lovely book, so if you're a dollmaker, it might be a great book for inspiration 0to get your creative juices flowing to create something of your own, but it's probably better if you make something up yourself. 

2FC91CBB-F042-474A-B365-3A037B8FB9A8-2134-0000011731AA19EF, Uploaded from the Photobucket iPhone App
Here they are.  I call them Olivia and Flynn, and yes Flynn is a girl.  Flynn is the one with the single bun on her head.  I don't know why, but dolls tell me their names as I'm making them.  I'm not crazy and yet have no idea how it works, but by the time I finish a doll, her name (or his) is definitively decided and it's not by me.

Hair is blonde much like Miss Molly.  Eyes are a dark violet/purple, as Miss Molly has my eyes and my lovely husband likes to tell me my dark blue eyes are violet -- which is nice because I always assumed I was weird and they were probably navy or something not as nice as violet because no one ever has dark blue eyes like me.

They were made out of some much loved scraps.  The double bun girl is Olivia.  She has some of my much hoarded and loved Munki Munki fabric scraps from these adorable wedding day pajamas.  I love this print, it is so so cute! I kept looking for the perfect thing to make out of it, and the dolls in the book told me that they were definitely the thing to do with that fabric.  I've literally being holding on to it for years. Flynn's dress is mainly a flannel Amy Butler.  I cannot remember who the designer is for the sleeves, but I thought the fabric coordinated nicely. 

Even though I've made tons of waldorf dolls with embroidered eyes, these eyes scared me.  But, they came out great! I really like using a 6-string embroidery thread over my usual 3-string.  In fact, I might change to that if it comes out nice on my next experimental waldorf doll.

All in all, a great book to have in your collection when you want a doll to whip up for a birthday or christmas present. 


Monday, December 24, 2012

Gutermann Thread is AWESOME!!!

I love to use a wooly nylon thread in the loopers of my serger.  Lately, my local Joann's only carries Gutermann's bulky nylon, so I made to the switch to it.  It is so much easier to thread in the loopers than the YLI wooly nylon because I don't have to twist it; it just fits right through.  So I switch to using Gutermann's exclusively because it is so nice. 

Then, a couple of the spools of the Gutermann's bulky nylon starting doing something weird.  About halfway through the spool, when a fair amount of the plastic at the top of the spool was exposed, it would catch on the top of the spool.  If I didn't notice it and undo it with my fingers, it would pull the thread tight in the serger, then break the thread and my serging was HORRIBLE!  And, it would do this literally over and over again.  I finally would have to chunk the spool with half the thread still on it.

This thread was rather expensive, like close to $5 a spool, I think.  So, after the second spool did this to me, I emailed the company and explained the situation and asked if there was a way I could make the spool stop doing that -- because I had tried everything.  I even filed it with a nail file to smooth the plastic in case something was sticking up in it.

Uploaded from the Photobucket iPhone App 

The very next morning a nice lady at Gutermann emailed me, and asked me to send them my spool of thread that was messing up so they could figure out what the problem was.  Then, she said she would compensate me with a replacement thread plus some extra for the inconvenience.  Yesterday, I got my package.  Not only did it have a replacement spool, they also sent along an additional entire box of the same bulky nylon.  I couldn't believe it!  Isn't that a nice thing to do?


Sunday, December 23, 2012

American Girl Mermaid Tail Sewing Pattern


 The downloadable pattern has finally arrived!  And, it's only $4!  Please head on over to Etsy or Craftsy to download your very own copy.  The pattern is completely digital, which means you print it right from your computer and can get to work as soon as you want!

Click here for Etsy
Click here for Craftsy

You can whip up 2-3 mermaid costume sets with just 1/2 yard of a four-way stretch dancewear fabric.

This is a great last minute gift you can whip up in an afternoon for the little girl in your life who loves American Girl. This is an easy to make tutorial for a mermaid tail and bandeau style top for your American Girl or similar 18 inch doll. It also fit my 18 inch Waldorf style dolls.

Recommended fabrics: dancewear fabrics, four-way stretch lycra and spandex knits.

Uploaded from the Photobucket iPhone App

Review: The Passage


The Passage
The Passage by Justin Cronin

My rating: 2 of 5 stars


I was on the request list for this at the library FOREVER, only to be completely disappointed.

It started out with such promise. I was hooked from the first chapter and then....I felt like I was just dumped into a completely different story. Not just into another story, but in the middle of another story. It could not hold my attention.

I hate when a book feels like it starts in the middle of the story and I don't know what is going on and am completely confused, or what's worse is when I can't even figure out how to know what's going on. This happened in this book. I had to stop in the midst of part 2. In fact, I skimmed along quickly to see if I could get more of a better feel for completely different characters who had nothing to do with the beginning of the story. I never could. It just drove me insane. I was really hoping to enjoy this book, but it just couldn't hold my attention. I started to hate coming back to it.


View all my reviews

Thursday, December 13, 2012

Boden - Waldorf Fairy Doll

Uploaded from the Photobucket iPhone App

This is Boden.  He is a night fairy like his twin sister, Nyxy.  But, he prefers the stars.  You’ll often find him in the canopy of the tallest tree he can find trying to touch all the stars.  He’s tried flying to them, but pixie dust can only get you so far. So for now, he just wishes on the first falling star he sees every night that one day he will be among them. 


He was a custom order waldorf doll fairy I made for a customer. He has a twin sister I showed previously, Nyxy.He has wrap pants and a vest.  His hair is this wonderful wool roving yarn from Martha Stewart.  He has a full head of hair that can be brushed.
 
I have never seen any tutorials on how I make my waldorf doll hair.  I do not crochet a cap and then sew it in.  I crochet the entire cap and hair all together as one.  It goes very quickly and when you're done, you have brushable hair. For girl hair on an average 15 inch doll, it takes almost an entire skein.  For boy hair of the same size, it takes about half a skein. 

Very soon, I hope to get my husband, the youtube video maker, to help me make a video tutorial to show exactly how I do it. 

Look for my Wee Santa ornament tutorial tomorrow!


Tuesday, December 11, 2012

Wee Santa Ornaments

I make these little pocket dolls, sometimes I call them "wee" dolls.  They are waldorf inspired.  Sometimes I sew wool batting onto their faces to make them into gnomes.  Looking at a red one I had, it dawned on me to turn these into little Santas for an adorable ornament for the Xmas tree.  I love how they came out.

I used real wool batting for the beard and around the hat.  I had to felt it a bit by rolling it in my hands to get it to be a bit denser than it comes.  I also added a little jingle bell on the end of the hat. Then to finish him off, I added a little blush on his cheeks.  I originally wasn't going to add a face, but after I made them, I felt he needed eyes and a mouth.  I was able to sew the mouth threw the beard, but for the eyes I just added them with a fine point Sharpie. 

Uploaded from the Photobucket iPhone App

Uploaded from the Photobucket iPhone App


Uploaded from the Photobucket iPhone App

Uploaded from the Photobucket iPhone App


I made some of these for ornament exchanges and gifts, and I had a few extra I put in my Etsy store.  I've sold out of the darker burgundy ones, but I have some of the red ones still in my Etsy store.  

Monday, December 10, 2012

Pumpkin Cheesecake Cupcakes - the Yeti of cupcakes

Uploaded from the Photobucket iPhone AppI just completed the marathon cupcake-a-thon in my kitchen.   A total of 4 dozen, baked, frosted, embellished with sugar crystals, and prettily packed away in boxes for gift giving at dh's work.  And then, I realized I never have posted about these cupcakes.   These are like the BEST holiday fall/winter cupcakes EVER. 

I can't believe I have never posted the recipe for my world famous pumpkin cheesecake cupcakes before.   They are like the Yeti of cupcakes - seriously.  My husband has a bake sale at work to benefit a charity that buys coats for kids, and people get in bidding wars over these cupcakes.  Days before the bake sale, rumors begin to swirl about the elusive pumpkin cheesecake cupcakes.  It's crazy!

These are an amalgam of various pumpkin cupcake recipes I've used over the years with my own little cheesecake twist.  My secret weapon for these is two fold -- it involves extra pumpkin and ninja cheesecake hiding out in the middle.  The combination of these two things makes this cupcake so "magically delicious" it can't be contained.  Then, top it off with a cream cheese buttercream frosting, and you are in heaven. As proof to how amazing these are I give you my husband, who oddly enough does not like sweets yet will eat an entire batch of these if I let him. 

So try them out yourself. Here are the recipes:

Pumpkin Cheesecake Cupcakes

Yields 24 cupcakes

Cheesecake Batter:
1/2 cup powdered sugar
8 oz cream cheese, softened
1 egg white
1/2 tsp vanilla

Preheat oven to 350.  Beat all ingredients together until smooth.  Set aside.

Pumpkin Batter: 
2 eggs + 1 egg  yolk (leftover yolk from cheesecake batter)
1/2 cup oil
1 cup white sugar
1 cup brown sugar
1 tsp vanilla
15 oz can pumpkin puree
2 cups flour
1 1/2 tsp baking powder
2 heaping tsp pumpkin pie spice
1/2 tsp salt

In separate bowl mix flour, baking powder, pumpkin pie spice, and salt.  Set aside.  In mixing bowl combine eggs, oil, both sugars, vanilla, and pumpkin.  Combine until well mixed.  Gradually add in dry ingredients and mix until smooth. 

In cupcake liners layer pumpkin batter, then cheesecake batter, then pumpkin batter. Then, I jiggle them a teensy bit to smooth out the layers. Bake 15 minutes.**  Let cool and frost. 

**Because there is cheesecake in the middle, you can't insert a toothpick into the cupcakes to see if they are done.  When I cook them, they are always done in about 15-16 minutes.  Just make sure the top layer of pumpkin batter looks "done."

Cream Cheese Buttercream Frosting
1/2 cup of butter (1 stick), slightly softened
8 oz cream cheese, softened
3 cups of powdered sugar
1 tsp vanilla

Mix all ingredients until combined.  Then, beat for another 1 minute until fluffy.  This is enough to frost 24 cupcakes nicely. 

Tip - I have three sizes of scoops from Pampered Chef.  I've found if I use the medium scoop for the pumpkin batter and the smallest scoop for the cheesecake, it hides the cheesecake perfectly in the center of the cupcake. 

Uploaded from the Photobucket iPhone App


Uploaded from the Photobucket iPhone App


Uploaded from the Photobucket iPhone App

Uploaded from the Photobucket iPhone App


Friday, December 07, 2012

Mermaids!

Gosh, I've been so busy this week and last week. And...it's just crazier next week.
  • I've been helping my dear husband with his Calculus. It's all due tomorrow at midnight, and he still has one more test to take -- EEK! 
  • I finished up three ornaments for two different ornament exchanges earlier this week. I can't wait to share, but I have to wait for them to arrive, so I don't spoil the surprises. 
  • I'm in the midst of finishing up a custom order. 
  • Plus, I had a craft fair this past weekend, which those just kick my rear. 
  • And, my darling 13 yr old has more homework than ever in her classes. Algebra and Pre AP English are kicking her rear. Thank FSM I'm a math whiz around here lately. Seriously, I never realized how helping dh do Calculus the past 2 semesters would perfectly refresh my brain for algebra I tutoring. (And, secretly, it makes me kick myself I didn't major in math.  God, I miss it.  Derivatives are like better than Sudoku for me, right now.  WTH am I thinking that for?)
  • So next week, I had to sign up to work at Mr E's school for the Santa workshop thing.  Kids get to buy gifts for super cheap for their families.  And the PTO moms get to help them shop and wrap the gifts. 
  • And then next Friday dh is finally graduating from college.  Woohoo!  I'm thinking of bringing a cowbell ;P  On a serious note, this is an amazing feat.  My husband, who in the last 2 years has become quite a successful award-winning stockbroker did not graduate from high school.  He dropped out the first semester his senior year, then got his GED.  It is something he has regretted for a long, long time.  He has never walked a stage to to get a diploma or wear a cap and gown. It has been a dream of his for so long.  I am so proud and excited for him.  Now..I just need to think of a super amazing graduation gift. 
  •  Here is something I recently designed.  It took a few tries to get it just perfect, but I love the design of this mermaid tail for American Girl dolls.  I sold quite a few at this past weekend's craft fair.  I was so excited -- little girls were begging their mothers.  I have put a few up in my Etsy store, but will have more colors up this weekend.  I'm thinking of making a pattern for this set.  If that sounds like something you're interested in, post a comment. 

Tuesday, December 04, 2012

Review: A Discovery of Witches


A Discovery of Witches
A Discovery of Witches by Deborah Harkness

My rating: 3 of 5 stars


This is the story of Diana Bishop. A expert in chemistry and alchemy of the 17th century who happens to be a witch. Which she hates, so she pretends she is human and avoids magic. That is, until in her research she comes across a very old and very odd manuscript that has been bewitched. Her breaking its spell brings out the creatures including more witches, vampires,,and demons. This book has apparently been lost got hundreds of years and has the secrets of the beginnings of each of these creatures.

Because of this, Diana becomes a target for many, including a gorgeous vampire named Matthew who sweeps Diana off her feet. Danger ensues and they must hide from it, which eventually leads Diana and Matthew into "time walking" or time travel. All of which sets the stage for an adventure told in a trilogy.

While I really did enjoy this story and I'm anxious to read the rest of the trilogy, I did not care for the way Diana seemed to go from successful expert professor who takes care of herself to pitiful Bella Swan when she finds her soulmate in Matthew the vampire. This is a successful woman who has made it all the way to Yale tenured professor all by herself. Yet, she meets this vampire and suddenly she's a helpless witch who can't take care of herself. She just falls into obeying him and going along with his pack mentality. WTH? This is a vampire and he's a vampire with rage issues. Why does she just turn into this helpless little girl who keeps getting hurt and needs to be saved and then sedated by him? Like I said, I enjoyed the story, but it definitely had shades of Twilight -- including the lack of sex and her always wanting it.

And furthermore, if her magic is spellbound and she can ONLY use it when she needs it why the heck was she so useless when Satu kidnaps her? Shouldn't her witch abilities come out in that time of need?


View all my reviews

Monday, December 03, 2012

Tutorials coming soon and Christmas Shopping on Etsy

Finally! I'm done with craft shows for awhile.  I can breathe again.  I've got lots to do this week.  Finishing up some custom orders for Etsy.  Plus, I've got so much planned for this little blog o'mine.  I've got two Christmas ornament exchanges to finish today, and I plan to have a tutorial to finish up of the Christmas ornaments I've been making.  So easy, and perfect to add to a teacher gift or something!

But first, this week, I'll have a great new tutorial to make your little toddlers for a Christmas gift.  It's Waldorf inspired.  It should be up by Friday morning.  I can't wait to share!

And, I've been stocking up The TipToe Fairy Etsy store this weekend with lots of new stuff.  I'm still currently stocking the store in between projects and hope to be done by tonight or tomorrow. 

But I have a coupon code just for you!  It is good for the entire month of December to get 10% off at the TipToe Fairy Etsy store.  The coupon code is: DECEMBER.  Click on the picture below and it will take you directly to the store.  Ready made things are shipping in 1-2 business days.  If you're interested in a custom order, send me a convo on Etsy, and get it in soon, so it will be shipped in time for Christmas.


Wednesday, November 28, 2012

North Pole Days

Having attended my first craft fair with the Etsy craft fair this month, I'm not as terrified as I was. It was a lot of fun, so my hubby and I have decided to do another one before Christmas this year.

In our small town, we have a festival called North Pole Days.  For the month of December, our town is called North Pole, and if you mail anything to Krum,TX it will be stamped "North Pole."  Isn't that cute?


We have a festival with a tree lighting and parade and a chili dinner  and...a Craft Fair!  The TipToe Fairy will be at the craft fair this Saturday, December 1st from 9 am to 4 pm.  It will be held at the Early Education Center in Krum. 

We'll have lots of fun stuff - tutus, baby things, hair bows, American Girl fantasy wear like tutus and mermaid tails, and more.  Come see us!

Friday, November 23, 2012

Craftsy is having a SALE!

Happy Black Friday!  I can't believe it, but I already finished one of my three kidlets Xmas gifts (Thank you, Amazon.com!).  I'm halfway done with the second one, and by Sunday, the baby's Xmas will be done too!  I've never this fast.

But, this sale would be the perfect gift for your somebody who is "crafty." For Black Friday and Cyber Monday, I just found out Craftsy is having a sale!  All their classes are $19.99 and under through Monday, even the ones that are usually $39.99! There are just so many to choose from.  I'm really wanting to try the make your own monster class.  So cute!!

I've recently signed up for the class The Art of Cloth of Dyeing.  I can't wait to get started!  I love to dye things, and I'm hoping the advanced techniques will be new things I can learn.  I have to finish a few crafty things for an upcoming craft fair before I can get started, but I just can't wait.  I'll definitely be blogging my projects in the near future. 

If you're interested in finding out more about the classes, just click this link --  Online Sewing Classes .  It will take you to the entire list of classes they offer.  And, it's not just sewing and crafty things.   Gosh, there is so much I want to take...breadmaking, cheese making, cake decorating....the list just goes on and on.

Now I'm off to the kitchen because I'm starving after thinking about bread and cheese. 


Wednesday, November 21, 2012

The BEST gift I have ever received....like ever

Yesterday was my wedding anniversary.  We've been married 3 years.  Almost 4 years ago, we met in the midst of starting our lives over.  I had been married for almost 13 years, and he had been in a long term relationship that had just turned into a marriage.  But both our lives came crashing down, and we had to start over.  If you so desire, you can read my descent into madness at that point in this blog.  (I've considered deleting it off my blog, but I feel like this record of my life should stay, even though it is probably the lowest point I've ever been in my life.)

We met, fell in love, introduced my children into the mix, got married, had an adorable baby, and the rest is history.  This is the man I will grow old with, and I love that.  He is my soul mate, my rock, and my best friend.  I could live on the silliness he emits that bring me to a fit of giggles.  I feel so very lucky to have found someone like him.  Now, our family is a happy one, and I love that other people can see that, too.

Uploaded from the Photobucket iPhone App
This jar was what I woke up to yesterday.  His gift for me.  He spent all morning working on it.  I love that he was tooling around in my crafty things making something for me. He found an old jar I had been saving, painted the lid and glued a note to it.  Then tied ribbons around it.  But...the best part is what's inside.  He wrote countless little notes of why he loves me.  Gosh, I just tear up writing this.  He even folded each one into a tiny envelope.  Where did I find such a wonderful guy? I'm savoring opening them.  I've only looked at a few so far. 

And, we had a date night!  DH had taken the past couple days off.  He even cleaned the carpets today!  We got a little dressed up, and my mom came over to babysit, and we went to dinner at this wonderful Italian restaurant called Guiseppe's.  It's in a quaint old house right next to a bed & breakfast off the square in Denton.  It was delicious!  We had never been there before, but every time we've driven by we kept saying we needed to go.  So, we thought our anniversary was the perfect time.

It was a candle light dinner (with no kids!), and on a Tuesday there was hardly anyone in the entire restaurant.  We had the room we were in to ourselves.  The service was amazing.  I can't remember having such good service -- when the waiter is attentive, but knows just the perfect time to come back. I had this dish called Capellini Rustico, it's pasta in this delicious champagne marinara sauce.  It does not taste like typical marinara sauce.  Even my sweet husband liked it, and he's not a fan of tomato sauces.  Then, we shared a plate of canoli.  My meal tasted more and more delicious the more I ate.  It was such a wonderful night.  Then, we stopped for groceries (with no kids!), and topped the night off with a couple of episodes of Breaking Bad on Netflix before my hardworking hubby had to head to bed for a day of work tomorrow, while I attempt to get the ready-to-party toddler into bed. 

Thursday, November 15, 2012

Yummilicious Thanksgiving Dressing

One of my favorite meals is turkey and dressing.  In fact, I made it Tuesday night. I actually cooked an entire turkey with homemade dressing plus gravy and veggies for a week night dinner.  Yes, I am crazy.

4D851647-2057-4246-8599-22539D999818-7304-0000067BA0684668 My family has a secret recipe for dressing that is to die for.  We are from Texas.  We like cornbread dressing in these parts, and we don't do the weird apples in the dressing thing.  In fact, we tend to put things like jalapenos in the dressing.  We also don't call it stuffing, it's dressing.  I don't know why these things are the way they are, but I just go with it.

If you love cornbread dressing, then you will love this recipe.  It actually comes from my aunt's sister in law, whose name is Honey.  So, we call it Honey's Dressing.  Everyone who comes over for Thanksgiving and tries it, LOVES this dressing.

When you put it in the oven, it's almost like a soup, but it comes out so wonderfully moist and delicious.  I even converted my husband who tends to prefer "Stove Top" to the real made from scratch thing.

It calls for lots of broth - more than you think is necessary, but it works.  I usually use 1 of those 32 oz chicken broth containers plus about 2 or so cups of drippings directly from the turkey.  You want it to look very soupy and runny when you put it in the oven. 

Honey's Dressing

1 tube of biscuits
2 pans of cornbread
1 onion
1 stalk of celery
1 tbs sage

1 stick of butter
3 eggs
lots and lots of broth

Chop onion and celery into tiny pieces, saute in butter.  Crumble breads.  Mix everything together until soupy.  Bake at 325 for 1 hour. 

Wednesday, November 14, 2012

Fairies and Mermaids, oh my!

I haven't been blogging regularly because I've been getting my house in order since the craft fair. I sewed a lot for 2 weeks before the fair, and my house just went downhill since all I did was sew, feed people, and do laundry.  I don't think my dear husband or my sweet children realized how much I do around here until I stopped doing it.

Today's post is in two parts.  Part 1 - my recent creative endeavors.  Part 2 - drama at the craft fair. 

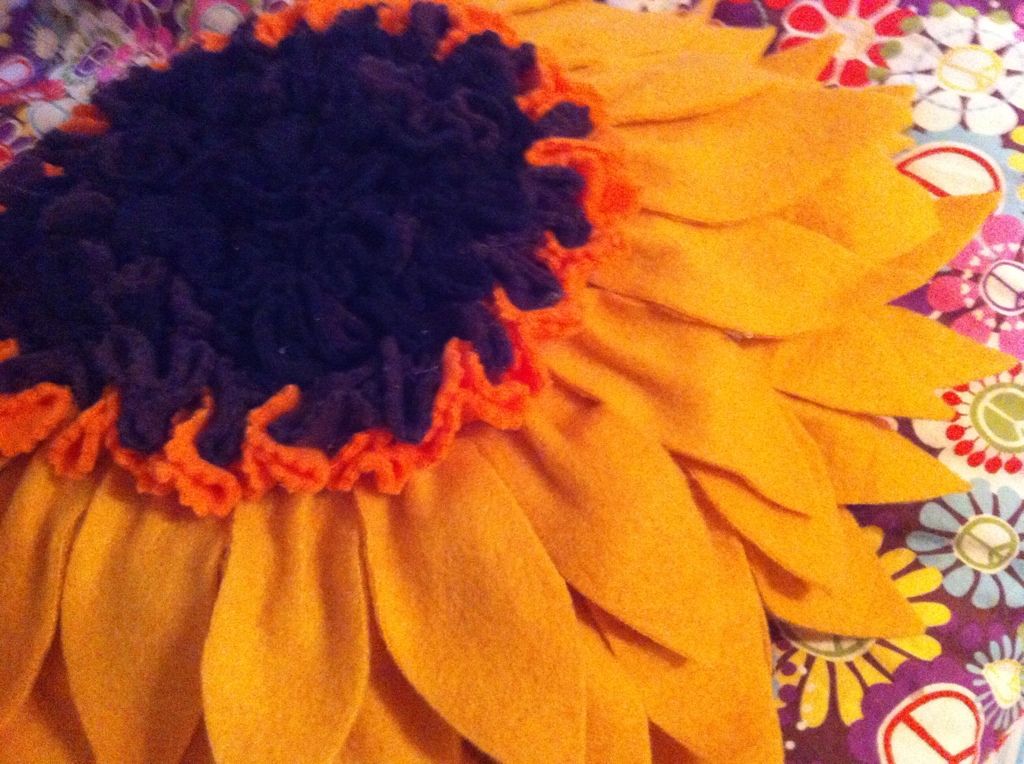
Part 1 - Here are some new waldorf dolls I've recently made.  They are currently on Etsy, if you are interested in purchasing them.  Click on the individual pictures and it will take you to their listing.  I just love how they came out!  They are all about 10 inches in length, all stuffed with wonderful wool I purchase from an Amish farm, and all have wool hair.  

This first one is Nyxy, the night fairy.  She has a dark navy body made of super soft cotton velour.  Her hair is a pale green wool roving. Her petal skirt is an embroidered pieced batik, and her wings are blue sparkly print. 

The second one is Ivy, the forest fairy.  I love her lavender hair.  It's a soft wool roving as well. Her body is a bright green cotton velour.   She has purple wings to go with her purple hair.  She also has a petal skirt made from an aqua batik with lavender moons and stars.  I think that is my favorite batik fabric I've ever owned.

Lastly, I have two mermaids.  I'll have pictures of the other one soon.  But for now, this is Tallulah, which means leaping waters.  I love the meaning of that name!  My husband says this one most looks like me of all the dolls I've recently made.  She has a green velour tail with hot pink top and blonde hair.

I am also slowly adding things on Etsy.  In addition to these dolls, I have some of my super soft knotty style dolls, and I'm happy to take custom orders, just send me a conversation over there. I just recently had a custom order for knotty dolls that were other colors than I had offered. 

I'm also open to trades for my dolls for things for my children for Xmas/Yule.  My youngest dd is 2 and loves pretend play and babies.  My oldest dd is 13 (going on 30), and loves mustache stuff.  My middle ds is 8 and loves pretend play when it comes to swords and things like that.  Send me a convo at Etsy, and we can work something out.

Part 2 - The craft fair was fun, and we made about triple what we paid for the booth, so that was nice. I really want to do another one before Christmas, so we are looking for a good one that isn't too expensive for booths.  If you know of a good one in the DFW area, please post in the comments!

My dear sweet wonderful adoring husband never left my side, so I wasn't nearly as nervous as I thought I would be, except for one incident. Fairly close to the opening, we are standing there smiling, answering questions, when he gives me this look and is vigorously pointing with his head (as best as one can point with their head, lol).  All I see is this man standing there, and I'm thinking WTH is he trying to tell me.  I was partially blocked by this wire bookshelf on our table.  Then as I move around it, I see it....his ex-wife and her mother are oohing and awing over MY things.  They have yet to look up and see whose table this belongs to.  So my dear husband, as hilarious as he is, smiles the biggest smile he ever had and says rather excitedly, "Good Morning!"  At this point, I am in a fit of giggles.  His ex looks up and I swear she actually ran, physically ran, about 3 booths away, funniest thing ever.  Her mother then completely oblivious to what has just occurred, then proceeds to have a conversation with me about what I make.  My husband thinks his former mother-in-law didn't realize he was even there.

After that, the ex kept circling around the entire craft fair, trying to pretend we didn't exist, except I kept seeing her peek over at us.  The weird thing is I'm starting to wondering if she's facebook stalking me or something.  Three days after she's practically at our house for trick or treating (she's not a parent, nor does she live anywhere near our town), she ends up at the craft fair?  Both of which I blog about, which also shows up on my facebook page? This is not a tiny small town either, and there were at least three other craft fairs going on in the same town on that same day.  Weird. 


Friday, November 02, 2012

Etsy Handmade Harvest - this weekend

I'm going to have my first ever booth at a craft fair this weekend.  I'm excited and terrified at the same time.  Thankfully, my darling sweet husband is coming with me.  He's my secret weapon because he is such a flirt and loves talking to women, which make him a great salesman. 

If you're local to the DFW area, it's with Etsy Denton for the Handmade Harvest.  It's Saturday from 10-4 pm at the Center for Visual Arts. 

You can find all the info needed here. 

Thursday, November 01, 2012

Halloween 2012

We were mostly zombies last night with a cute little skeleton thrown in to the mix.  Total cost of costumes and makeup was $1.99 as both older kids were zombies and picked out old clothes to bloody and rip up.  The toddler's glow in the dark skeleton pjs were a Gymboree thrift store score for $1.99.  Makeup was flour, toilet paper and school glue with cocoa powder, acrylic paint, red food coloring, and corn syrup - all on hand.

So, last night, my husband's ex wife shows up on our street trick-or-treating.  The kicker is....she doesn't have any kids nor does she live in our town.   There were two or three couples of parents with their kids trick-or-treating as a group and there she was in the middle of them.  Weird....

Monday, October 29, 2012

Upcycle T Shirt into Peasant Dress

Easy peasy tutorial!!  Upcycle a favorite t-shirt into a peasant dress for your daughter.

Materials:
1 Tshirt
1/4 to 3/8 inch width elastic


495BC82A-A900-425B-90E3-10883D7E7CAE-16374-00000E609A58DF38

Step 1:  Cut off the top of the tshirt.  Make sure to do a slight upward curve at the sleeves so you don't end up with a V as you hem the sleeves. (I will take a picture of this close up in the next few days and post.)

Uploaded from the Photobucket iPhone App

Step 2: Fold over the neck and sew a casing.  Leave a small opening to insert the elastic.

Uploaded from the Photobucket iPhone App

Step 3:  Insert elastic using a safety pin.  Try on and wiggle around elastic to make sure you have enough, cut and pin. (I use about 18-20 inches for a 3-4T)

Step 4:  Sew elastic ends together.  Insert into the casing, and sew up the casing opening. 

Uploaded from the Photobucket iPhone App

Step 5: Voila! You're done!

Uploaded from the Photobucket iPhone App

Uploaded from the Photobucket iPhone App

Friday, October 26, 2012

Outdoor Halloween Decorating

Halloween is my FAVORITE holiday.  I drag my husband outside every year, and we decorate the yard.  So, here are a few of my decorations.  Some of them I got from Pinterest, others were our own thrift store creations, and others my own ideas.

This idea came from a great picture I found on Pinterest of a ghost circle.  I had one last year with wooden dowels, but the rain bent them.  This time I used 2 foot rebar and it's so much better.  I used lunch sack's stuffed with the sheets from last year's ghost circle. Then I used clear duct tape and cut plastic drop cloths.  Next, I used two sets of our old orange Halloween lights as the fire.  I love how it looks like glowing embers at night, and it's a great way to creep my neighbors out.  My husband put one of our broken skeleton's head as the centerpiece.

I spent about $12.50 for the rebar and a 3 pack of plastic drop cloths.  Everything else I had at home. 


Uploaded from the Photobucket iPhone App

E626D34D-9FE9-4DB8-9184-E60301795377-16374-00000E600066FB85

This is our thrift store find.  We found a brand new spider web, spider, and a two pack of barbie dolls (though this one is technically Midge).  I wrapped her like a mummy in yarn, and we made the sign.  This one is over one set of windows.  We live on a corner lot, so I have a second one up now on another part of the house with another barbie who is completely wrapped up, even her head with another spider, but it wasn't up yet while I was taking pictures. 

 Uploaded from the Photobucket iPhone App

Next is our tree ghosts.  This is a composite of several ideas I've seen on Pinterest and other blogs.  These are cheesecloth and paper lantern ghosts.  I bought two packages of the rolls of cheesecloth in the Halloween section at Walmart.  I think they were less than $3-4/ea.  It was 6 yds x 36 inches wide.  I purchased a 3 pack of white paper lanterns from Hobby Lobby for $4.99.  They are in the party decoration area.  Then, I used our battery operated flickering tea lights (the ones for your jack o'lanterns).  You can get a 2 pack of those with extra batteries for about $2.99. 

First, I cut out ghost eyes and mouths from duct tape and stuck them on each lantern.  I used purple because my children's rainbow of duct tape colors was conveniently missing the black.  Then, I cut varying lengths of the cheesecloth (around 2 yds each) and threaded it over the hook on the top of the paper lanterns.  I had enough to do 2 layers on each ghost, to give it a ripped up look.  Then I taped up the bottom of each lantern so the tea light would not fall out.

Uploaded from the Photobucket iPhone App

I love the way they blow with the wind and flicker at night.  They came out better than I expected.  And, even in a torrential rainstorm, they came out perfectly fine.


Uploaded from the Photobucket iPhone App


These are some of our decorations.  I have other regular ol' decorations like lights around trees, light up bats, the messy spider webs with giant spiders coming off our garage lights, etc.  You can find some great cheap stuff at thrift stores in Aug/Sept before Halloween.  I get practically new decorations for cheap, like my latest zombie bride door hanging that was probably $10 or more in a store, I paid 1.99.

We also have various small 3-ft skeletons climbing our house.  Those we put up with clear duct tape.  If you open the daylight paper lantern ghosts picture, you'll see on our skeletons climbing up the house. These were purchased at Target for $9.99/ea I think? I can't remember the price.

Oh! I found a picture of the one climbing the street lamp  in our yard.

78F1049B-63F6-486A-AE1D-30AF658CB81D-16374-00000E600F714729

I do have some special decorations that are "one night only" that will go up on Halloween.  I'll take pictures of those and share next week.