

Saturday, August 25, 2012
Swaddled Waldorf Babies
These are some of my newest Waldorf inspired dolls, just for toddlers. My 2 year old loves to hold wrapped up babies, and I thought I'd give this idea a try and see how she liked it. She absolutely loved her new baby, so I made a few up for my microboutique.
 This is also a tutorial I have mostly completed, but put on the back burner when I got so sick last week and then while I finished up my most recent restocking at my store the last few days. Look for it in a few days.
Thursday, August 23, 2012
Babies and Babies and More Babies
Here is my current project -- a basket of babies. These are tiny pocket-sized Waldorf dolls perfect for toddlers who love to carry tiny things around with them.
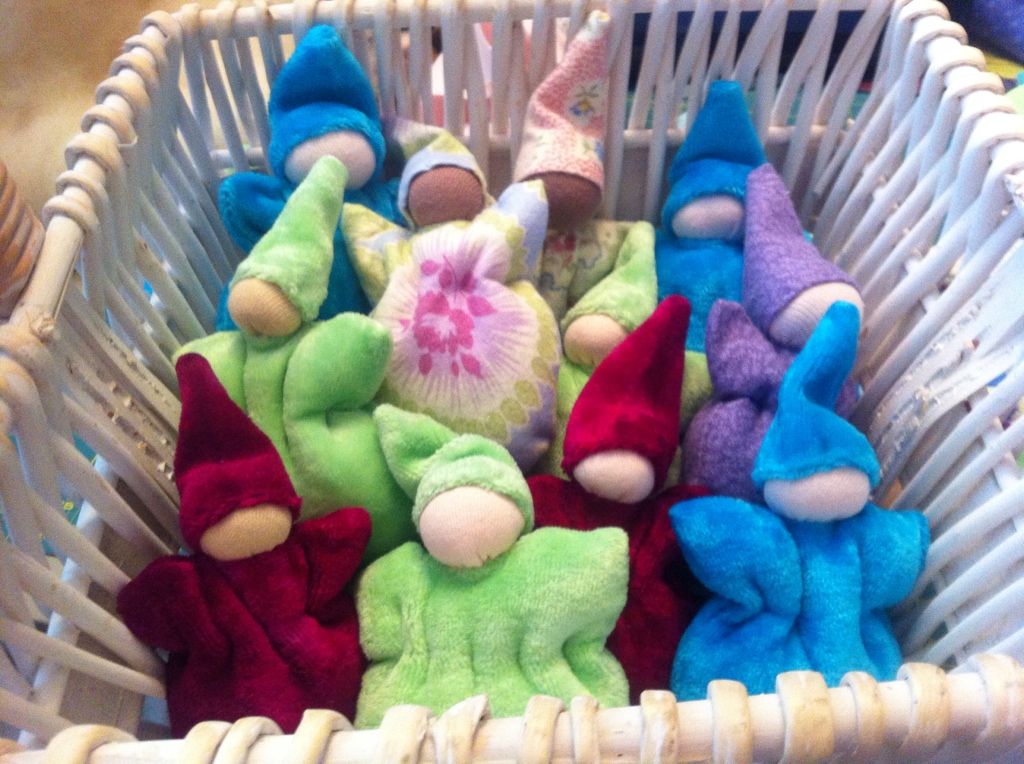
A tutorial for these will be up very soon. I don't have the time to put the finishing touches on it just yet because I'm in a frenzy mode for 2 reasons:
#1 My oldest dd's birthday is the first day of school (oh how fun!), and she's having a sleepover Friday night with her two best friends. I plan to have my awesome jumbo rainbow cupcakes ready for them to frost and my house is currently a mess because my children are part of the best demolition crew known to man.
#2 I have to finish a few different projects to take to my microboutique this week, and I'm already 1 day late doing it. I am not a procrastinator, and I hate when I fall past a deadline, even if it's a stupid deadline I set myself.
Sunday, August 19, 2012
Review: The Forest of Hands and Teeth

The Forest of Hands and Teeth by Carrie Ryan
My rating: 3 of 5 stars
I have not finished the trilogy for this book yet. I will probably come back and write more in this review once I have.
This is the story about a girl named Mary who lives in a village surrounded by fencing. It's run by this mysterious Sisterhood who provide everything to everyone in the village. The fence keeps out the Unconsecrated, basically zombies.
Mary dreams of leaving the village to see the ocean. Her mother told her stories about her great-great-great grandmother swimming in the ocean. No one has left the village for generations.
On the morning of Mary's marriage to a boy she doesn't love, the village is swarmed by zombies and all that are left are Mary, her betrothed, her best friend and her best friend's betrothed (whom Mary loves), a little boy, and her big brother and sister-in-law. There are gates that lead further into the forest with narrow fenced paths that no one has ever used. But, when the zombies take over, the only choice this group has is to start down the paths.
It is a nailbiting journey, but that seems to be all it is. It seems the only things that happen are zombies and people being killed. Mary keeps making selfish, childish decisions that end up killing people she loves.
I liked it, but I wish there was more depth to the characters and the back story. It just seems the story starts out many many generations into the future where all they have ever known are zombies and the mysterious Sisterhood and no one questions it. Who are the Sisterhood? Where did they come from? Why are they so damn religious? Why are there so may zombies in this forest?
I did enjoy the story, so I am anxious to read books #2 and #3 to see if there is more depth to the story besides zombies and dying.
View all my reviews
Review: Quiver

Quiver by Holly Luhning
My rating: 3 of 5 stars
If you've ever been intrigued by the Countess Elizabeth Bathory, better known as the Blood Countess who liked to bathe in the blood of young girls to stay young, then you would find this book enjoyable.
This is the story about Dani, a young psychologist fellow in London, who had a fascination with Bathory, and then is given a patient who killed in the name of the Blood Countess. And, supposedly, he is in a secret society who worships the Blood Countess and kill in her name.
Dani has this old "friend" named Maria, who was also fascinated by Bathory. A few years ago, they went to Hungary looking for the lost diaries of this crazy countess and come up empty handed. Then, in the present day, Maria comes back into Dani's life having found the diaries, feeding her tidbits of them as she translates them to english. Dani is fascinated but also cautious to trust this woman again.
I liked it, but I felt the main character was just a pitiful loser who is easily talked into anything. She doesn't seem to have much depth to her. She doubts herself and seems like she just gives excuses for everything. She can't even stand up to the bullying and outright lies of a more senior psychologist at the mental hospital where she works. She seems intoxicated by Maria, even when her clinical self doubts Maria is nothing more than a narcissistic freak.
It's a good mysterious story, especially getting to read the absolute horror of Bathory's diary entries. They just made me cringe.
Even with the character issue, I really enjoyed it.
View all my reviews
Stomach bugs and waldorf dolls
Don't those just go together? Unfortunately, I have been sick as a dog with some kind of stomach bug. It's not fun, so that's why I've been MIA for a few days. I had grand plans to get up a new tutorial on Thursday, but I just felt horrible. And, I haven't felt much better since. So the tutorials are piling up around here. I have 3 or 4 tutorials worth of pictures. I just need to feel good enough to write them up and post. They are all Waldorf doll inspired, and the first one will be up in the next few days.
I've been on a Waldorf doll kick for the past few couple weeks. I've decided to offer custom dolls available for order in my little microboutique with my mom. Hmm, "little microboutique" is rather redundant, dontcha think? :)
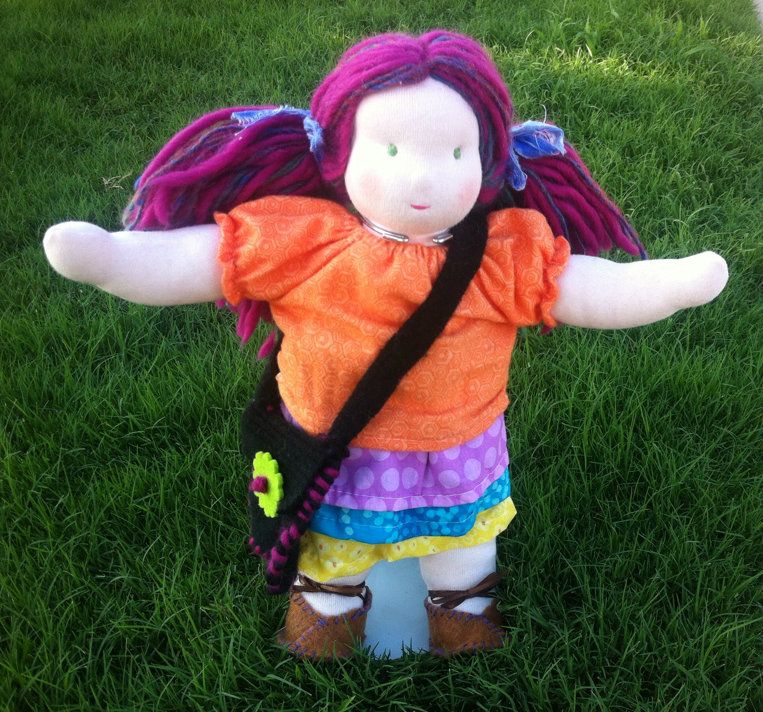
I made up a sample doll to place in my store and for sample pictures on Etsy. Here she is. She told me her name was Lorelei. I was going to name her after my yougest, but she informed me her name was definitely Lorelei. She's apparently has some spunkiness to her much like my darling youngest daughter, who is so sure of herself and she's not even 3 years old yet.
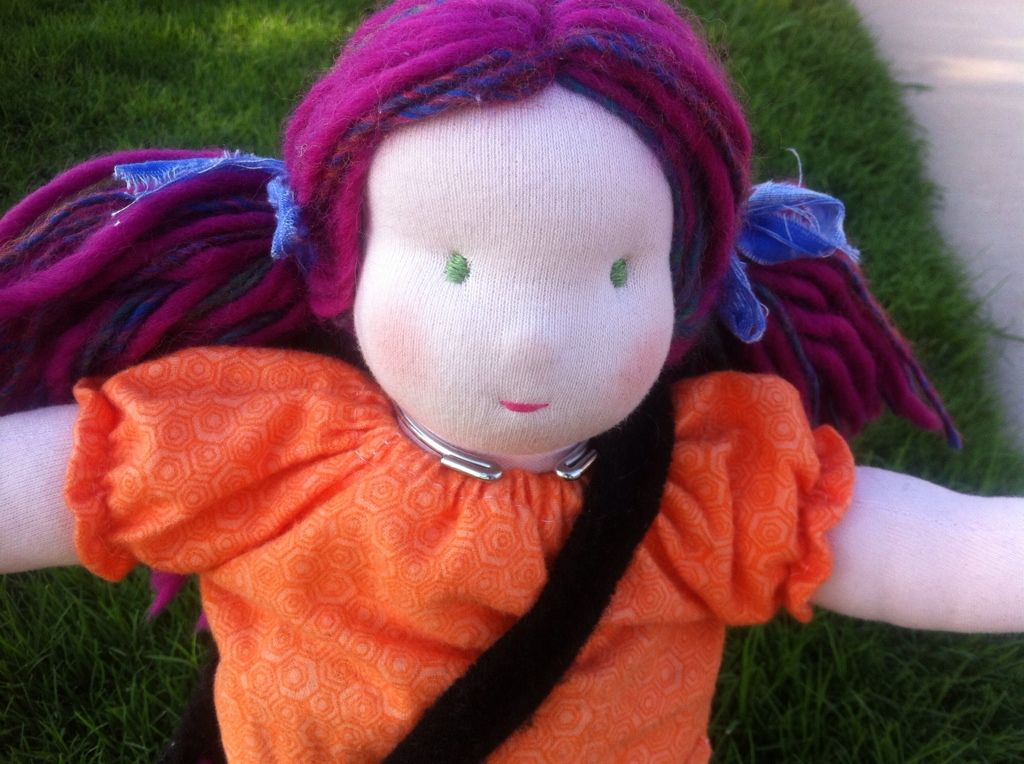
This is Lorelei. She has a mixture of wool yarns for her hair, mainly in fuschia. She has green eyes and a little bright pink mouth. I love her outfit, especially the colors. They just screamed at me to be her outfit. She has a layered skirt with coordinating peasant top. She also has a wool felted messenger bag upcycled from a black sweater vest because Lorelei loves nothing more than to go thrifting and repurpose what she finds. And lastly, she is wearing brown felted shoes that tie around her ankles with ribbon.

I've been on a Waldorf doll kick for the past few couple weeks. I've decided to offer custom dolls available for order in my little microboutique with my mom. Hmm, "little microboutique" is rather redundant, dontcha think? :)
I made up a sample doll to place in my store and for sample pictures on Etsy. Here she is. She told me her name was Lorelei. I was going to name her after my yougest, but she informed me her name was definitely Lorelei. She's apparently has some spunkiness to her much like my darling youngest daughter, who is so sure of herself and she's not even 3 years old yet.

This is Lorelei. She has a mixture of wool yarns for her hair, mainly in fuschia. She has green eyes and a little bright pink mouth. I love her outfit, especially the colors. They just screamed at me to be her outfit. She has a layered skirt with coordinating peasant top. She also has a wool felted messenger bag upcycled from a black sweater vest because Lorelei loves nothing more than to go thrifting and repurpose what she finds. And lastly, she is wearing brown felted shoes that tie around her ankles with ribbon.

Wednesday, August 15, 2012
Babies Sneak Peek
On Thursday I'll have my newest project to share. Here is a sneak peek of what's coming.
These are the perfect Waldorf style babies for toddlers and little ones. And so easy to make, too!
These are the perfect Waldorf style babies for toddlers and little ones. And so easy to make, too!
Saturday, August 11, 2012
Review: Witches of East End

Witches of East End by Melissa de la Cruz
My rating: 4 of 5 stars
I'm not really a series book kinda girl. If something is labeled as a series, I tend to avoid them. I got way sucked into the Patricia Cornwell Kay Scarpetta thing when I was a teenager, and since then, I just want everything wrapped up in one book, thank you very much.
However, this book is apparently the beginnings of a new series by Melissa de la Cruz. If you've taken a look at the books I read, you'd figure out really quick that I tend to like witchy kinda stuff. So, when I was perusing the new bookshelf in the library and saw this one, I decided to give it a try. It wasn't until I got to the end that I realized it was a new series.
This is the story about the Beauchamp sisters who live in a little ol' place on Long Island known as North Hampton. For reasons unknown until you get well into the book, the two sisters and their mother are barred from using their magic. However, they get bored with being immortal and after so long without magic they start to do a tiny bit here and there to help their neighbors. Then, bad weird things begin happening in the town that give it a bit of mystery for them to figure out. There are some good twists in the book you never see coming.
It's somewhat formulaic and probably close to "chick lit," but it was rather enjoyable. I quickly was hooked, and there is definitely some mysteries that make it a page turner. And now that I know it's a series, I'm actually looking forward to the next book.
I discovered the author has another series called Blue Bloods about vampires, which I think has some tiny bits of crossover from this book. I really like her writing style and plan to check out that series as well.
View all my reviews
Friday, August 10, 2012
Animal Applique - Free Downloadable PDF

Here are some more "boy" friendly appliques (as opposed to the cupcakes and ice cream ones from before), though they are perfectly find for girls too. I love this crazy-eyed octopus. I've been putting him on all kinds of things lately, especially lots of onesies for new babies.
Included in this sheet is the crazy-eyed octopus and the elephant pictured above, as well as a whale, that I forgot capture in a picture. I'll make a new one soon. To describe it, he should have curly cue water spouts coming out of the top of him, a bullion stitch for his eye, and a little smile.
Find the printable here.
These samples are headed to my little microboutique over at Creative Collective in Fort Worth. If you are local, check my blog for our little boutique here. I update when we restock.
If you need help with learning to applique, I have a great tutorial here.
This animal applique printable will go up on Craftsy soon. I'm combining the "how to" applique tutorial with the sheet before I upload it. And, I'm currently in sew-mommy-sew mode by making some Mommy Diva diaper bags and changing pads for my microboutique. I'll be sure to snap pictures to share. The fabrics are coming together and looking so adorable!


Wednesday, August 08, 2012
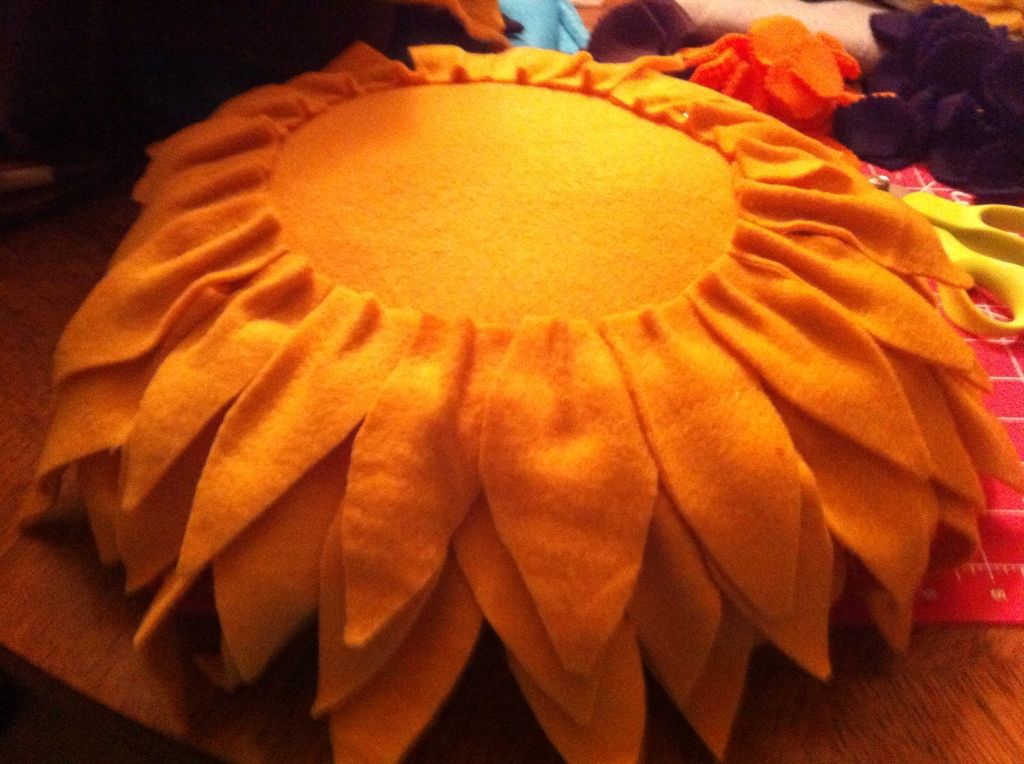
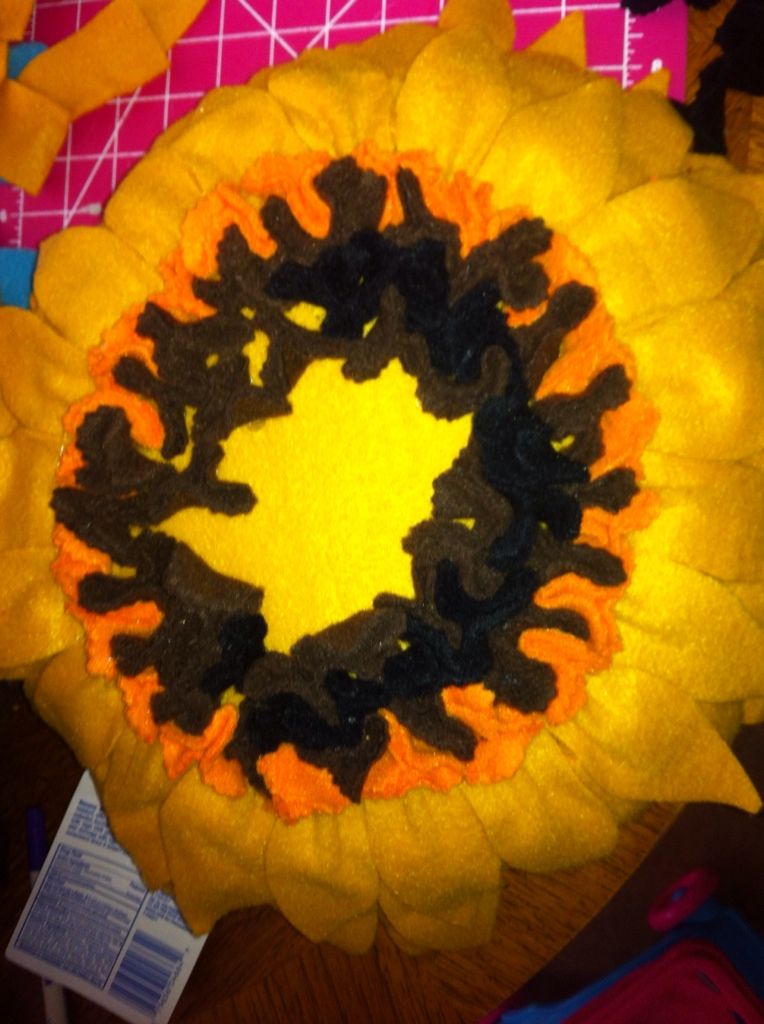
Fleece Sunflower Pillow Tutorial

I was inspired by the fleece pillow tutorial I posted about over the weekend, and I had this vision of a sunflower version I could not wait to try. So, while Joann's was having their blizzard fleece solids super cheap, plus the extra 25% off your entire purchase ($3/yd!!), I ran up there 30 minutes before closing and got the supplies. Then, it took me until today to complete my masterpiece because I've been awake for the last 3 days with my poor 2 year old and her nasty stomach bug. Toddlers and puking do not go well with anything.
I have to say, I love how this came out. Even my almost 13 year old liked it, and that's saying something! Woohoo! The only thing I'd change was that I used a mustard yellow fleece and I'd probably do it in a brighter yellow if it was for a child's room. This darker yellow just gives me harvest gold 1970s afghan on the back of the couch vibes. It's perfect for a hipster's couch ;).
Below is the tutorial, I will make it into a printable PDF and put it on my website and Craftsy.com later today. For the time being, you can download my petal template at the link under the materials list.
Materials:
1 yd of yellow fleece
1/8 yd of orange fleece
1/8 yd of brown fleece
¼ yd of black fleece
½ lb of Polyfil stuffing
Hot glue gun
Hot glue
Pinking shears
Thread
Instructions:
1.
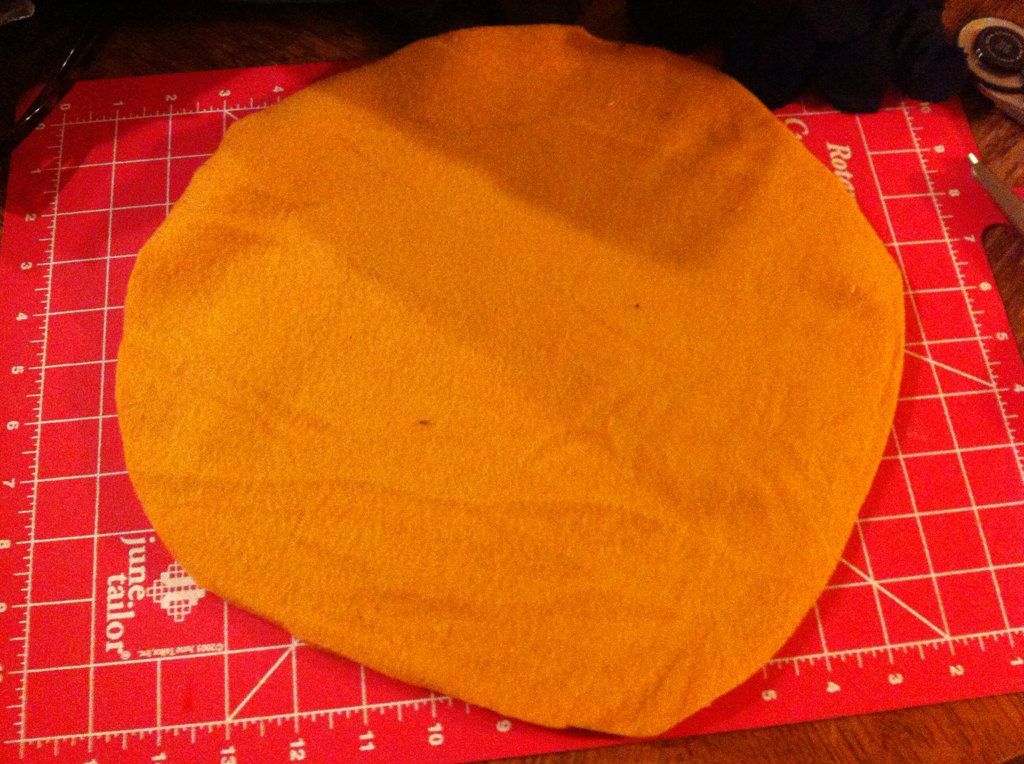
Take a large dinner plate and trace it (roughly
14 inches in diameter). Then, using the
template cut out two circles of yellow fleece.
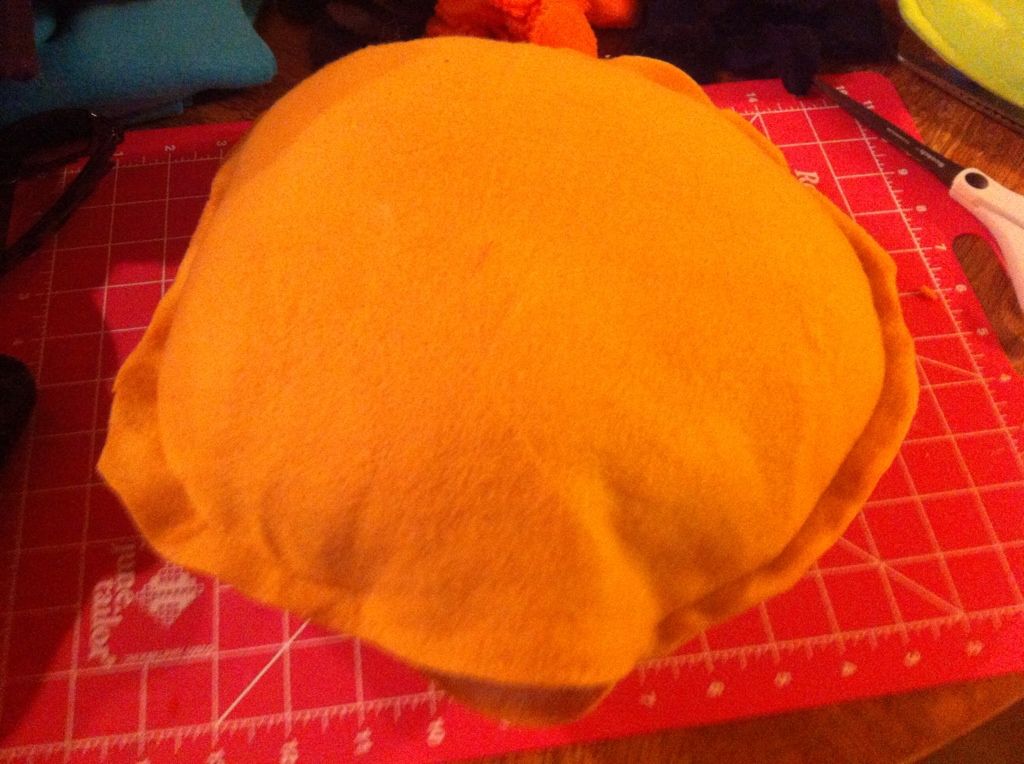
2.
With WRONG SIDES TOGETHER, using a ½ inch seam
allowance, sew around the circles, leaving a 3-4 inch opening. This could also be done with hot glue.
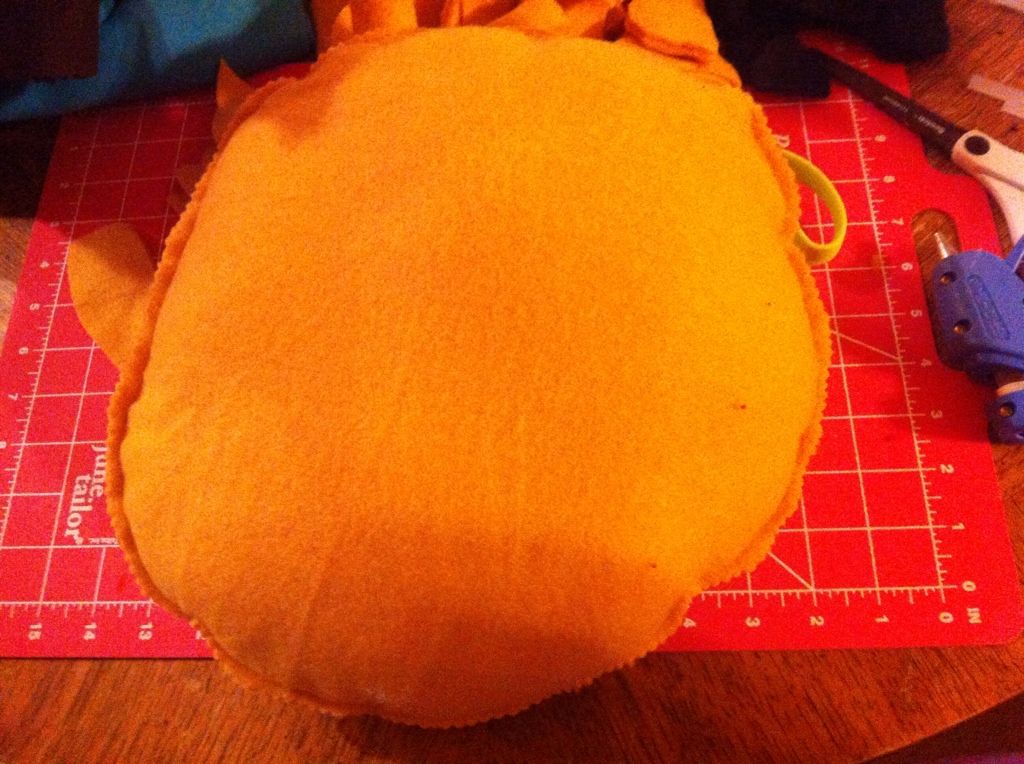
3.
Stuff the pillow until satisfied with it’s
shape, then sew the opening closed.
4.
Pink the edges of the seam to get a uniform
look.
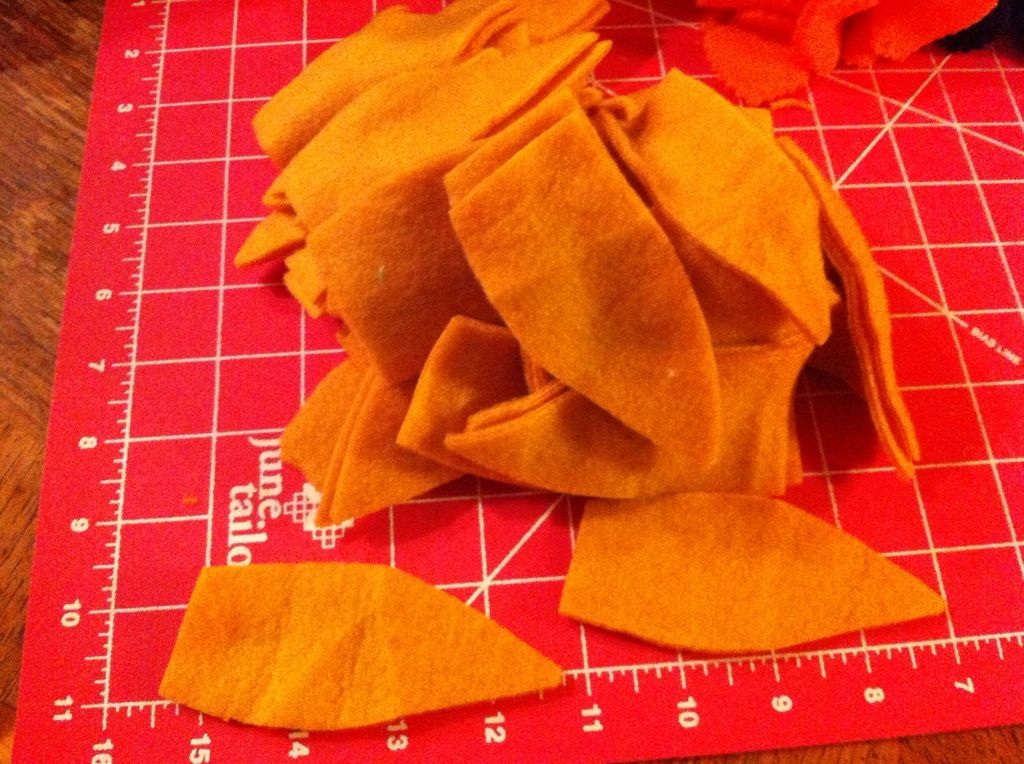
5.
Cut 3 strips of the fleece 4 inches in length by
the entire width of the fabric (usually about 60 inches). Cut petals from the yellow fleece. You need enough petals to make three
rows. The pattern piece is at the top of
these instructions.
6.
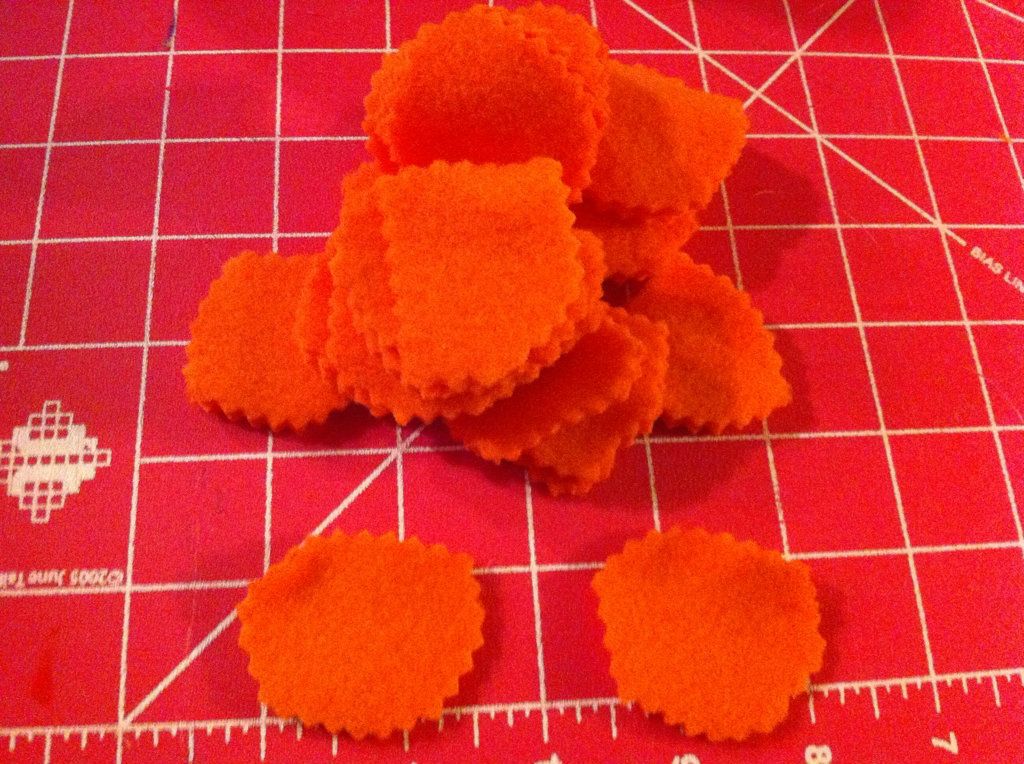
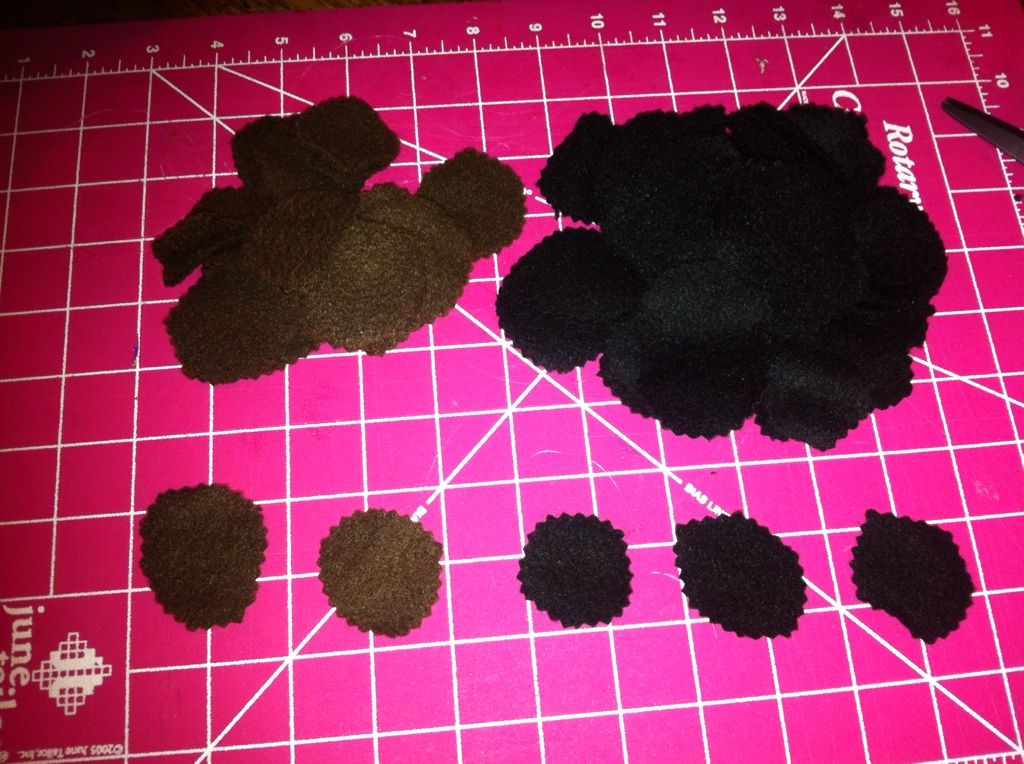
Using pinking shears, cut circles about 1.5
inches in diameter from the orange, brown, and black fleece. You will need 3 or 4 times more black circles
than orange and brown. They do not need
to be perfect circles.
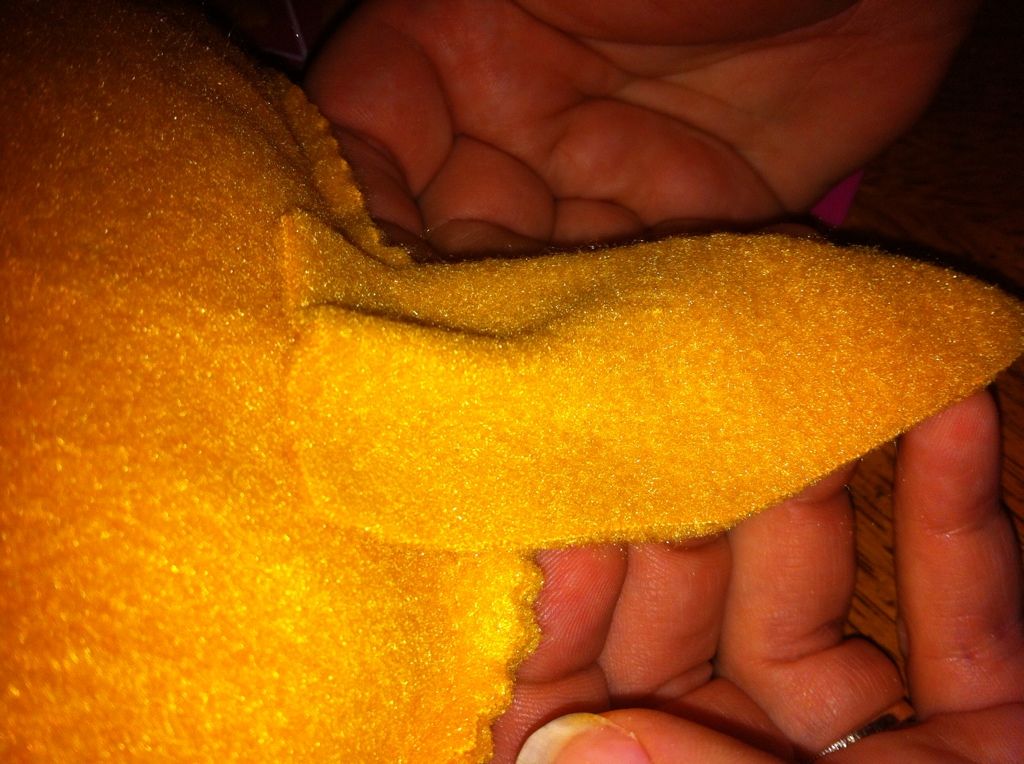
7.
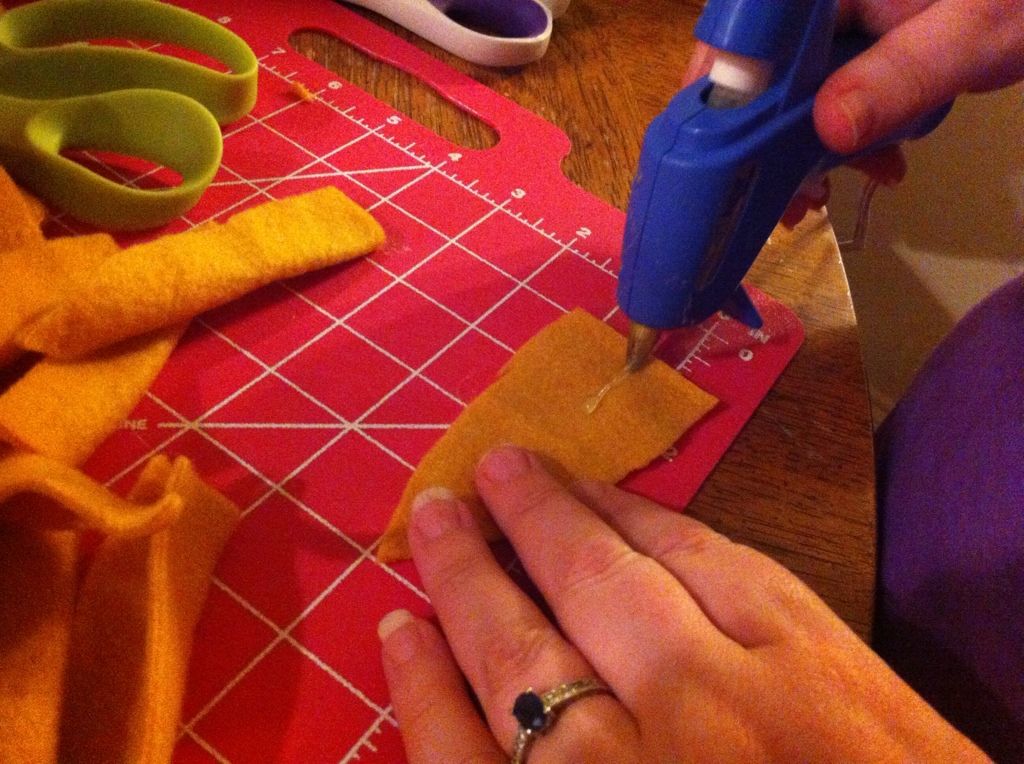
Begin
with the petals. First, take a handful
of petals and put a 1 inch line down the middle back and fold them in half as
shown.

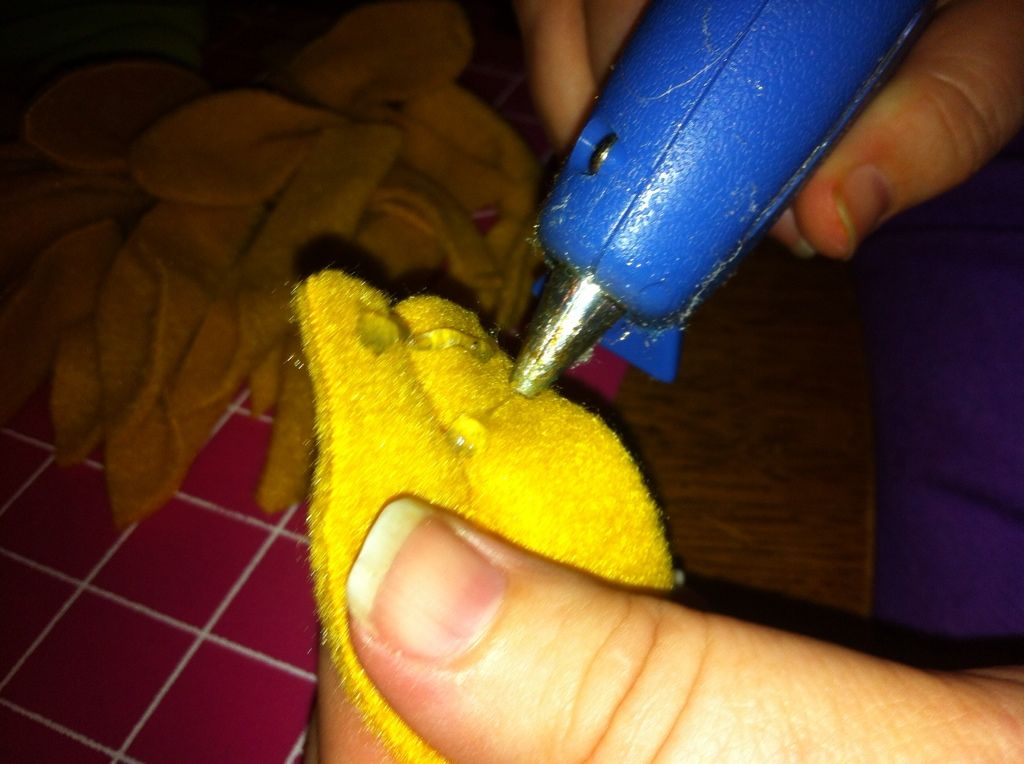
8.
Then,
when they have dried a little, I take one at time and add glue at the edge and
a dot at the end of the line I previously made and glue them to the pillow.
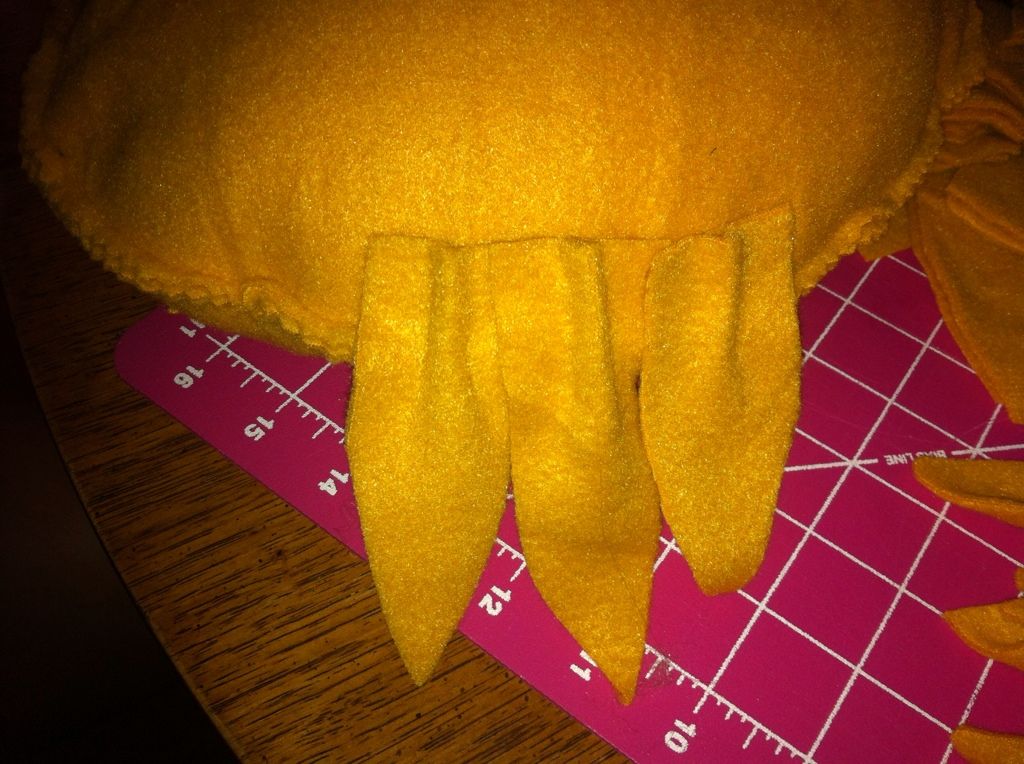
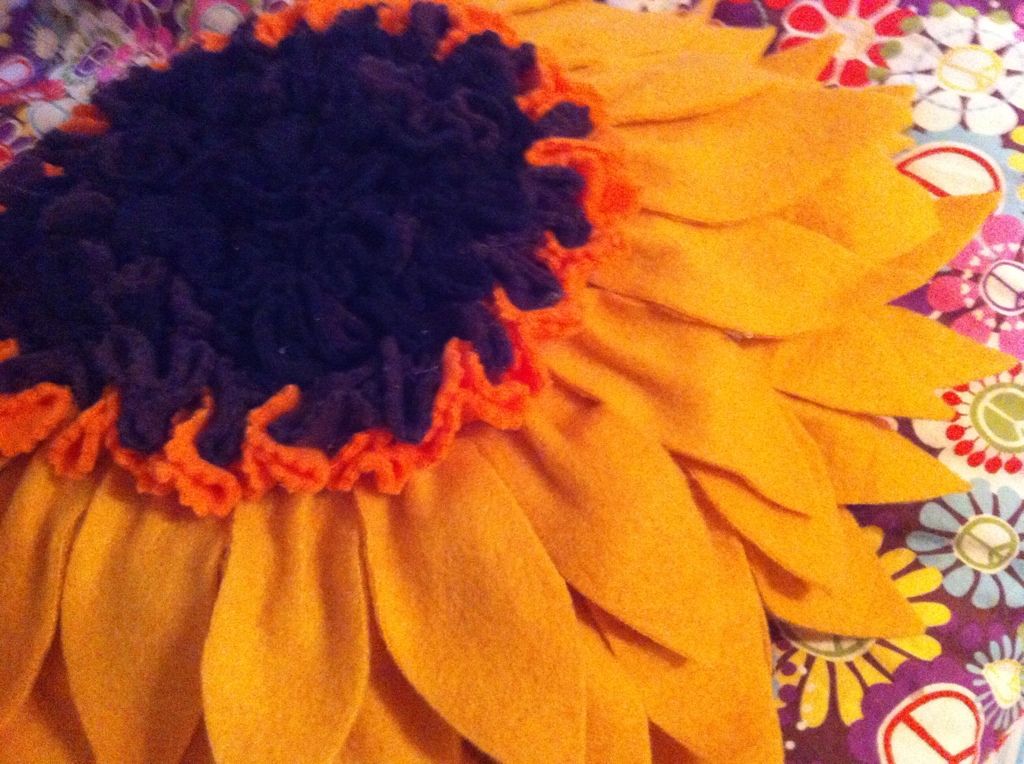
9.
Place the glued edge of the petals about 1.5
inches above the pinked seam. Begin
overlapping the petals just slightly as shown in the picture. Complete an
entire circle of petals.
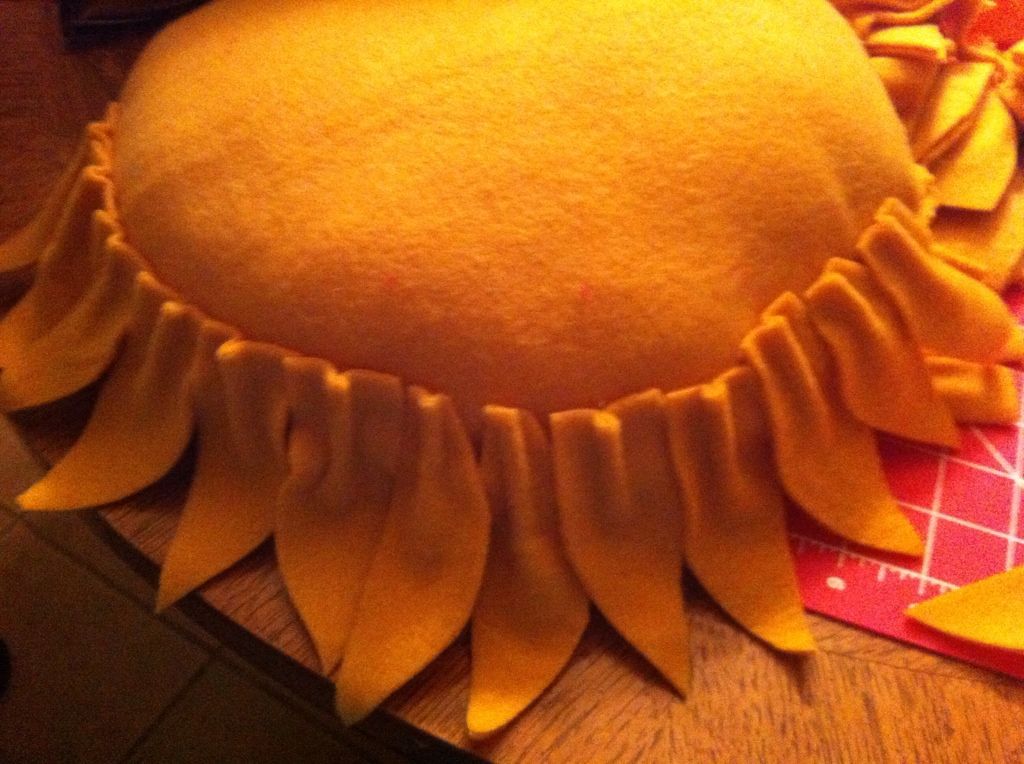
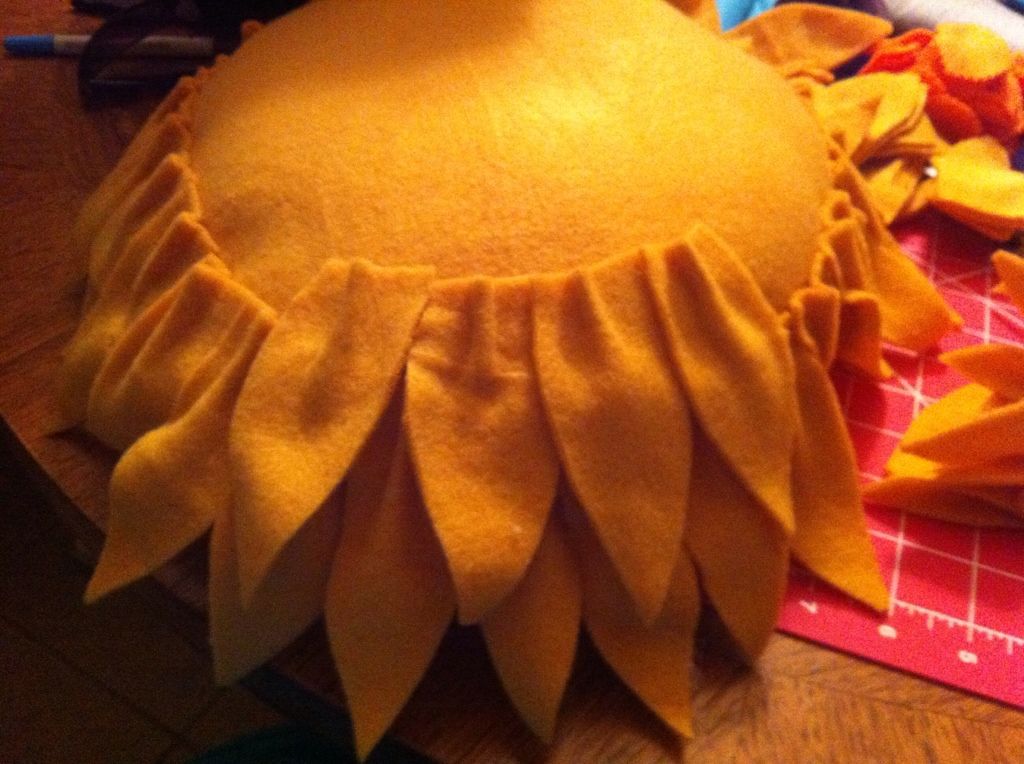
10.
The
second row will be placed about 1.5 inches above the glued edge of the first
row as shown in the picture. Then, the
third row will be about 1 to 1.5 inches above the second row’s glued edge.
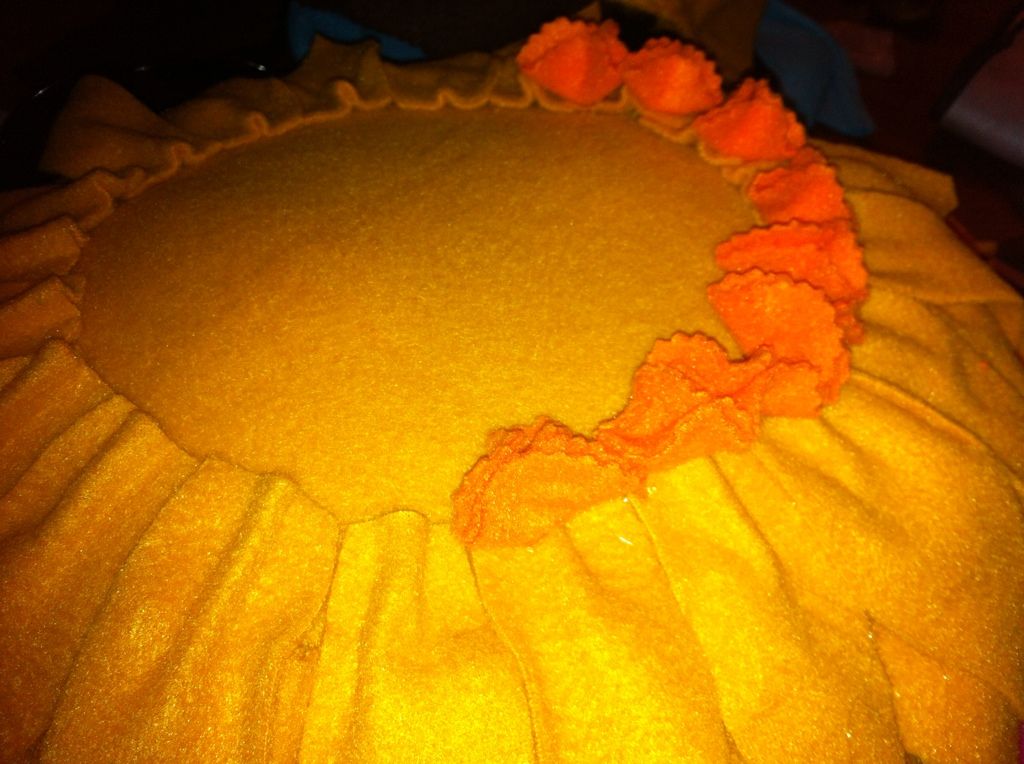
11.
Take the
orange circles, place some hot glue in the center and then pinch them into a
trifold as shown. Then, begin gluing
them in place around the raw edge of the inner most petal circle until they are
an entire circle around the petal edges as shown.

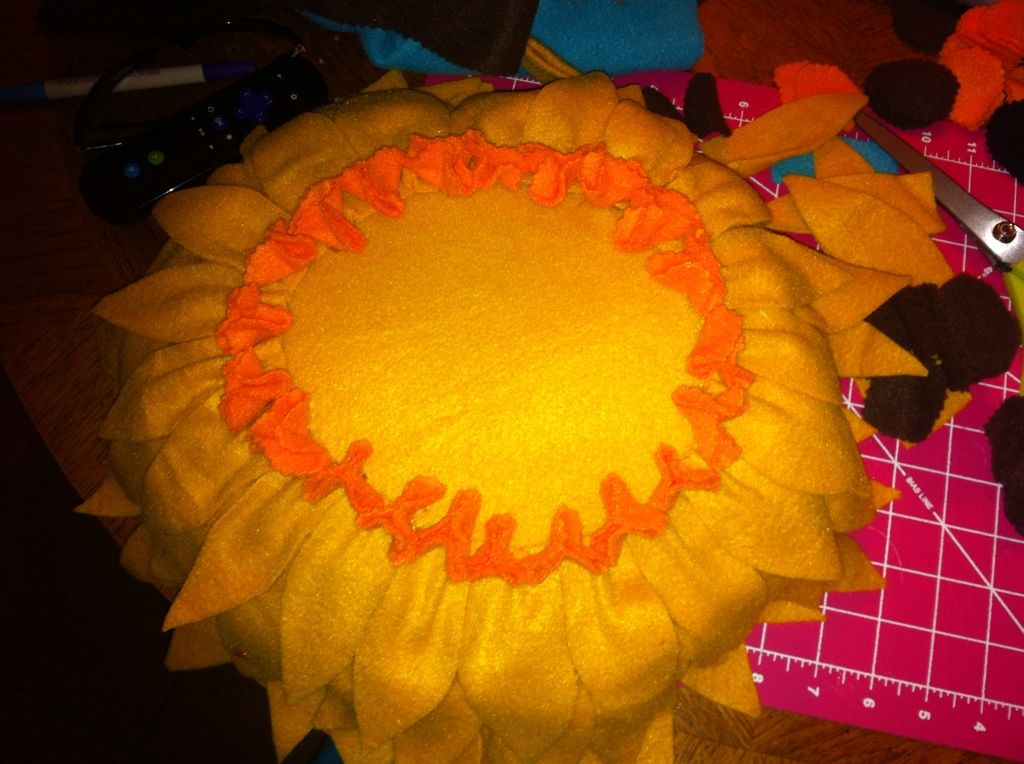
12.
Next,
make trifold circles from the brown and begin interspersing them between the
orange circles as shown.
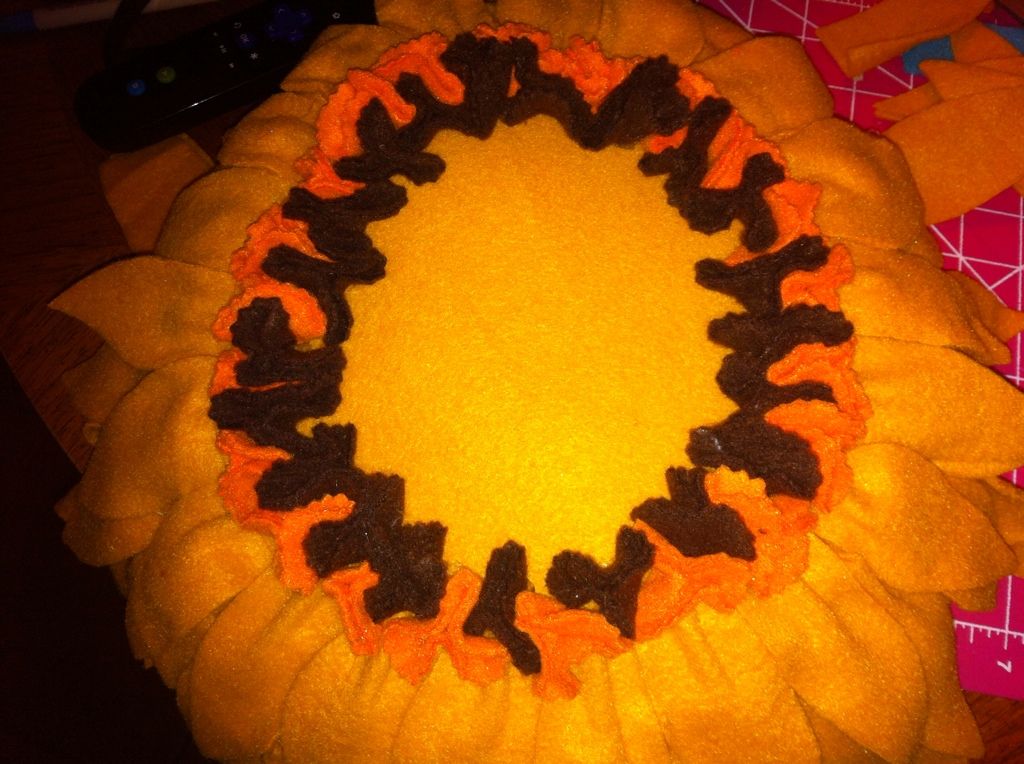
13.
Then,
begin the next inner circle with both black and brown trifold circles, as
shown.
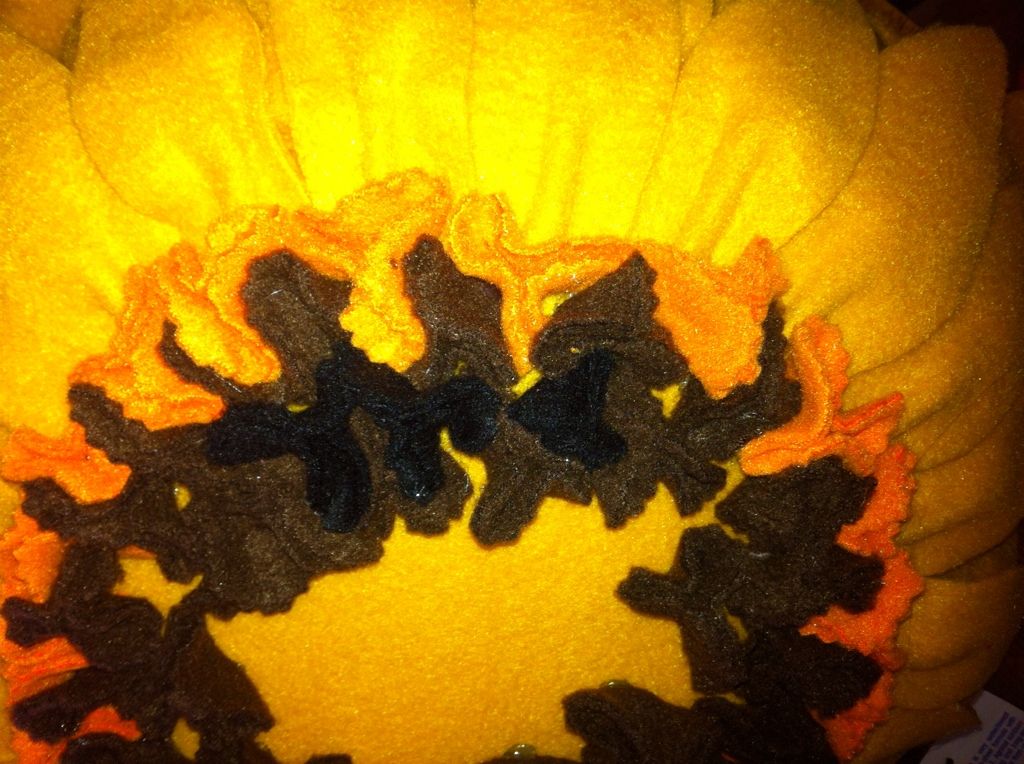
14.
Lastly,
fill in the rest of the inner most part of the flower with black trifold
circles until you cannot see anymore yellow underneath.
And
you’re done!!


The Booth At The End - Season 2 Premiere!!
I clicked on Hulu tonight to see if my favorite show was back. It had been a few days since I had checked last. And guess what? The first episode of season 2 was up. Oh and it was just as good as the first season. I can't wait for the rest!!
Literally, in the first 2 1/2 minutes of the show he tells one lady what she has to do to save her 3 year old who has some horrible brain disease, and I was like "Wha?????" I had to rewind and hear it again.
And, the blond waitress, Doris, from last season is back. She's definitely up to more than we thought last time. Oh geez, and the teenage girl who wanted to help her dad from last season, we thought the hermit serial killer murdered her, but she's back, and she's seriously creepy.
Last season I was thinking he's the devil or one of the devil's minions, but with Doris thrown into it, now I'm not so sure who he is.
Anyway, if you are someone who loves different, thought-provoking tv shows, which there isn't that much out there, this show is for you. It is like Lost in the way that you have to pay attention every second or you'll miss something. I'm so excited it's back!
Sunday, August 05, 2012
Peony Fleece Throw Pillow

And...since solid blizzard fleece was super cheap at Joann's this weekend (especially with the extra 25% off coupon), I decided it was time to attempt one of these pillows myself. It did not take a whole of time. I think you could whip out 2 or 3 in an assembly line in about an hour.
So here is my attempt. It reminds me of a peony...which gave me an idea. I'm going to go run back to Joann's today and grab some more stuffing while it's still on sale today. Then, I'm going to attempt a sunflower pillow and I'm going to play around and see if I can create a rose pillow.

Saturday, August 04, 2012
Jumbo Ombre Cupcakes

My son is still talking about the rainbow cupcakes I made from a few months ago, so I thought I'd try this ombre thing everyone is doing. I could not get a decent picture, but they sure look cool in real life.
It's super easy if you haven't done it before. I was a bit worried they'd bake weird.
I made 6 jumbo cup cakes. Here is what I did:
1 box white cake mix
3 egg whites (no yolks to prevent yellowing of the batter)
1 1/4 cups water
1/3 cup oil
Preheat oven to 350.
Separate batter into 4 bowls.
1 bowl: white
1 bowl: 3-4 drops food coloring
1 bowl 6 drops of food coloring
1 bowl 10 drops of food coloring
Then I layered the cupcakes. I used a regular ol' flatware spoon and but 2 spoonfuls of each color batter starting with dark, then medium, then light, then white. I filled these up about 3/4 full as I wanted big tops. This yielded 6 jumbo cupcakes (which is probably about the same as about 18 regular cupcakes only filled 2/3 full of batter. )
Bake for 20 minutes.
And Voila! Ombre cupcakes.
I also made a cream cheese butter cream frosting
6 oz cream cheese
3-4 tbs butter
3-4 cups of powdered sugar
Allow cream cheese and butter to sit until close to room temperature. Then beat together until smooth. Gradually add powdered sugar until the frosting makes stiff peaks.
I used a large star tip and swirled it on the cupcakes. Then, I dusted them with pink sugar crystals.
Enjoy!!
Friday, August 03, 2012
Don't you just hate Netflix when....
you find a show you LOVE, and it's been canceled?
Before I whine about this, I am honestly not a spokeperson for Roku, I just love that thing.
We don't have regular tv or cable tv or even satellite tv. We have a Roku in both our living room and bedroom. We subscribe to Netflix streaming, Amazon Prime, and Hulu Plus. So, what used to be a $70 satellite tv bill (of which was one of the lowest packages we could find) is now about $20/month. Woohoo! Plus, we can watch it all on our iPhones, iPods, and iPads. Seriously, if you want to cut the cable bill, you can do it a lot cheaper as long as you have a decent internet connection with Roku. And, the best thing about Roku is you don't have to have one of them fancy flat screen tv's. Nope, it will work on the older televisions too. Oh wait, and one more wonderful little thing -- if you lose the Roku remote, they have a FREE app for the remote on your iPhone. Don't ask me how many times we've lost the remote and had to use the app, it's rather embarrassing. But I digress.
So, I've been catching up on years and years of shows I was interested in a few years ago when my life was in turmoil. Surface, anyone? That darn show ended on episode 15 with them trapped in the bell tower of a church after a tsunami. What the heck? How can you leave us hanging like that network tv? This is why I hate network television, too.
Then, I just discovered this Joss Whedon show called Dollhouse. We love Joss Whedon in our house....Firefly, anyone? How did Dollhouse get cancelled? I'm totally hooked on it right now. Well, that and Damages. Oh, and do you remember Persons Unknown a couple summers ago? That was so cool! Then, it never came back. I hate this Netflix. It keeps getting me hooked on canceled shows. I did get my husband addicted to Jericho....also cancelled, though I did hear Netflix or Hulu or somebody might resurrect it.
But Hulu has this awesome show. You have to watch it. It's called The Booth at the End. If you like shows like Lost or Alfred Hitchock, you will LOVE this show. The entire show takes place in this booth, but so much happens, you will be shocked as it progresses. They said it's coming back for season 2, I cannot wait. I keep checking, but no season 2 yet. My luck, it's gonna get canceled.
Thursday, August 02, 2012
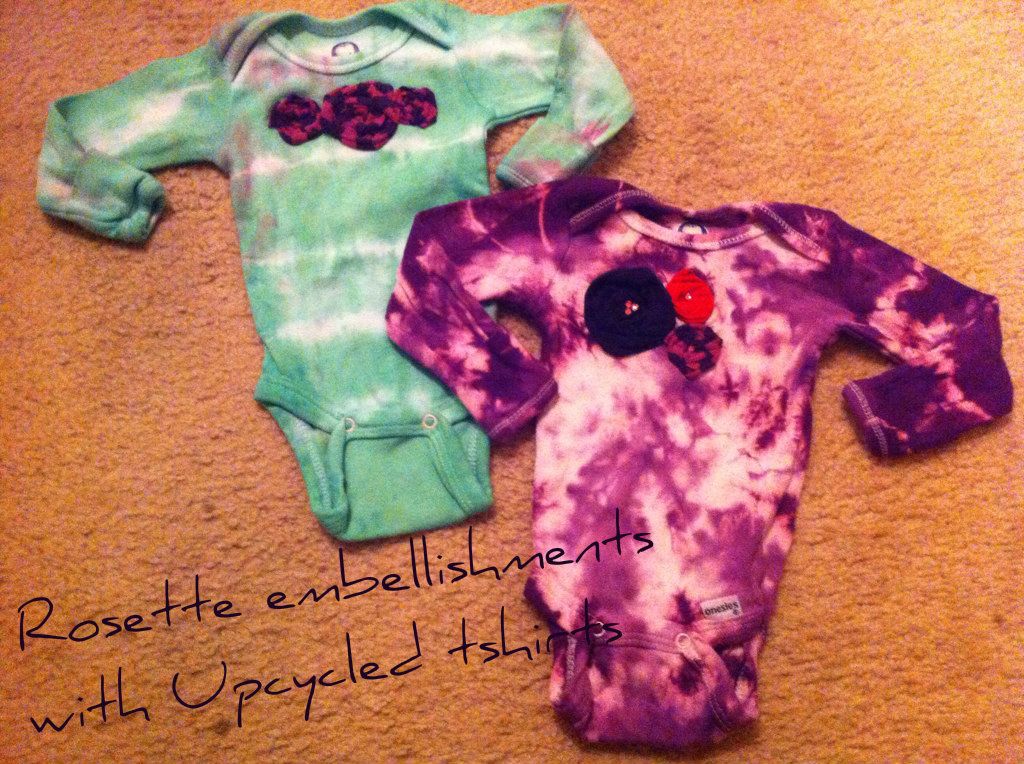
Upcycle T-Shirts into Rosette Embellishments
I know my family always has a bag of t shirts that are too small just waiting for the next yearly garage sale. But...you can use up some of those t shirts in a new way. Just cut strips of various lengths and make rosettes.
This is a super easy way to use up old t shirts and give your baby a chic look. It's also a great way to hide stains on solid color onesies or t shirts, too. This same technique can be done on any other fabric or clothing item as well.
If you would like the downloadable version of this tutorial to save for later. Please click the picture:
Materials
·
Onesie or t shirt
·
0.5 inch and 1 inch strips of old t shirts
·
Coordinating
thread

**These were
onesies I had previously tiedyed. You do
not need to tiedye yours for this tutorial.
I just like tiedyed onesies. A
lot. And I picked up used ones at thrift
stores for super cheap and dye them all the time.
1. Cut strips of t shirt roughly ½ inch to 1 inch in with by various lengths. I do this from the leftover sleeves from making upcycled pillowcase style dresses out of old men’s t shirts.
2. To form the rosette, roll up a strip of t shirt in kind of a smashed way, like the picture. Make sure to keep the ends tucked into the back of it. The longer the strip, the larger and thicker the rosette will be.

3. Once you are happy with the size of the rosette, pin it on the onesie.

4.
There are
two options to sew the rosette.

a.
Beginning
at the outer edge, sew around and around in a spiral until you finish off in
the middle of the rosette – make sure you backstitch at the beginning and end. Try to get as much of the fabric into your
stitches so that nothing is loose.

b.
Another option is sewing a big zigzag back and
forth through the rosette, just make sure nothing is left loose. With the red rosette, the zigzag design can
easily be seen.

5.
Once you
are satisfied with your rosettes, you’re done!
You can add some extra embellishments such as hotfix crystals as shown
in the second picture below.

©2012 Stephanie Pass Sewing Chick Studio / The TipToe Fairy


Subscribe to:
Posts (Atom)


