Saturday, April 06, 2013
WE'VE MOVED!
I've moved just about everything over to The TipToe Fairy blog. You can click the link to go their directly or in 5 seconds you will automatically be redirected to the new blog. Come join us!
Saturday, March 30, 2013
I've made a decision...
Currently, I have two blogs and an Etsy store. I've been thinking this over awhile now, and I've made a decision. I'm gonna change things up a bit. Forgive me, but I have this issue with everything. I move furniture. I reorganize kids rooms. I move my sewing room around. I can't help it. I feel like a Star Trek Borg. I have stuff a certain way, and then in my mind's eye I begin to see more efficiency by moving things around -better space saving, better seating arrangements, blah, blah, blah. I just like to refresh every once in awhile. And yes, it drives Nate crazy, but he loves me anyway.
Now that I have a good amount of business for my Etsy store since it's been open a few months, I think it's time to move my domain name to the Etsy store instead of the tiptoe fairy blog. I've also decided I want to have just one blog and not a personal and store one. I hate myself sometimes for wanting to share stuff on both blogs that pertain to both, it is so redundant and annoying. So why not just combine them?
My kids keep me busy, so this is going to take a few weeks to get done. I'm going to retire Sewing Chick (but it will stay here). Plus, I will export the entire sewing chick blog over to The TipToe Fairy blog, so all the tutorials and recipes and what will be able to be found on both.
I'm going to revamp The TipToe Fairy blog and etsy store to look more like my love of vintage and ephemera things much like the look of my Sewing Chick blog.
I plan to keep posting on Sewing Chick in the next couple of weeks. Then, I'll be making announcements as things change and move. I'll also create a redirect here at Sewing Chick that will send you directly to The TipToe Fairy blog, just in case you get lost ;) .
Friday, March 29, 2013
Thrift Store Score!
My newest obsession is creating upcycled tiered cake plates. They are great for lots of things -- craft fairs, bathroom counters, party tables -- the list just goes on and on. In looking for more supplies, I swung by the local Goodwill to find candlesticks and plates. (I'm in the middle of finishing another one and then I'll post all about them.)
But while I was there, I spied this dress. Look at this beauty! It's a hand smocked heirloom dress I found. Amazingly, it's in pristine condition. I only paid $4!
It'll be a few years before my youngest can wear it, but I could not pass up such beautiful craftsmanship. Look at those details. The pleating, the smocking, the perfect little bullions. Gorgeous!
Someone's mother or grandmother made this beautiful thing and it ends up at a thrift store. I felt so bad for it. I just had to take it home with me.
Sunday, March 24, 2013
Cupcakes, cupcakes, and more cupcakes
I told you guys how I was going to be selling cupcakes at the local "trade days" for our little town. Well....I stayed up all night finishing them. They looked AH-mazing! Then, we drove up there at 6 AM (well, it's technically, a hop, skip, and a jump in front of our neighborhood.), and it was raining. There were about 3 of us at that point, who waited until about 7:30. Then, it started raining harder and the thunder and lightning came, so I told Nate it was probably time to go home. He was holding out that the rain would quit -- it didn't for the rest of the day. His compromise was we could leave if we could go eat breakfast out. So, we went and had a lovely breakfast at the Old West Cafe in Denton.
My mom came over and bought a bazillion cupcakes to take to my brother's house for his daughter's birthday. Then we gave a couple boxes to the neighbors. But, we still have about 3 dozen or so.
Oh well, maybe next time. But I'll share pictures and recipes.
I found this idea on Pinterest for single cupcakes. At Walmart, a bag of 40 of these plastic cups is a couple dollars, 100 pk of spoons is less than $2, a bag of 20 bags of these plastic bags was 97 cents, and the ribbon was 47 cents a spool. And they are easy to stack together without ruining the icing.
I also made some cake plates with plates, candlesticks, and E-6000 glue. Super easy and about $3 foe a tiered cake plate.
From left - Dreamsicle, Chocolate Peanut Butter Caramel, Cherry Limeade, and Pumpkin Cheesecake.
Tart it up! Luscious lime cupcake drizzled in
sweet lime syrup, topped with maraschino cherry buttercream frosting
Sweet & Salty! Chocolate cupcake with peanut
butter cheesecake center, topped with salted caramel cream cheese buttercream frosting
Creamy orange and vanilla cupcake, topped
with light and fluffy vanilla buttercream frosting
Spicy pumpkin cupcake with cheesecake center,
topped with cream cheese buttercream frosting
A couple of things I should mention:
On the Cherry Limeade recipe, I used Key Lime Pie yogurt instead of plain. I originally used milk and wanted to make it a bit more tart. I also tried both cake flour and all purpose flour. Nate felt the ones with all purpose were better. Weird.
On the Dreamsicle recipe, I used clementines. I had 2 bags of them and no regular oranges and figured it would be a little twist. I also added 1/2 cup of juice instead of the 1/4 cup in the recipe. These were my favorite cupcake. They were SOOO good. My eldest daughter said these were her fave too.
Enjoy!
Butterfly Wings
I'm working on new items for my Etsy store. I'm concentrating on children's dress up and pretend play items. My children have always loved dress up, and it's so much fun to make.
This newest creation is a set of butterfly wings. I've seen lots of them in my love of Waldorf toys, but they are always made of silk and very expensive. I found this great batik in my fabric stash the other day, and it told me to turn it into a pair of butterfly wings for little Miss M.
Halfway through the process, I got the bright idea to take pictures, so I only have half a tutorial of pictures ready. I'm currently a little busy with some Etsy orders, so as soon as I sew through those, I'm going to whip up a few sets of butterfly wings for the store and will make a tutorial.
I did get one action shot, but I wasn't running with her, so it's far away. Next time we're using the sports action shot app so I can get lots of action shots together.

I did get one action shot, but I wasn't running with her, so it's far away. Next time we're using the sports action shot app so I can get lots of action shots together.

Wednesday, March 20, 2013
Chocolate Peanut Butter Cupcakes with Salted Caramel Frosting
I've been so busy lately, and it's just normal stuff. Cooking, laundry, children, etc. I stare longingly at my blog, but I just haven't had time to finish anything for it.
But, I have been creating new cupcake recipes this week. My husband and his colleagues at work have been in love with my cupcakes for years. In fact, he usually comes home with many people telling him I should sell my cupcakes because they are so good. Well....I'm gonna do it this weekend.
We live in a tiny town - as in so tiny, we have no traffic lights. The main road has one 4-way stop and that's pretty much it. The city is trying to raise money to build a park right by our neighborhood. They've instituted "fourth trade days" where the park is actually going to be built. It's a flea market, farmer's market, craft fair, etc. kinda thing. In fact, they even convo'd me on Etsy awhile ago to have a booth. Since, it's only $10 to have a booth, we are going to try an experiment and sell my cupcakes - this weekend!
I'm not gonna lie. I'm terrified, but I have my trusty husband to be my wonderful salesman. He is the one person who can talk me into believing I can do anything.
My plan of action is to make a few dozen cupcakes of 2-3 different flavors. My first choice is my world famous pumpkin cream cheese cupcake. I wasn't sure what other flavors. I recently tried a Cherry Limeade -- not my fave, but my husband LOVED it. I think that will be #2. I'll share that one in a day or so on the blog. But, #3 came out so wonderful, I had to share it asap.
(Here on out, I'm tired of writing "my husband," and he will now forever be known as Nate.)
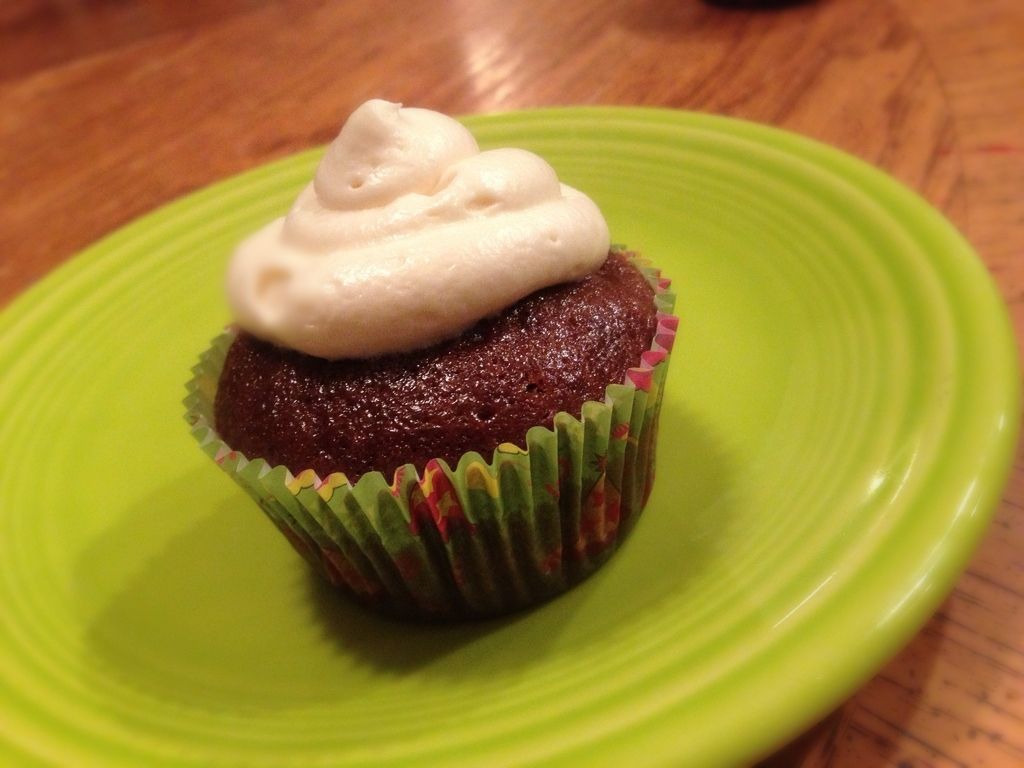
It's a chocolate cupcake with a peanut butter cream cheese baked in the middle of it, then it's topped off with a Salted Caramel Cream Cheese frosting. Nate really liked it -- and he REALLY REALLY REALLY liked the frosting. I haven't figured out a short name for this one quite yet. I wavered with adding a bit of coffee to make it more of a mocha flavor, but in the end, I didn't. However, when you bite into this cupcake and get the frosting/cupcake taste explosion in your mouth -- I swear it takes like mocha. I felt like I was eating a Salted Caramel Hot Chocolate with a little bit of peanut butter thrown in. So so good!
Now I love to make everything from scratch, but I was not in the mood to make caramel from scratch. I made my frosting using Hershey's caramel syrup. Maybe someday if I become a cupcake truck lady, I'll definitely be making it from scratch, but for now....meh.
Chocolate Peanut Butter Cupcakes with Salted Caramel Cream Cheese Frosting
Peanut Butter Filling
1/3 cup creamy peanut butter
4 oz room temperature cream cheese
3 tbs sugar
1 1/2 tbs milk
Add all ingredients to bowl. Then, heat for 10-15 seconds in microwave. Mix until well blended and set aside.
**I found the PB mixture was just dry and sticky enough that I could roll it into semi formed balls and put in the center. This might be easier than spooning it because it's sticky.
Chocolate Cupcakes
2 eggs
1/2 cup oil
1 cup sugar
1 cup water
1 cup milk
2 tsp vanilla
1/2 cup unsweetened cocoa
2 cups flour
1-1/2 tsp baking powder
1 tsp sea salt
1/4 tsp baking soda
Preheat oven to 350. Mix first 6 ingredients. Combine last 5 ingredients, then slowly add while mixing to wet ingredients. (Be prepared for it to seem to runny, it's fine and will come out deliciously moist.)
1. Full cupcake liners 1/3 full with chocolate batter.
2. Add a small spoonful of peanut butter filling to center of each.
3. Add more chocolate batter until liners are 2/3 full.
Bake for 15 minutes. Allow to cool. Then frost.
Easy Salted Caramel Frosting
2 sticks room temperature butter
8 oz room temperature cream cheese
1/2 cup caramel sauce
1 tsp sea salt
3-4 cups powdered sugar
Beat butter and cream cheese. Add caramel sauce and sea salt. Mix well. Then add sugar a cup at a time until it makes peaks. Then whip the frosting until its light an airy (about 2-3 minutes).
Friday, March 01, 2013
Craft Fair - this weekend
If you're local to DFW, I will be at the Creative Christian Women's Craft Fair in Trophy Club this Saturday, March 2 from 9 to 3 pm. It's located at the First United Methodist Church in Trophy Club.
We have lots of fun stuff for kids including our new crowns pictured below.
See you there!
We have lots of fun stuff for kids including our new crowns pictured below.
See you there!
Sunday, February 24, 2013
I'm a moron
Sorry I haven't been updating the blog in a week or so. We have been through 2 or 3 rounds (I lost count) of sickies over here. I have the lovely task of water boarding my toddler for the next week with her antibiotics. Fun stuff, I tell ya.
Then, my daughter begged to have the cast party for her One Act Play at our house, so that was last night. Apart from one incident where a dozen teenagers ran outside around 9:30 at night to play "outside ninja" (whatever that is...), they all had a great time. My sweet husband watched from the kitchen looking wistfully as if he missed his teenage years. You could not pay me enough money in the world to return to 8th grade.
And now, it will be another week before I add a tutorial or update because I've got a craft fair next weekend that I'm currently working on.
Oh yes, and the reason I'm a moron has nothing to do with any of these things. It's because I thought I was being smart. I got the bright idea to organize my pictures over at Photobucket. I made all these little albums and organized all my pictures into the appropriate albums. This was around 2 weeks ago. And to my surprise, I just realized today, just now, that when I did that it completely screwed over all my pictures on this blog. So, I'm sitting here fixing them all. Stupid, stupid, stupid.
If you go to some long lost post and see the pictures are missing, please email me at stephanickety at yahoo and tell me which ones. I'll fix them asap.
Sorry I am a complete idiot for totally messing up the posts.
Saturday, February 09, 2013
Valentine's Monster Mailbox
This year Mr E's teacher asked the children make their Valentine mailbox at home. This was a first, so I went to look for ideas. I discovered over at The Polkadot Penguin an adorable idea for a monster style mailbox. I thought this was a great idea for a boy. Mr E was feeling the Valentine ideas were a little too girlie for him.
Tonight, I stopped off at the Dollar Tree and picked up supplies, except I forgot googly eyes -- so I just made some with a marker and made the pipe cleaners on top some antennae.
FYI, Dollar Tree has solid white and solid red wrapping paper. I think I'm going back to get another roll of each. There is so much you can do with solid wrapping paper. It's pretty nice wrapping paper, too.
This is what I came up with, and he loves it! I like the signs. I think that's my favorite part because it rhymes, lololol. It's super easy to make, and you can probably make it with what's lying around the house.
Click the link to The Polkadot Penguin above to take you to the super easy tute!
I'm trying to catch up on housework since everyone is finally on the mend. I will be posting new tutorials this coming week. See ya!
Sunday, February 03, 2013
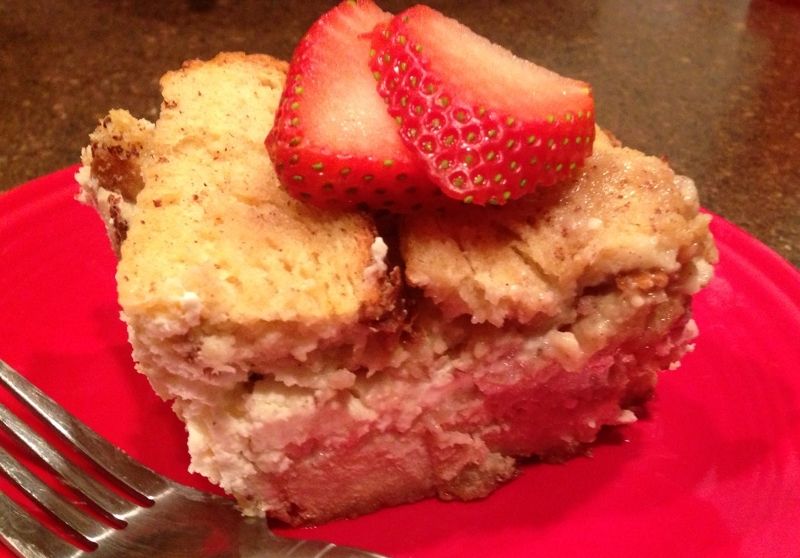
French Toast Casserole with Strawberries and Cream Cheese
The flu has hit our house, so I've been up to my eyeballs in taking care of everyone. I have 3 to 4 tutorials all about 75% ready for you guys. I think everyone is on the mend (crossing fingers!) so that I can get back to posting some new tutes very soon in the next week or so.
Wow oh wow oh wow! I made THE best breakfast last night. It was so delicious this morning I had to make myself leave the table. I've always heard people raving about the overnight french toast casseroles, but I've never had one until I experimented with my own version featuring apricots and cream cheese a few weeks ago. It wasn't my favorite because the bottom was too done, so I tweaked my recipe a bit and tried again last night. Oh my goodness was it delicious!
Unfortunately, we've had a house of sickies this week. I have one with the flu (who had a flu shot, btw) and the littlest one had a UTI (aren't those fun while potty training?). And, with all that fun, we've been staying home the past few days. So, last night I whipped up a french toast casserole from scratch to have this morning. I had just ran to the store yesterday, so I had fresh strawberries and cream cheese to add to it.
French Toast Casserole with Strawberries & Cream Cheese
Ingredients:
1 stick of butter, softened
1/4 cup brown sugar
8 eggs
3 1/2 cups milk or 1 1/2 cups half&half and 2 cup of milk
1 1/2 tsp cinnamon
2 tsp vanilla
3-4 tbs maple syrup
1 pkg of Pepperidge Farm Sourdough bread cut into large cubes (about 12 pieces of bread)
16 oz (2 pkgs) of softened cream cheese
1 pint or about 2 cups of fruit such as sliced strawberries mixed with 1 tbs of sugar
Topping:
1/4 cup brown sugar
First, slice up your strawberries and add about 1-2 tbs of sugar. Mix well, then put in the fridge for a couple hours. This will pull the water out of the strawberries and create a delicious syrupy-ness to it. If you don't have time for that - no worries.
Take your softened butter and mix with 1/4 cup of brown sugar. Then smear it all over the bottom of a 9 x 13 inch casserole dish.
Next, cube your bread. I love sourdough bread, and I love how wonderfully thick and delicious this Pepperidge Farm bread is, but plain ol' sandwich bread will do in a pinch for this recipe too. I cut mine into large cubes about 2 x 2 inches in size. Place half the bread in the dish.
Take your cream cheese and microwave it for about 20-30 seconds. This will turn it very smooth and a little runny and easy to smear on the bottom layer of bread. Smear away! Then, add your fruit.
Mix up the eggs, milk, cinnamon, maple syrup and vanilla. Pour half the mixture onto the bottom half of the casserole. Next, add the rest of the bread. Pour the rest of the milk/egg mixture onto it. Make sure you pour it so everything is evenly soaked.
Take the 1/4 cup brown sugar and sprinkle it all around the top of the dish.
Cover with foil and put in the fridge til morning. Or let it sit for at least an hour before baking.
Remove from fridge. I like to put mine on top of the oven as it warms up. Preheat oven 375. Bake for 45 minutes. Then, remove the foil for the last 15 minutes or so. Check to make sure it's not soupy in the middle. A knife should come out clean when inserted in the middle. Sometimes mine needs an extra 10 minutes. It will still be a bit mushy when done because of the cream cheese.
Let it sit for about 5-10 minutes before serving.
This is also wonderful to make ahead and bake, and then serve it for breakfast on school days.
I made an earlier version with apricots and apricot preserves with the cream cheese. It was delicious just needed something on the bottom of the pan to stop it from overcooking down there. That's why I added the butter and sugar -- which was PERFECT this time around.
However, if you'd like to use apricots, here is what I did:
I used about 1/2 cup of apricot preserves that I smeared on top of the cream cheese. Then I took a can of apricot halves, smashed them, and added those on top of the preserves. The tanginess mixed with the cream cheese was so yummy!! I'm definitely going to make that version again.
Wednesday, January 23, 2013
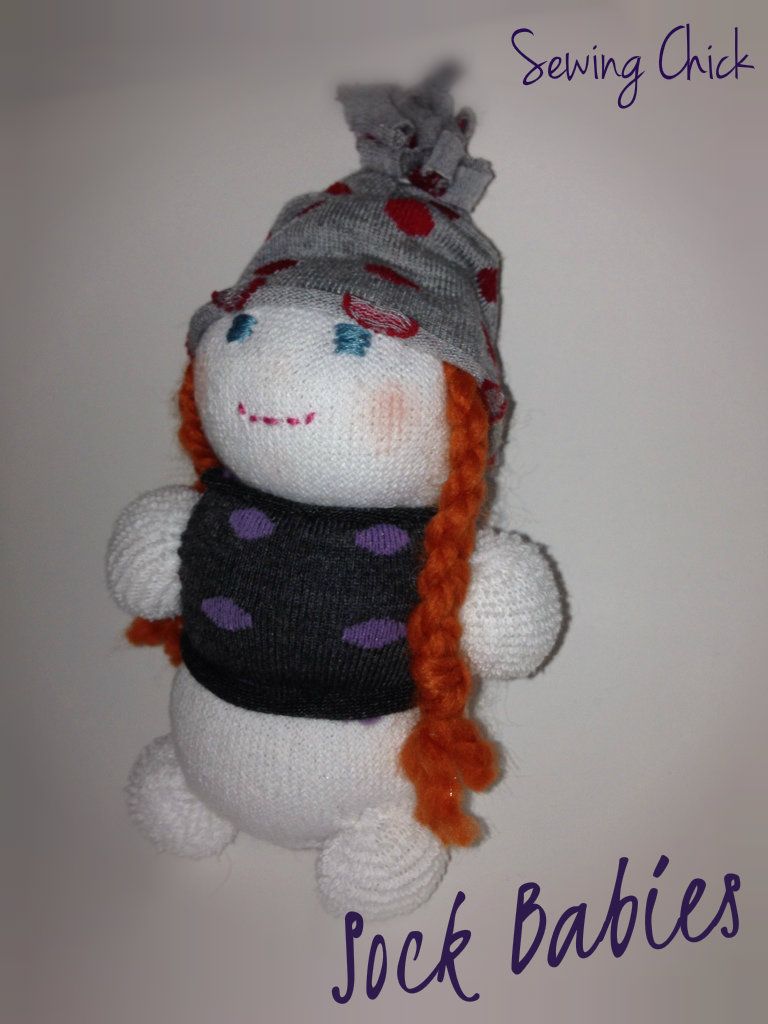
Sock Baby Dolls
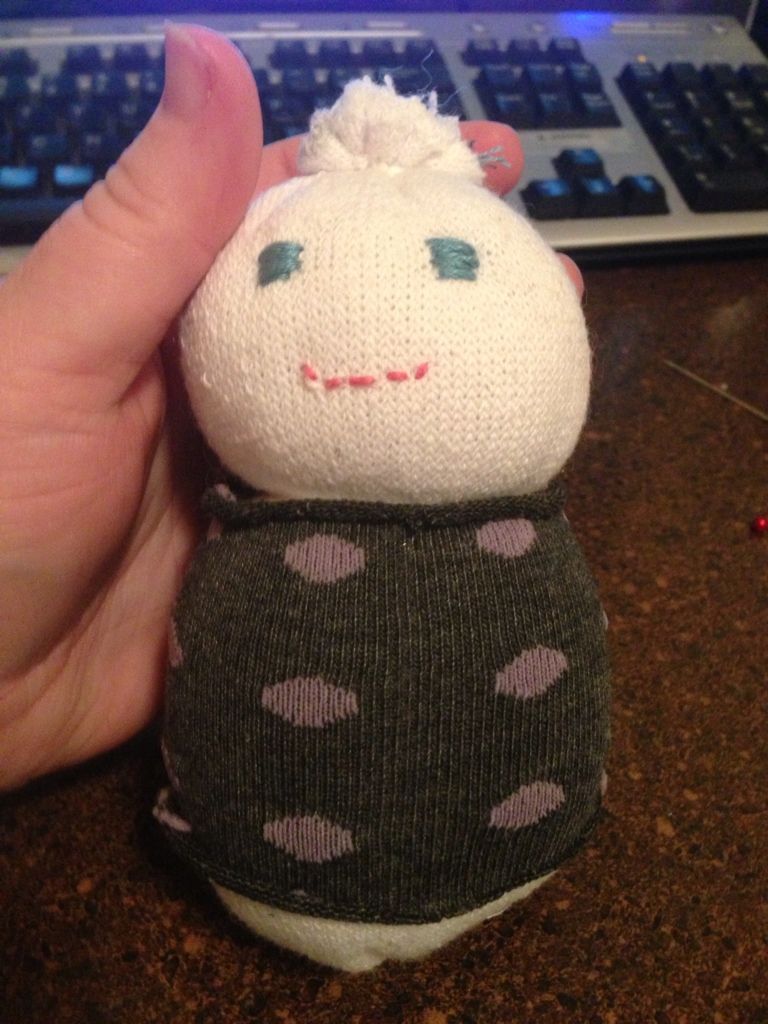
My darling 13 year old cleaned out her room awhile back and got rid of an entire grocery sack of socks stuffed full. Some of them she hadn't even worn. Children of the 21st century. I feel the need to explain to her that just 100 years ago people were darning their only pair of socks. Not only their ONLY pair of socks, they were also more than likely hand knitted by their mother and/or sisters.
I digress. I've been reading way TOO many dystopian teen novels lately.
I wasn't going to wear them and neither was anyone else in the house. I decided it was best to upcycle them into something crafty.
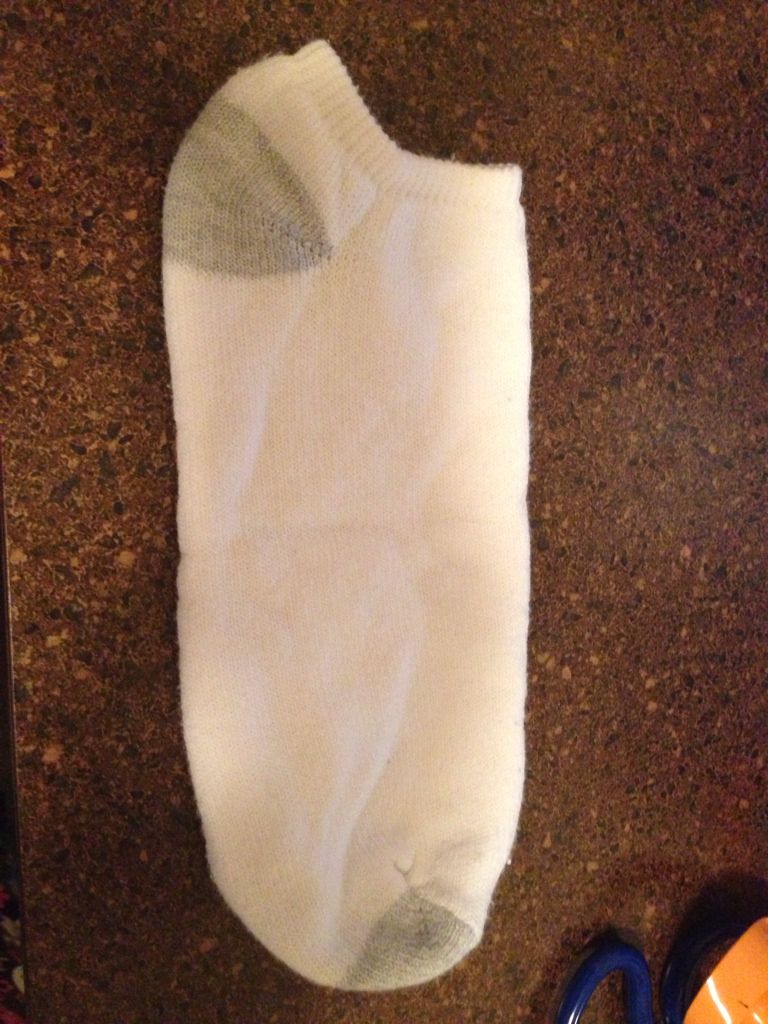
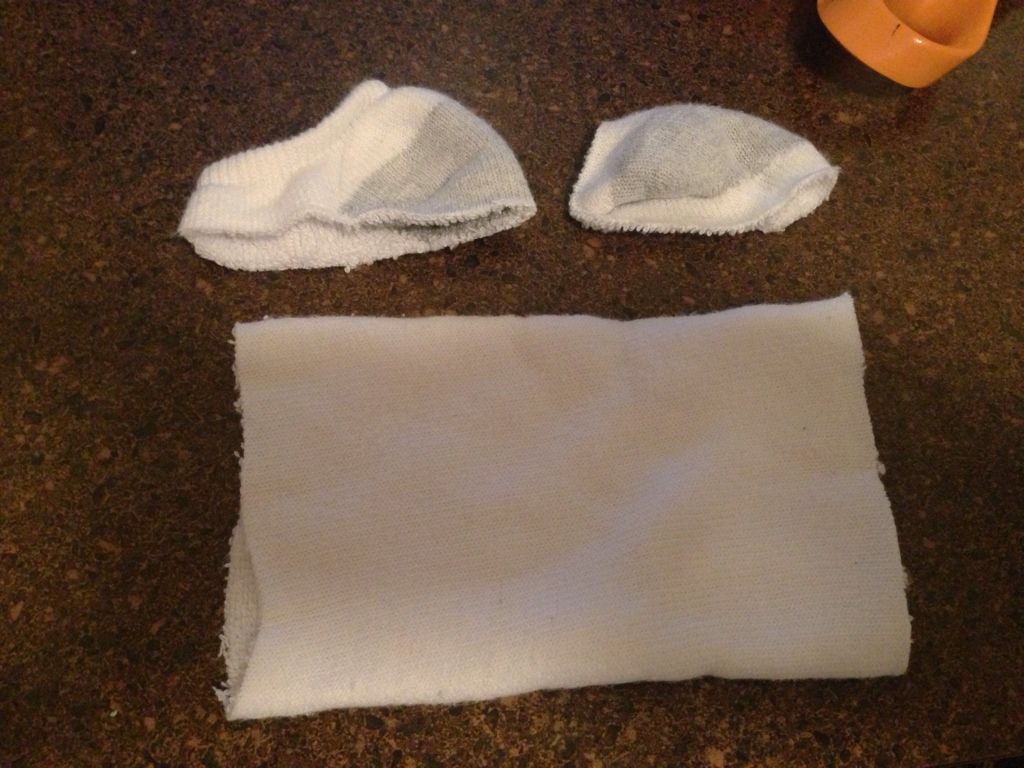
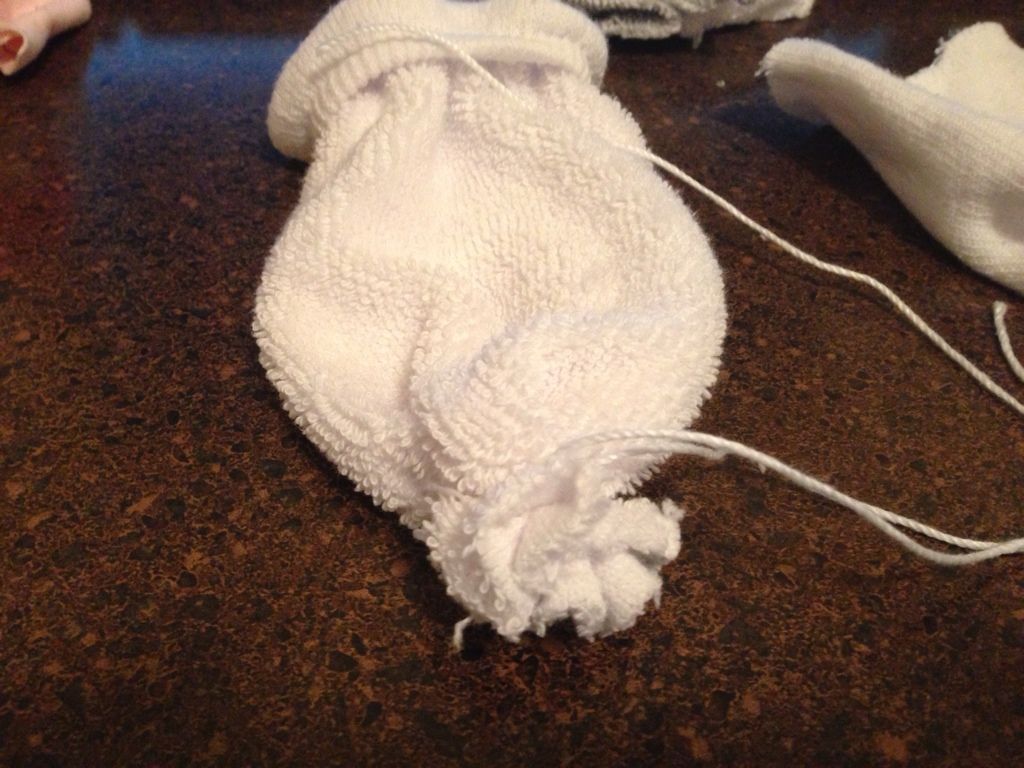
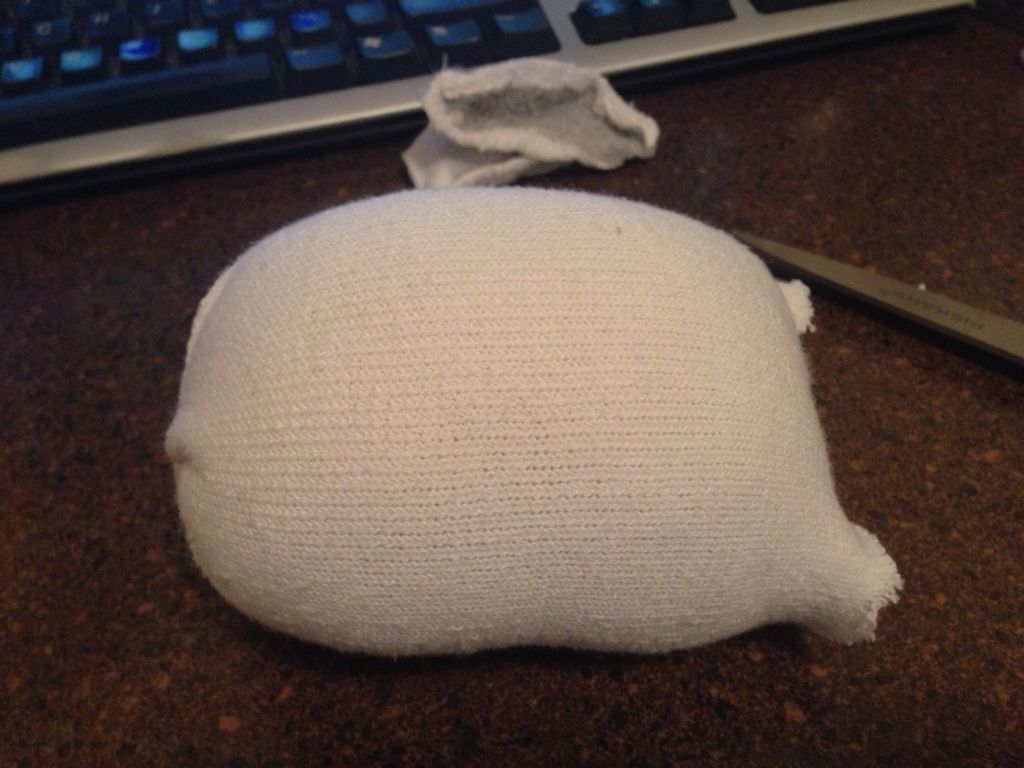
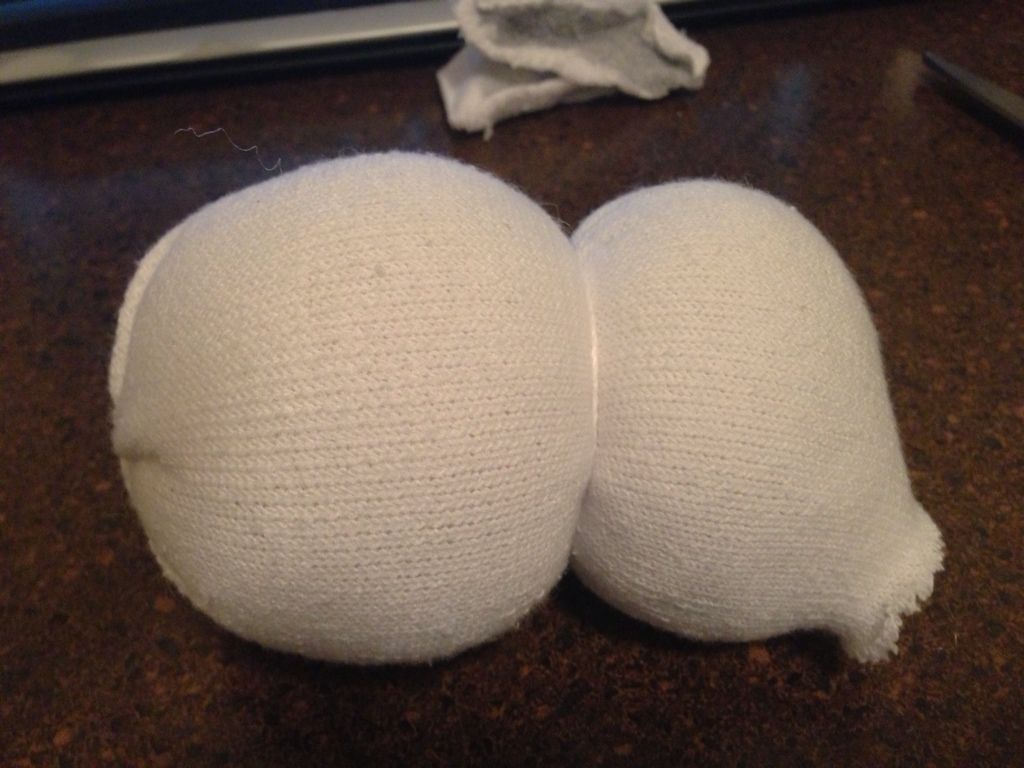
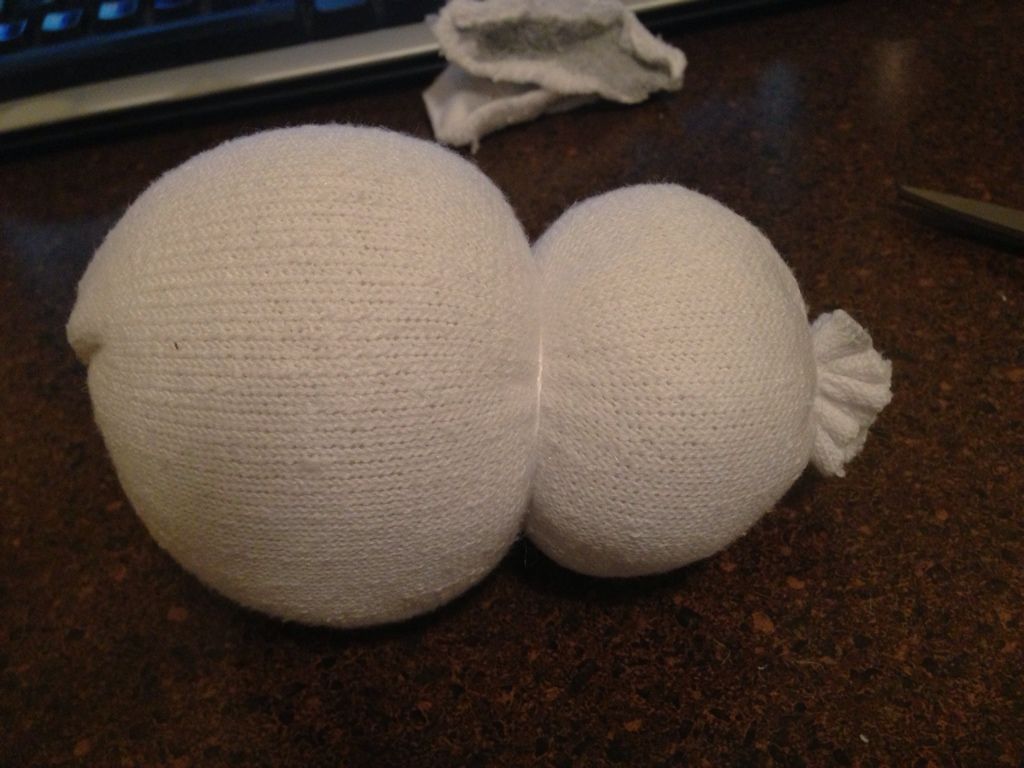
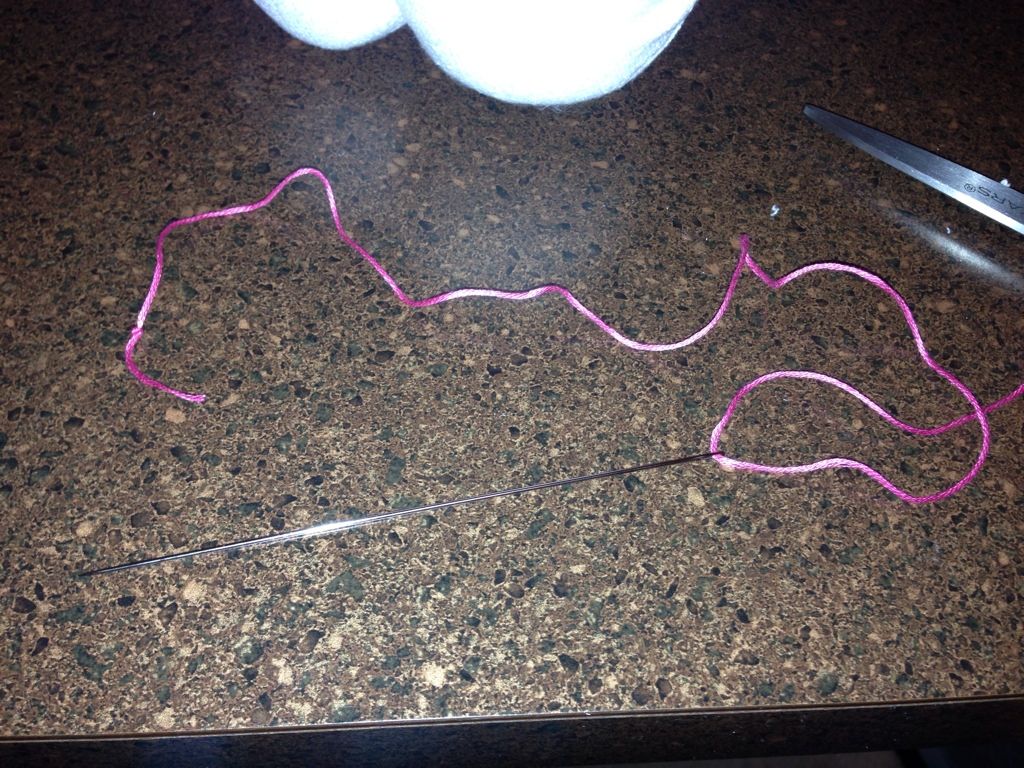
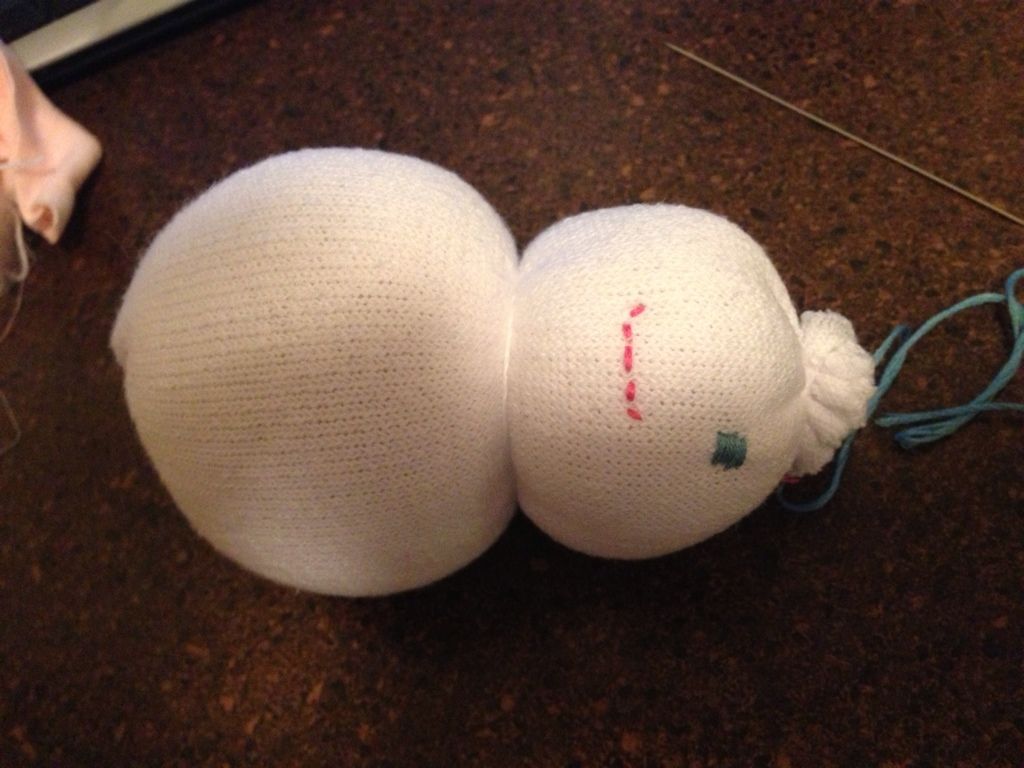
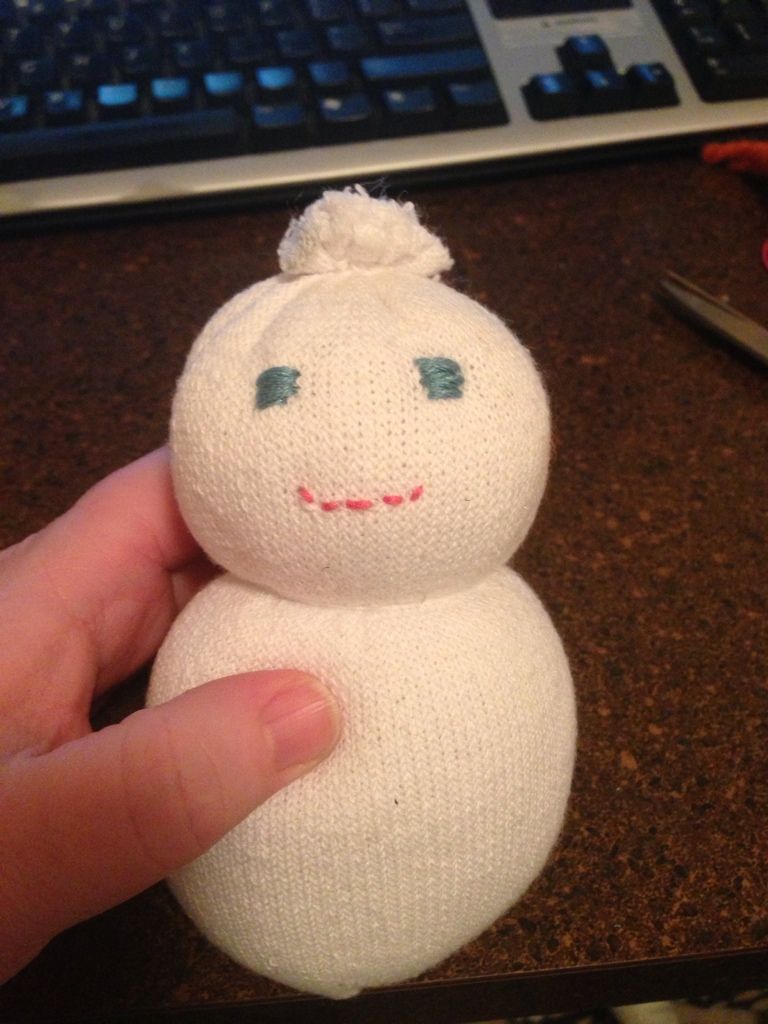
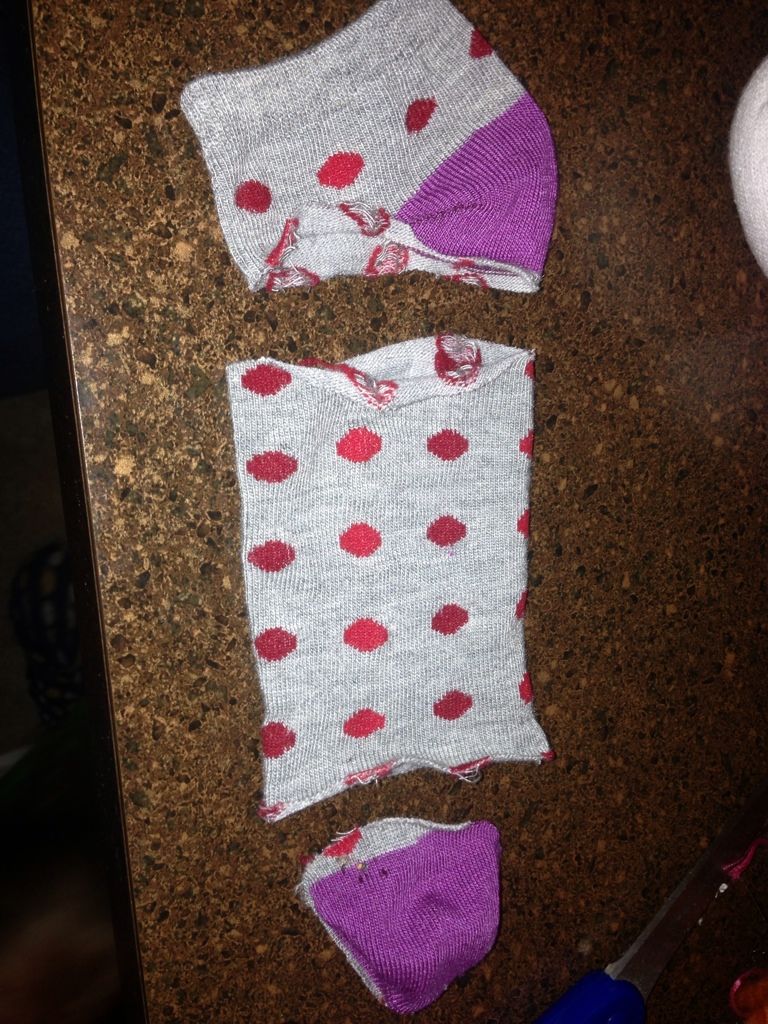
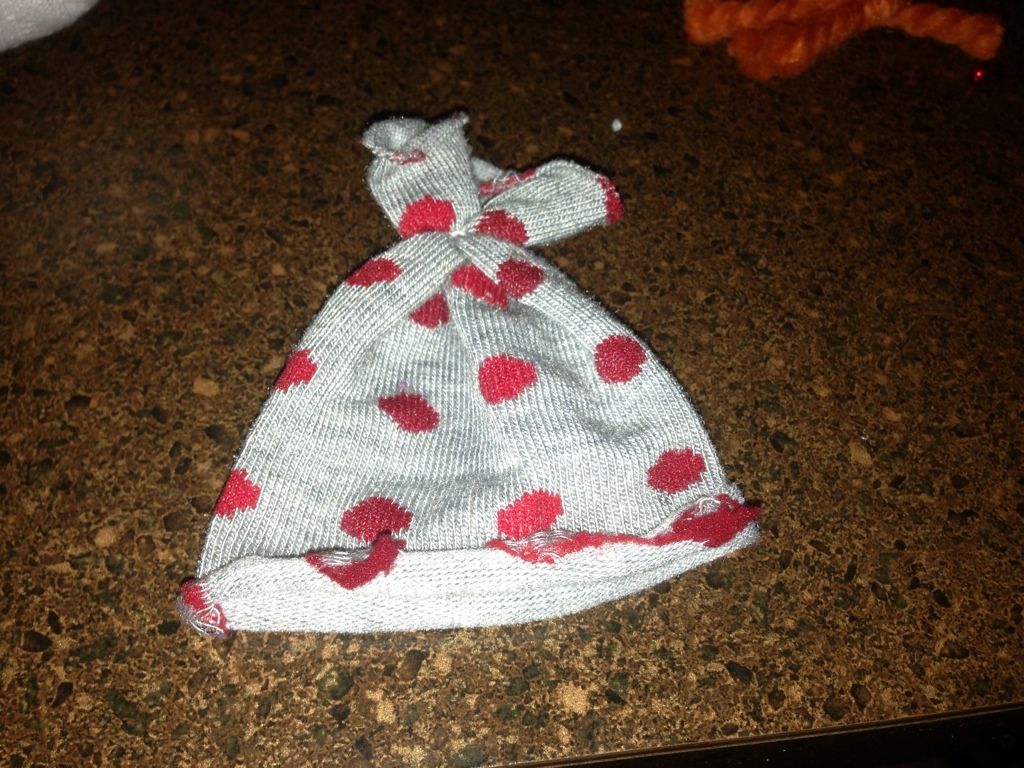
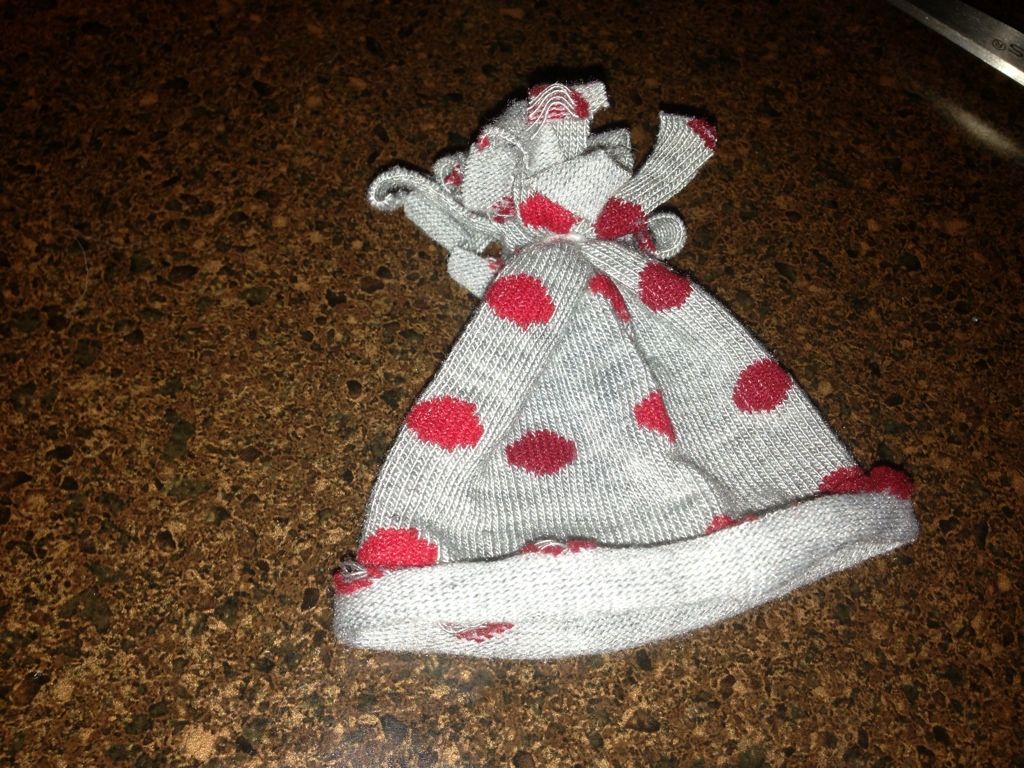
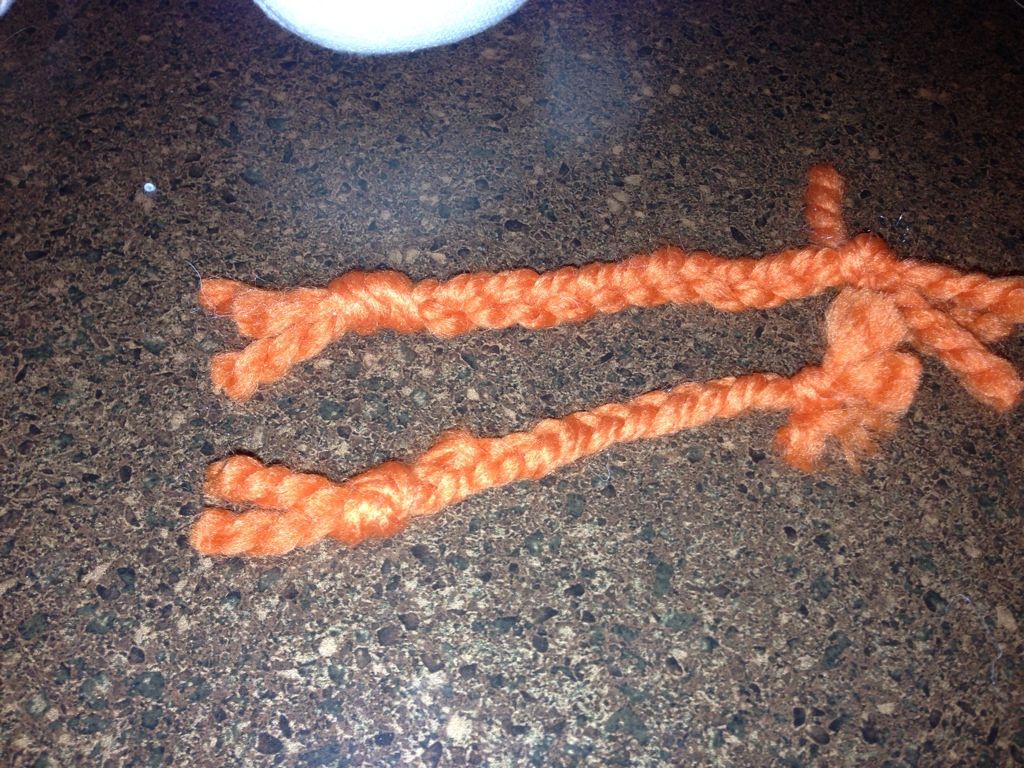
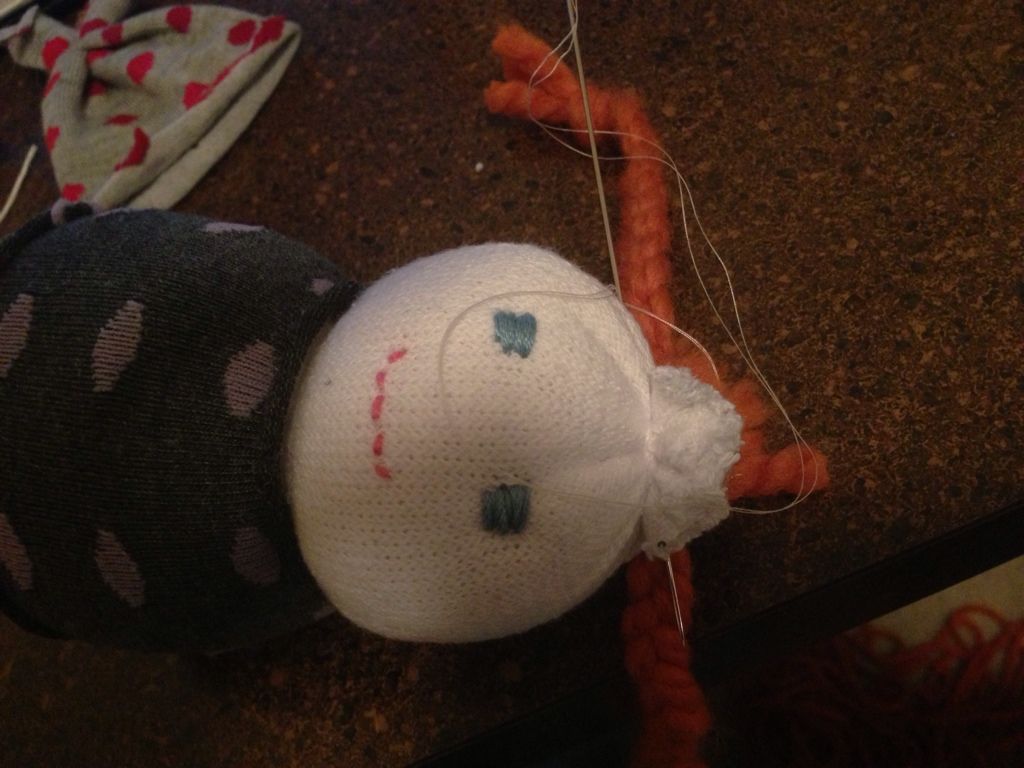
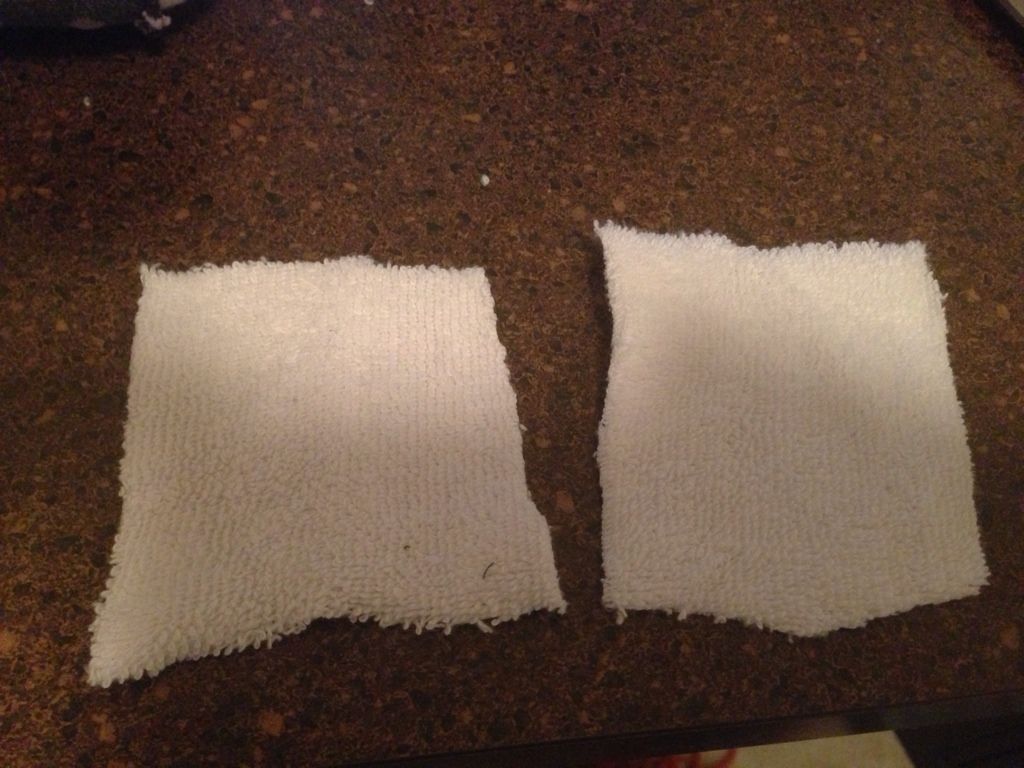
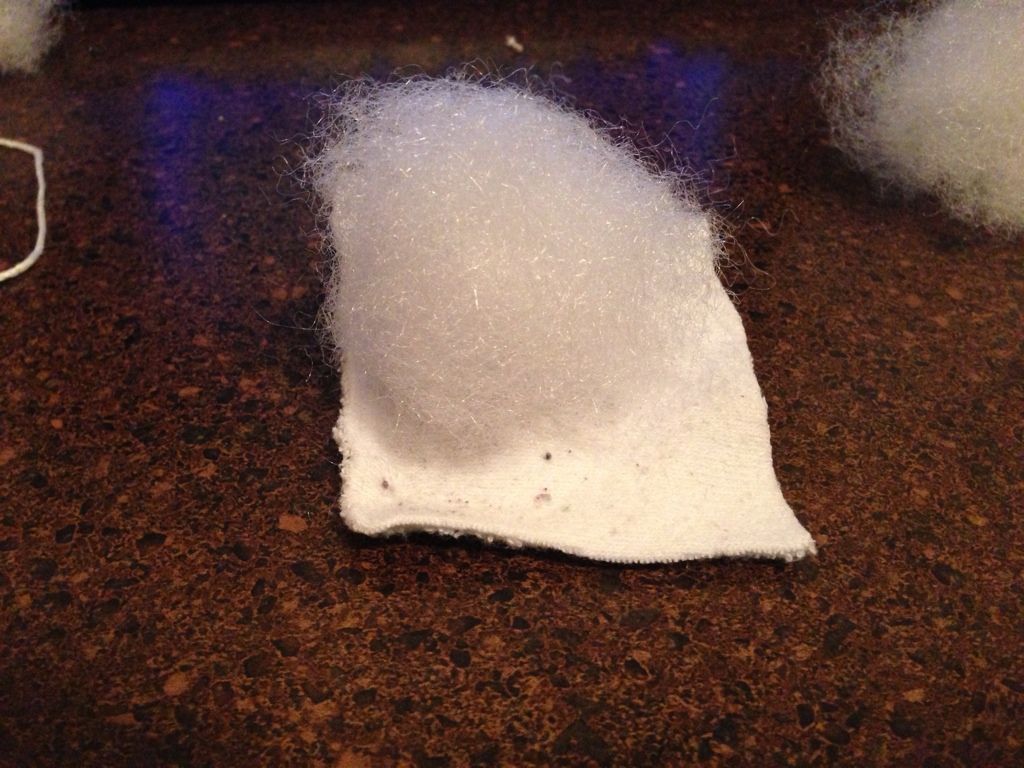
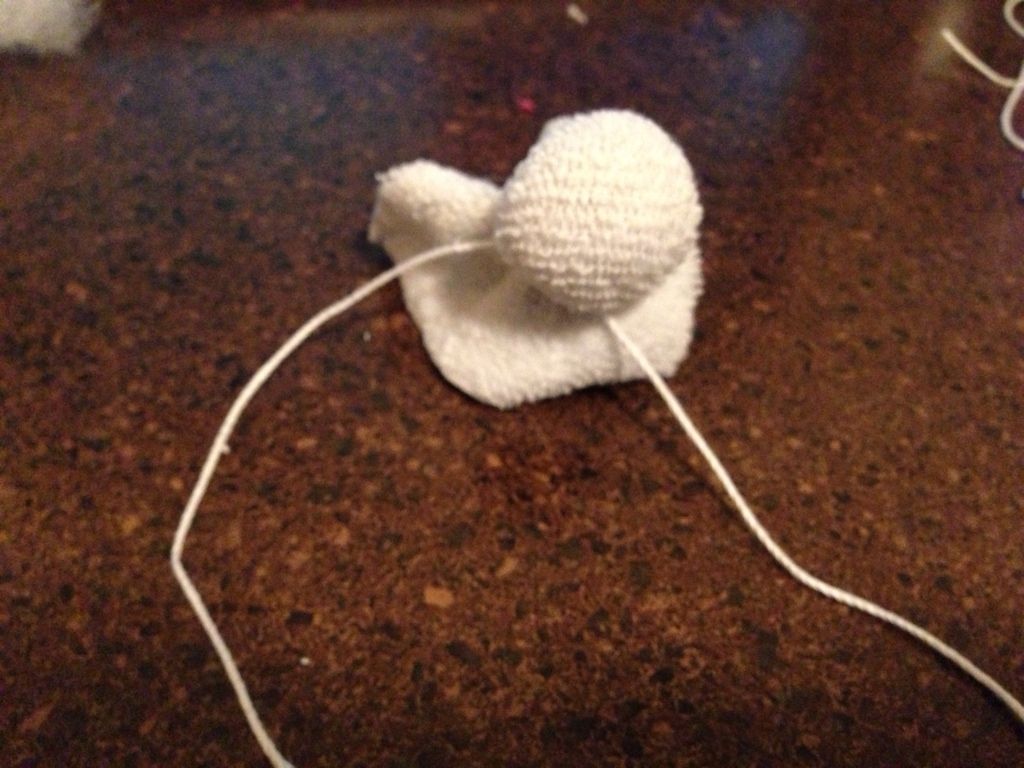
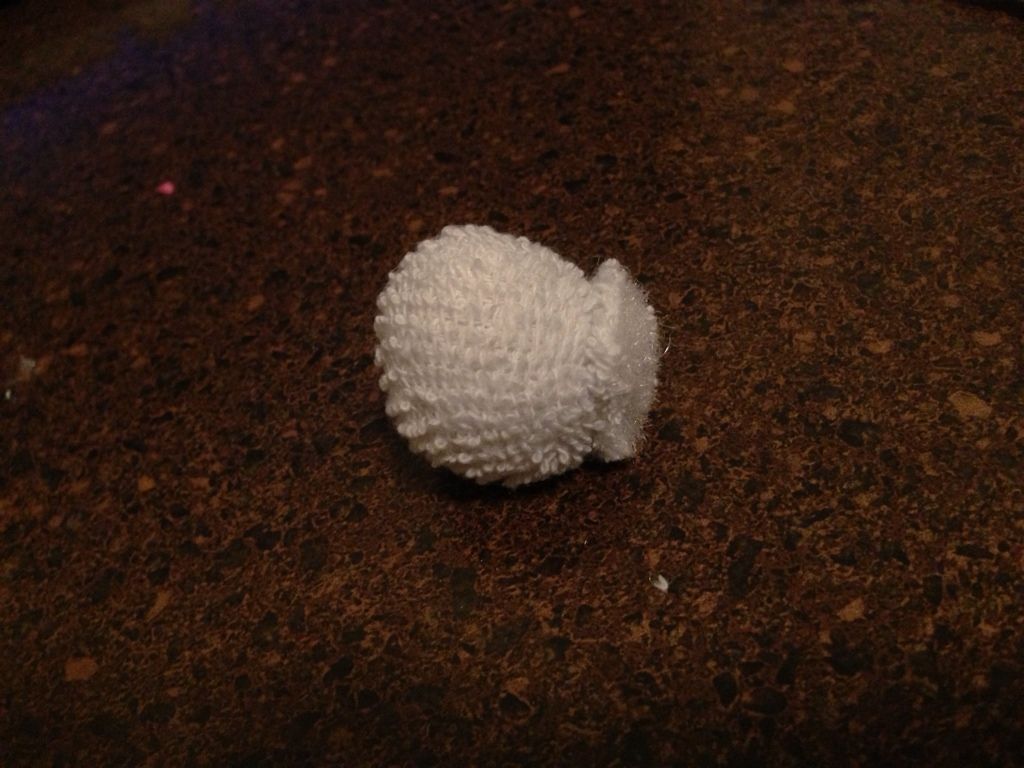
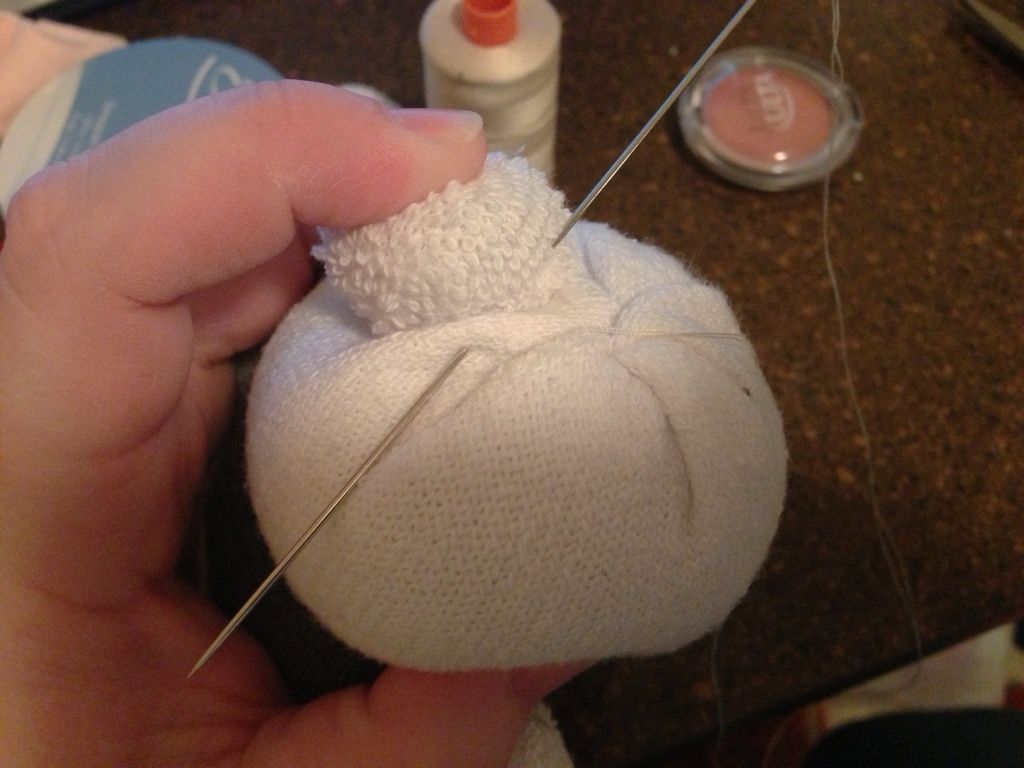
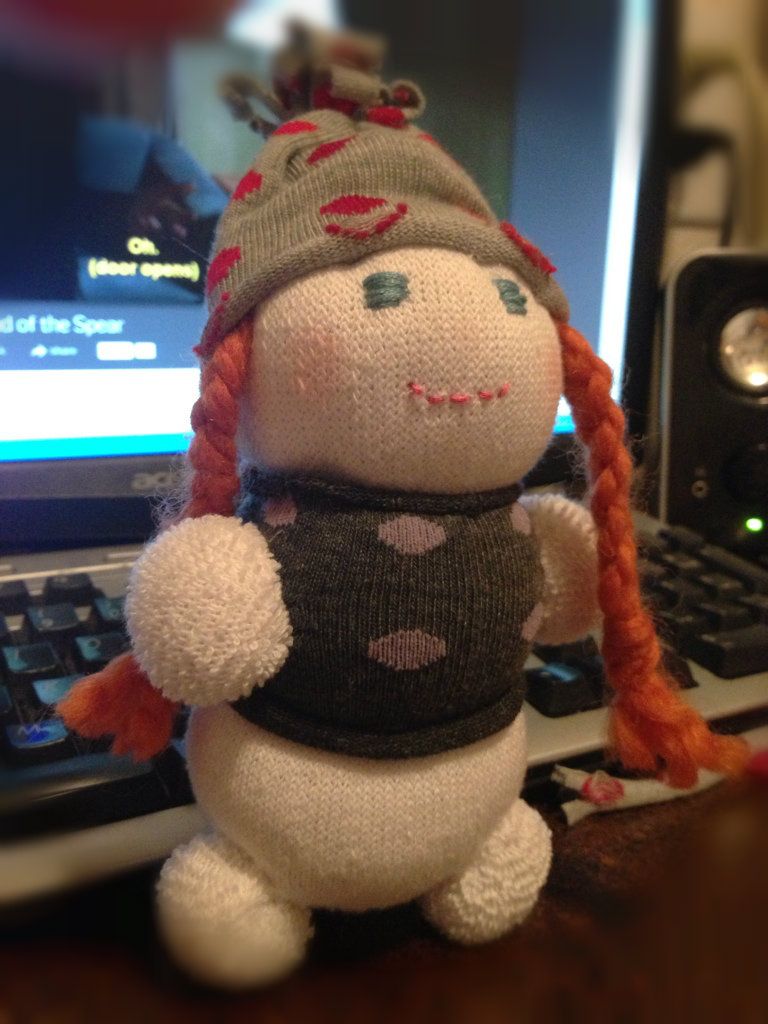
Luckily for you guys, I happened to remember my phone nearby and took pictures of the process so you too can make these little sock babies. Here is the tutorial in pictures, pretty self explanatory. Have fun!
This last step I was worried would be hard to understand in just pictures, so here is a little explanation. After you make the little round arms and legs. Cut off as much excess of the end of the arm/leg. Next, place the arm/leg where you are to sew it with raw side facing the body. Then, squish it into the body (as my finger is doing in the picture) so that you can whip stitch it against the body while hiding the raw edge. Make sense? I hope so. I'm not sure how else to explain.
Done in one episode of Fringe!
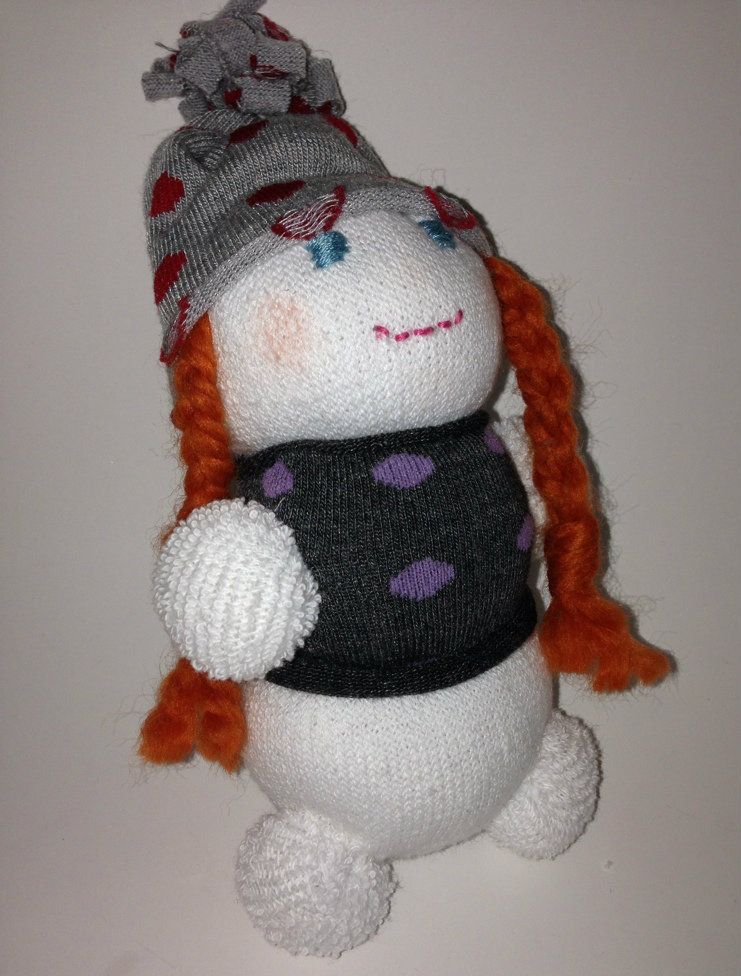
I got this idea in my head to make these little dolls. I even added arms and legs. What does everyone in this house say? They look like snowmen. No, no, no. They have arms not made of sticks. They have legs. These are not snowmen. My dear husband says it's the hat. Did Frosty switch to a ski style hat instead of a black top hat in his last Xmas special? Whatever. Enjoy!!
Friday, January 18, 2013
Homemade Pizza & Key Lime Tartlets
It has not been my intention to turn this into a food blog. However, there are two things I do every day -- cook/bake and read books. I don't want to ignore my blog until I have a moment between 3 kids and a husband, all of who require my constant attention for some reason, for only when I sew and/or craft. So, I hope it's not too annoying that I write a lot of posts about food and book reviews. And now....onto another post about food and sort of a book review :D
I've been on a mission to make pizza better than any of the pizza places around here. We have two mom and pop places that make delicious NY style pizza, but I'm cheap. When I make dough for 4 pizzas for pennies versus $25 for two pizzas, I would prefer to do it myself. So, when I found this book, I was super excited. It's called My Pizza and it's buy Jim Lahey. I found it in the new section at the library a couple days ago. I sat down to check it out while my youngest was playing in the awesome playroom in the kid area. They have a giant wooden playhouse complete with puppet theater at the back of it and a wooden grocery checkout FULL of food -- in the library! Did your library ever have that when you were a kid? Mine certainly didn't. A playhouse!! We love to go play there, especially on rainy and cold days. One of the nice things is that it's not a "quiet" library. It is so much better than any fast food restaurant play places.
Ok, I got off topic. I've been looking for a good pizza crust recipe, but it seems the ones I've tried just weren't very tasty, or I just didn't know how to cook them. The basic dough recipe in this book came out wonderful. I made it tonight. Well, it actually takes 18 hours to make the dough as you are supposed to make it the night before. I settled for early this morning after I dropped off the kids at school. I made mine in about 12 hours. Next time I will try the 18 hour version just to see if I'm missing something.
I love this book! It gives all kinds of wonderful tips for how to get the pizza stone super hot in an electric oven, how to get the oven super hot so it cooks pizza super fast, and how to squish canned tomatoes to make tomato sauce for the pizza. I used the tomato squish method tonight and everyone loved it. I even went the fancy route and bought some really nice mozzarella cheese that was still wet and squishy for our pizzas. My husband actually said it was better than takeout! Woohoo!!
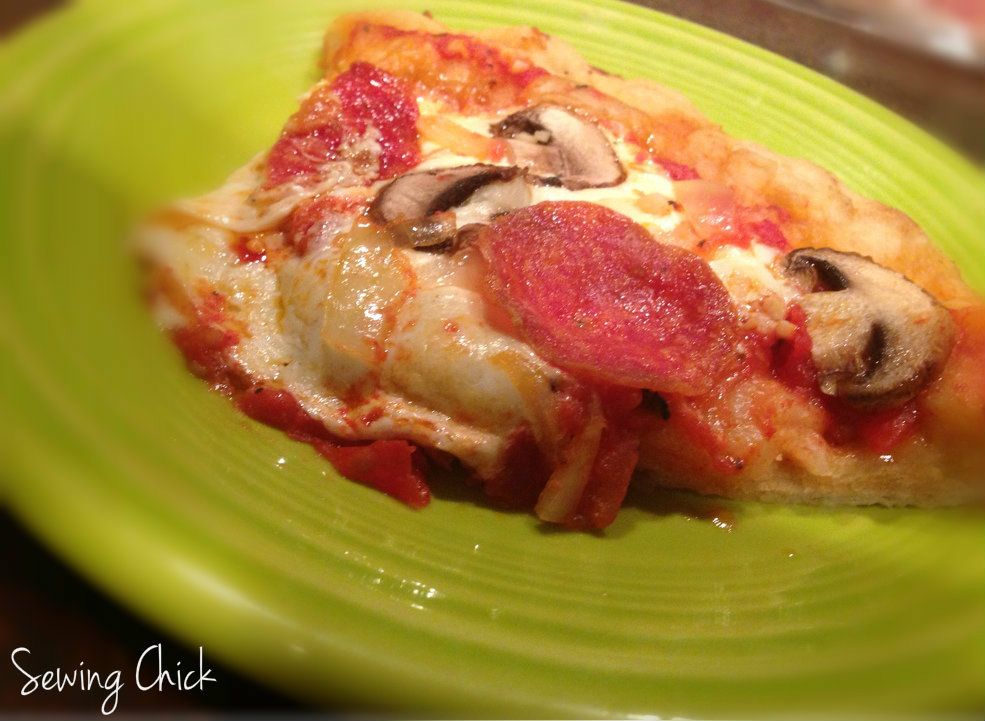
I made four pizzas out of the dough recipe in the book. Two were plain squished tomato sauce, mozzarella cheese, and minced garlic. I also brushed the crust with a garlic and olive oil combo. The other two I had a mixture of my tomato sauce along with a spicy spaghetti sauce (hubby doesn't like plain tomato sauce), onion, fresh mushroom, mozzarella, and minced garlic along with the olive oil/garlic on the crust. (We are garlic-o-holics in this family. The more, the better.) I would have taken more pics of my pizzas, but unfortunately, they were inhaled before I remembered. (Thankfully, I got smart with the tartlets and tooks pictures BEFORE I served them.)
This book is chock full of different pizza recipes much like gourmet or artisan style pizzas. It does have basics like a marguerite style pizza, but it also goes into pizzas with bechamel sauce (white sauce) as well as other things, too. And, I loved the pictures in this book. They are gorgeous and make you very very hungry.
From Yahoo Shine article about this very book and it's recipes:
Jim Lahey's No-Knead Pizza Margherita
Makes four 12-inch pizzas
Making the Dough:
500 grams (17 1/2 ounces or about 3 3/4 unsifted cups) all-purpose flour, plus more for shaping the dough
1 gram (1/4 teaspoon) active dry yeast
16 grams (2 teaspoons) fine sea salt
350 grams (11/2 cups) water
1. In a medium bowl, thoroughly blend the flour, yeast, and salt. Add the water and, with a wooden spoon and/or your hands, mix thoroughly. We find it easiest to start with the spoon, then switch to your hands.
2. Cover the bowl with plastic wrap or a kitchen towel and allow it to rise at room temperature (about 72°) for 18 hours or until it has more than doubled. It will take longer in a chilly room and less time in a very warm one.
3. Flour a work surface and scrape out the dough. Divide it into 4 equal parts and shape them. For each portion, start with the right side of the dough and pull it toward the center, then do the same with the left, then the top, then the bottom. (The order doesn't actually matter; what you want is four folds.) Shape each portion into a round and turn seam side down. Mold the dough into a neat circular mound. The mounds should not be sticky; if they are, dust with more flour.
4. If you don't intend to use the dough right away, wrap the balls individually in plastic and refrigerate for up to 3 days. Return to room temperature by leaving them out on the counter, covered in a damp cloth, for 2 to 3 hours before needed.
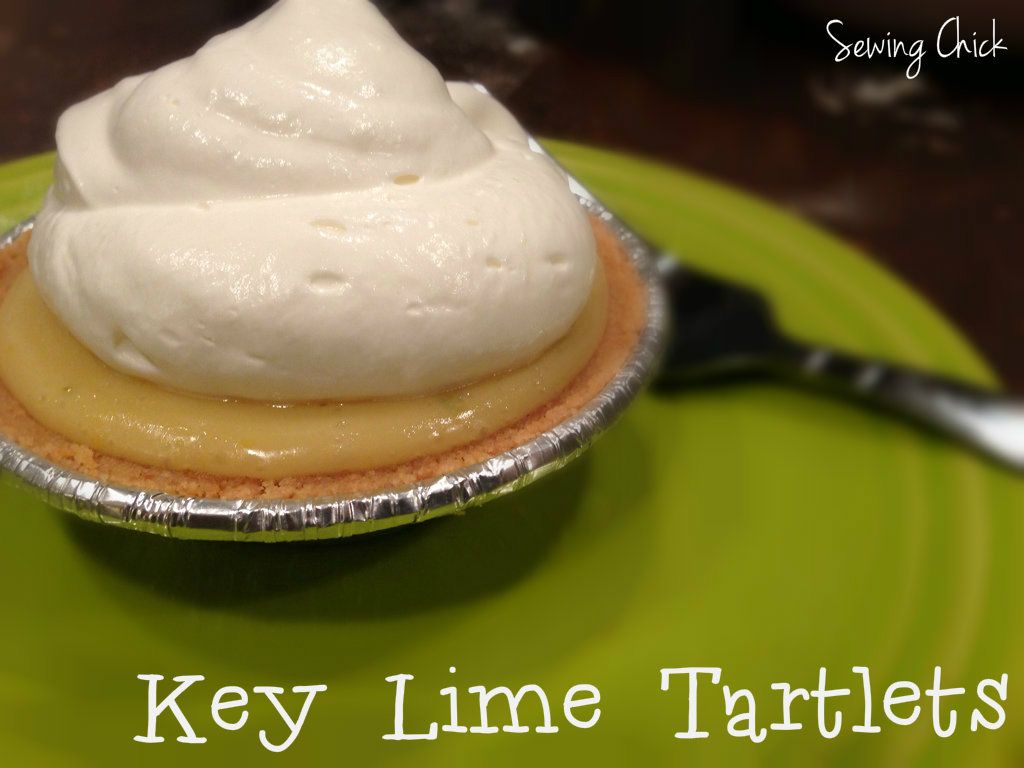
Then, I got a craving for key lime pie last night, so I decided to whip up one today for dinner. Yesterday was Mr. E's birthday. While I brought him lunch and had cupcakes at school, it was a swim team night, so we did not have time for a big thing at dinner. I tried to make up for it today with delicious homemade pizza, a stop with hubby at GameStop, and key lime tartlets.
I also got the stupid idea that instead of just buying Key lime juice already squeezed, I'd just buy 50 million key limes and squeeze them myself. Um...not one of my brightest moments, nor was it very fun pulling out about 100 million tiny seeds before juicing them. I think I squeezed about 25 key limes to get my 1/2 cup of lime juice. Next time, I'm probably going to buy the juice in the bottle.
Instead of one big pie I wanted to make mini pies, so I bought these Keebler little tart shells. They were at Walmart and very inexpensive. It came with six tart shells, which was perfect for my recipe.
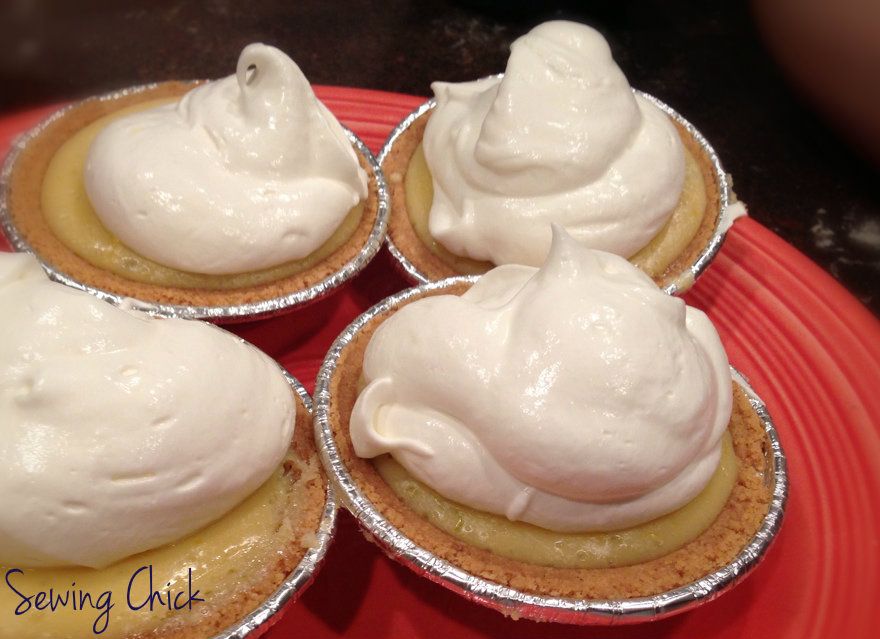
Key Lime Tartlets
Yields: 6 tartlets
Ingredients:
3 egg yolks
14 oz can of sweetened condensed milk
2 tsp lime zest
1/2 cup of key lime juice
Whip Cream Topping
1 cup of heavy whipping cream
1-2 tbs powdered sugar (though regular sugar will work in a pinch)
Preheat oven to 350. Combine all 4 ingredients until smooth and well mixed. Pour into tart shells. (I filled mine to just a tad above the shell.) Bake at 12-13 minutes until set. Then, chill in the fridge for 1 hour.
When ready to serve, whip the whipping cream and sugar until peaks are formed. Dollop a couple spoonfuls onto the tarts and serve.
I was kind of nervous when I was investigating various recipes on how to make key lime pie. It's very straightforward and not nearly as daunting as you might think. I was pleasantly surprised mine came out perfectly delicious!
My key lime tartlets were featured over at Ladybird Ln!! How exciting!!
Thursday, January 17, 2013
Dutch Oven Bread
I found this recipe awhile back from another blog called The Taylor House and pinned it. Check out her blog, she has some lovely recipes. I'm going to try the slow cooker potato soup very very soon. Apparently, this recipe goes back even further to The Merlin Menu -- which gives great pictures and steep by step instructions.
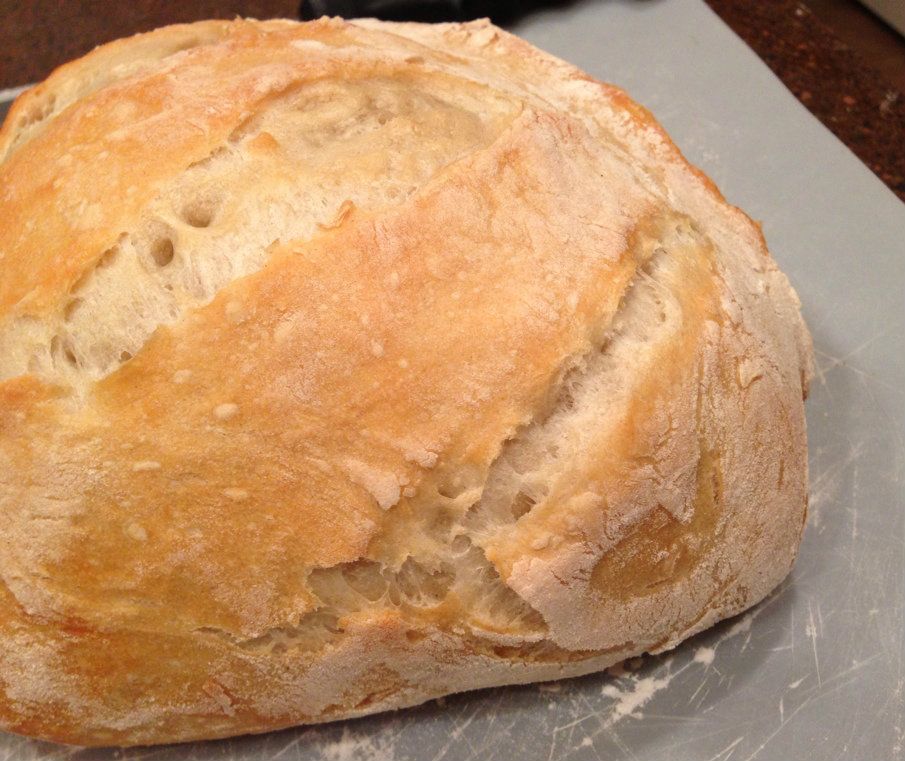
I've made this bread once before and it came out lovely. It has this amazing hard crust. I've found I prefer the extra effort of putting it together the night before over the peasant bread I whip up in a couple of hours. I am just so thrilled, it looks like a loaf I'd pick up at the fancy bakery. And, it tastes heavenly. Apparently, keeping the lid on the pan allows the steam to create that outer crust that is just wonderful.
Tonight I made it to go along with beef stew for dinner and cut it in big chunks. Then I used the new Land o'Lakes olive oil and sea salt butter. Lordy, that stuff is so good, I could have probably eaten the whole loaf myself slathered in just that butter. Yum!
I will tell you, I don't have a dutch oven or even parchment paper. So, for me this is Roasting Pan Bread, lol. I used my small roasting pan and just used cooking spray so it wouldn't stick. While I would love a dutch oven, I can't afford a nice one just yet -- nor I have seen one at a thrift store. My roasting pan worked fine, so if you don't have a dutch oven, try it anyway.
Dutch Oven Bread
- 1 package active dry yeast
- 1½ cups warm water
- 1½ teaspoons salt
- 3 cups bread flour or all-purpose flour and a bit more for dusting the bread after rising.
Instructions
- Dissolve the yeast in the warm water in a bowl or mixer.
- Add the flour and salt (in that order) and mix thoroughly.
- Cover the bowl with plastic wrap and let rest on a counter at room temperature at least six hours and preferably, overnight.
- Dust a cutting board with some flour and scrape the dough onto it.
- Sprinkle a bit of flour over the top as it will be very sticky.
- Just fold the dough over onto itself a couple of times, and shape into a ball.
- If the dough is too loose, just knead in ¼ cup of flour.
- Shape into a ball by pulling around the dough edges and folding underneath. Place on the counter on a piece of parchment paper and cover with a towel and let rise for another 1 to 1½ hours.
- When you are ready to bake the bread, preheat the dutch oven in the oven at 450 degrees.
- Carefully remove the dutch oven, take off the top, and using the parchment paper, lift up the dough ball and gently drop it into the dutch oven.
- Use a knife to slash 3 slits in the dough, diagonally.
- Cover and place back in oven.
- Bake covered for 20 minutes, then remove the lid and continue baking for 15 minutes until dough is browned.
- Remove from oven and cool for one hour before cutting.
Monday, January 14, 2013
Preschooler Busy Bags
A long, long, time ago, in a galaxy far away I was a member of this cool website called Swap Bot. When I left my husband I completely forgot about it. I had no access to my former email and with all the things going on, it just slipped away. I came across it recently again and decided I'd give it another try. I signed up for a Preschool Busy Bag swap.
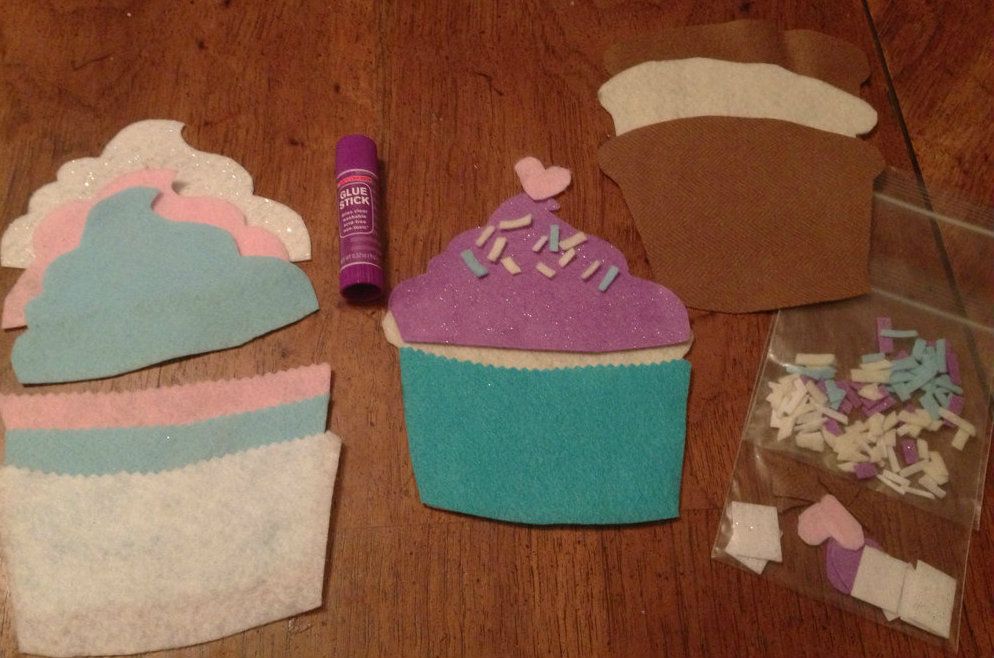
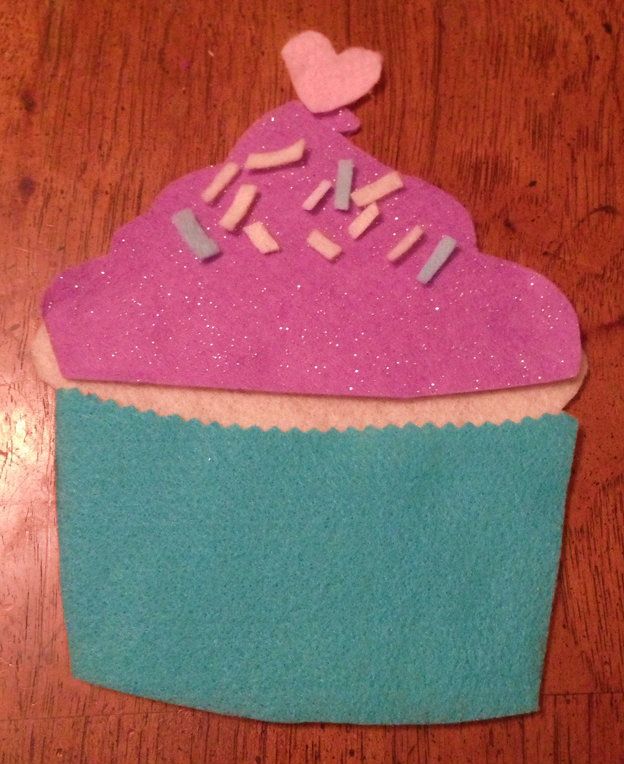 Busy bags are basically ziplock bags of fun for your child, that have everything in the bag to do the activity. Prior to the swap, I had never heard of these and had to google them. They looked like so much fun, I decided to join the swap. I go volunteer at Mr E's school and I always bring a bag of fun stuff for Miss Molly. I thought busy bags would be extra fun for her to play with while I'm doing projects or copies for the teachers.
Our theme for the bags was "winter," but I found this wonderful little cupcake busy bag instructions at Money Saving Mom's blog. To keep it winter, I tried to stick with "winter" colors like blues and whites and sparkly felt.
If you want to make your own, it costs little of nothing. Hobby Lobby has felt sheets for 4 for $1, 4 is enough for one busy bag, plus raid your own pantry for a large ziplock and a couple of small ziplock bags for the sprinkles and big toppings. I added a glue stick to each bag, but these can easily be done without glue sticks so you can use them over and over. Then print off the instructions from the link above and create your own.
 Busy bags are basically ziplock bags of fun for your child, that have everything in the bag to do the activity. Prior to the swap, I had never heard of these and had to google them. They looked like so much fun, I decided to join the swap. I go volunteer at Mr E's school and I always bring a bag of fun stuff for Miss Molly. I thought busy bags would be extra fun for her to play with while I'm doing projects or copies for the teachers.
 Our theme for the bags was "winter," but I found this wonderful little cupcake busy bag instructions at Money Saving Mom's blog. To keep it winter, I tried to stick with "winter" colors like blues and whites and sparkly felt.
If you want to make your own, it costs little of nothing. Hobby Lobby has felt sheets for 4 for $1, 4 is enough for one busy bag, plus raid your own pantry for a large ziplock and a couple of small ziplock bags for the sprinkles and big toppings. I added a glue stick to each bag, but these can easily be done without glue sticks so you can use them over and over. Then print off the instructions from the link above and create your own.
Saturday, January 05, 2013
Review: Shadow of Night

Shadow of Night by Deborah Harkness
My rating: 5 of 5 stars
I just finished reading Shadow of the Night. While I enjoyed A Discovery of Witches, it started out great but the Diana/Matthew relationship felt a bit Twilight-esque. I was just annoyed with the whole damsel in constant distress is saved by big vampire man.
Well, this book was a complete turnaround. Diana was strong and didn't need saving, she managed herself. I love Elizabethan historical fiction so that just added to a great story. You just felt like a fly on the wall with such vivid descriptions.
I loved this book. In fact, I've been reading it nearly nonstop for the last couple of days and when I finished tonight, I had to keep reminding myself I was no longer in this magical world of witches, vampires, and daemons.
Don't you love it when you get so deep into a book that once you pull yourself out of it, you have to sort of wake up and realize it's not real life?
I can't wait for book 3!!
View all my reviews
Wednesday, January 02, 2013
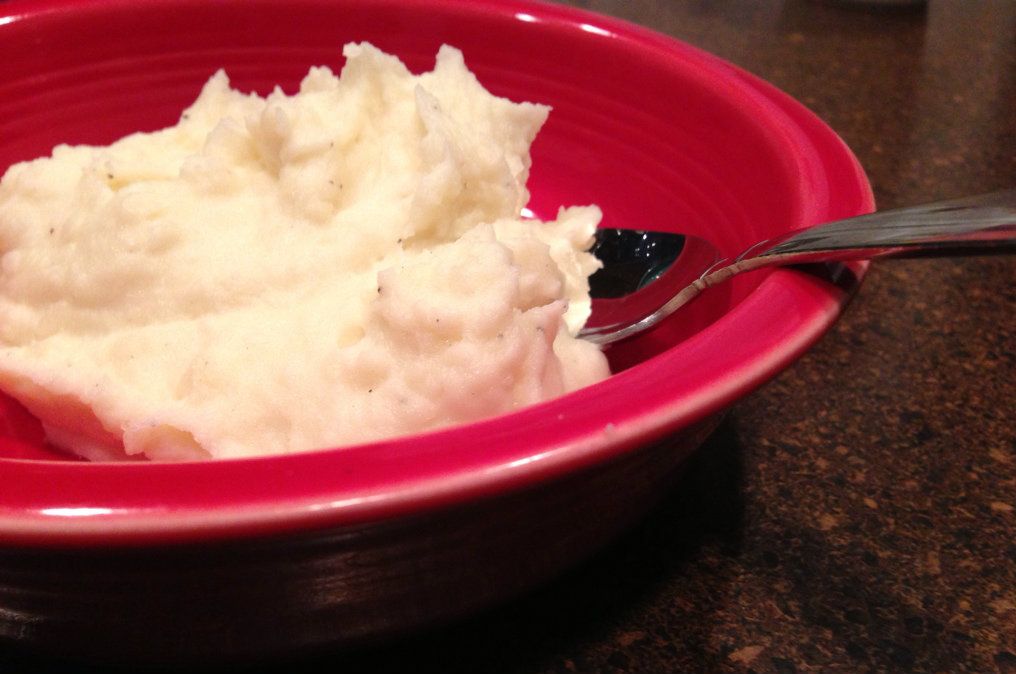
Cream Cheesy Mashed Potatoes
Dear god my mother made these for our "After Christmas" Christmas dinner, and I literally died and went to heaven. I have never tasted mashed potatoes so good in my life. Even my 2 year old, who has hated any mashed potatoes I've ever made (and I make good mashed potatoes), ate and ate and ate these potatoes.
They have two secret ingredients - lots and lots of butter and cream cheese! My mother requested they be named for her, so henceforth, these amazing mashed potatoes (which can be made a day ahead of time) will be named Mary's Cream Cheesy Mashed Potatoes.
Also, I usually whip my potatoes, but we used a masher with these and there were NO lumps. Just make sure you cook your potatoes long enough and the lumps will melt away as you mash.
Mary's Cream Cheesy Mashed Potatoes
4 lbs peeled and cut potatoes
8 oz pkg of cream cheese
1 stick of butter
1/2 to 1 cup of half and half
Peel and cut up potatoes into fourths. Boil for about 25-30 minutes until they are done. When I can slip a knife through one of the potato pieces like butter, they're done.
Drain the potatoes. Next, mash the heck of them. Slice up an entire stick of butter and add to the potatoes and keep mashing. Next, add an entire 8 oz pkg of cream cheese. We added it in whole and it melted just fine. Next, add the half and half until the potatoes are fluffy. If you're going to bake these, add enough half and half to make them a teensy bit soupy so they won't dry out while baking. Add salt and pepper to taste -- we probably added about a 1 tsp of both. You can also add Lawry's Seasoning Salt, but we forgot that step and they still tasted heavenly.
Lastly, I think this step is optional because they tasted so good before we put them in oven. Bake at 350 for 15-20 minute.
If you make them up a day or so before, take them out of the fridge an hour or two beforehand, then add several pats of butter on top and bake at 350 for 30 minutes.
Seriously, if you don't try these you will never know what heaven is like.
Subscribe to:
Comments (Atom)


